How to Clean Up the Back of a Deco Mesh Wreath Using Wreath Forms
Many followers have asked me how I clean up the back of my deco mesh wreaths. In my ebook, “Learn Deco Mesh Wreath Design“, I mention how to cut the floral stems in the back; therefore, the instructions that follow are assuming you’ve gotten that far on cleaning up the back of your wreath.
Let me show you how I finished off the back of this deco mesh wreath…

As you can see from the photo below, the back of this wreath already looks very clean but adding two more pieces of deco mesh ribbon will polish the back of the wreath up nicely and will make it look more professional.
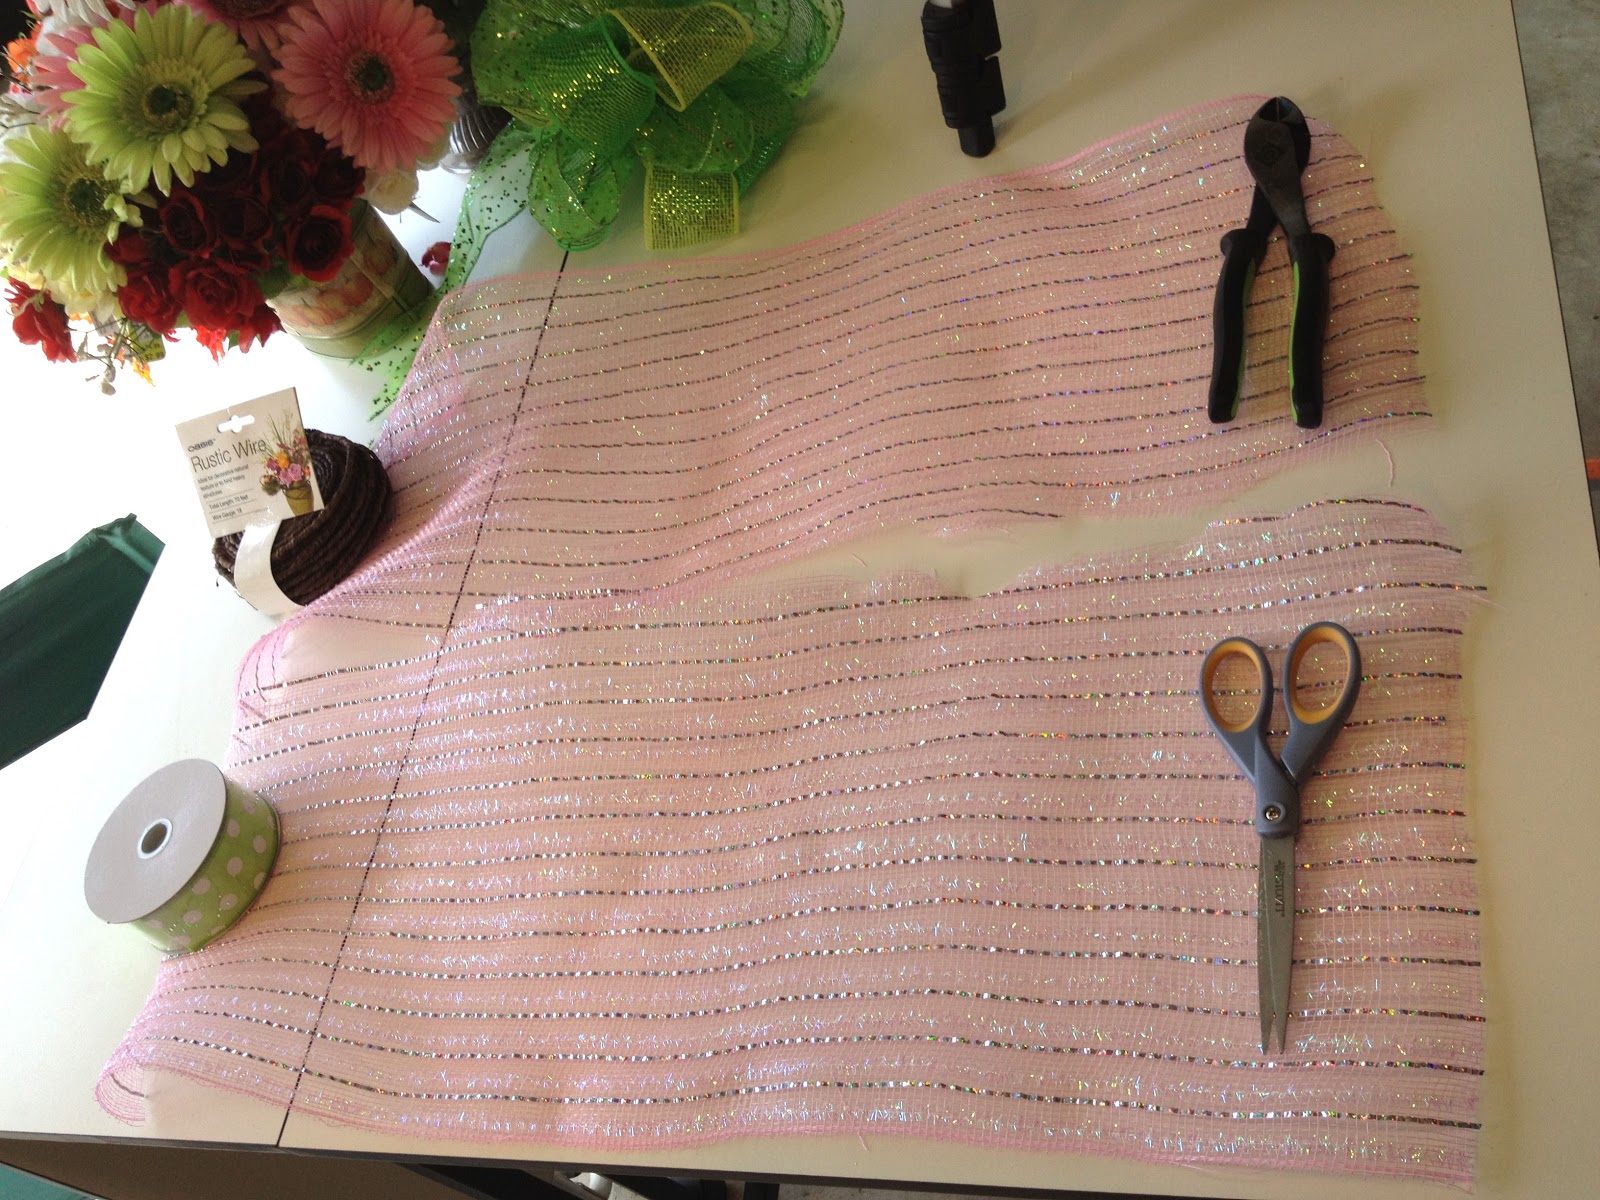
First, measure the length of a piece of deco mesh to the approximate width of your wreath and cut off from the roll. In this example my mesh width is using the 21″ width (see note below for using other widths). Make sure that the color you use to finish off the back is the same color as the main color in your wreath so that it will be hidden and less obvious. Most wreathers have at least this much, if not more, leftover mesh on the roll after making their wreaths anyway. Then cut this piece in half horizontally (see picture below).
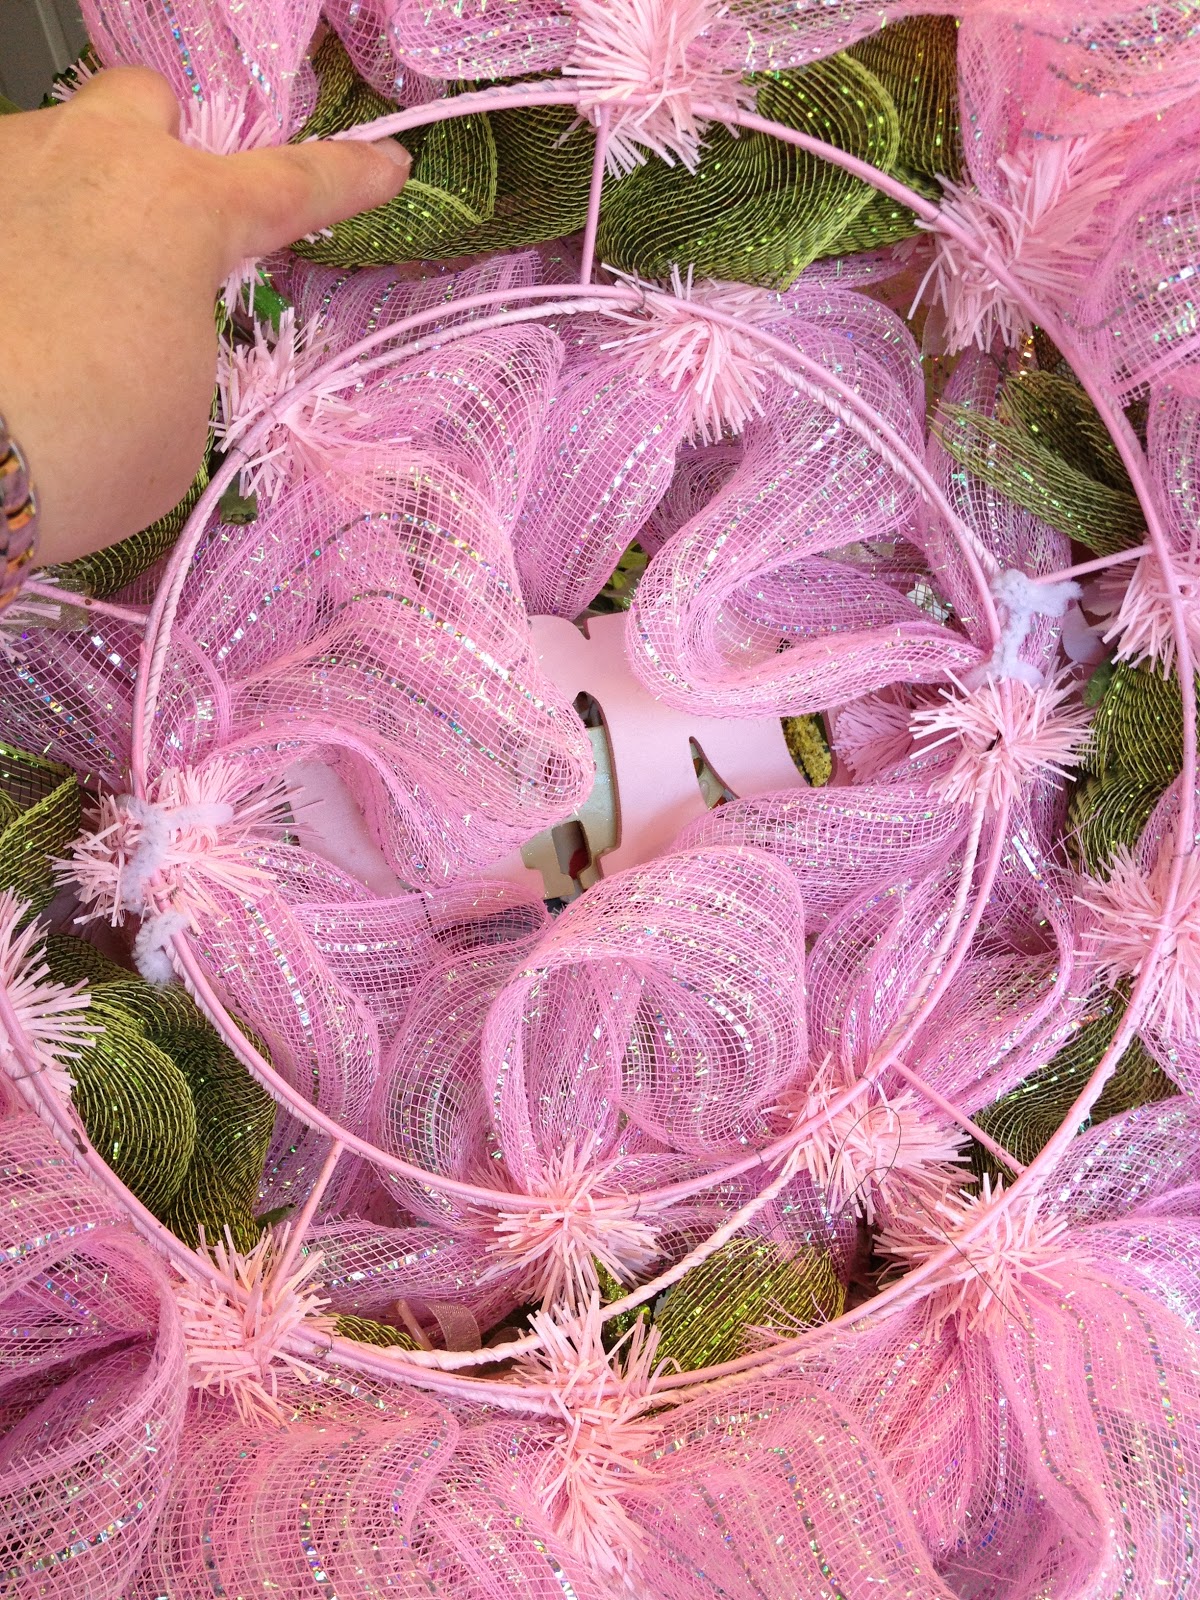
Taking these two pieces, you will roll them long ways as neat as possible to the width of the wire frame (approx 2-2.5 inches). Thread these long pieces in behind the horizontal crossbars on the back of the wreath frame. I find it is easier to do this when the wreath is laying flat on your work table. Make sure to keep the added mesh strips as tight as possible when weaving because you want the added mesh to remain inside the parallel wreath frame bars and not pop out.

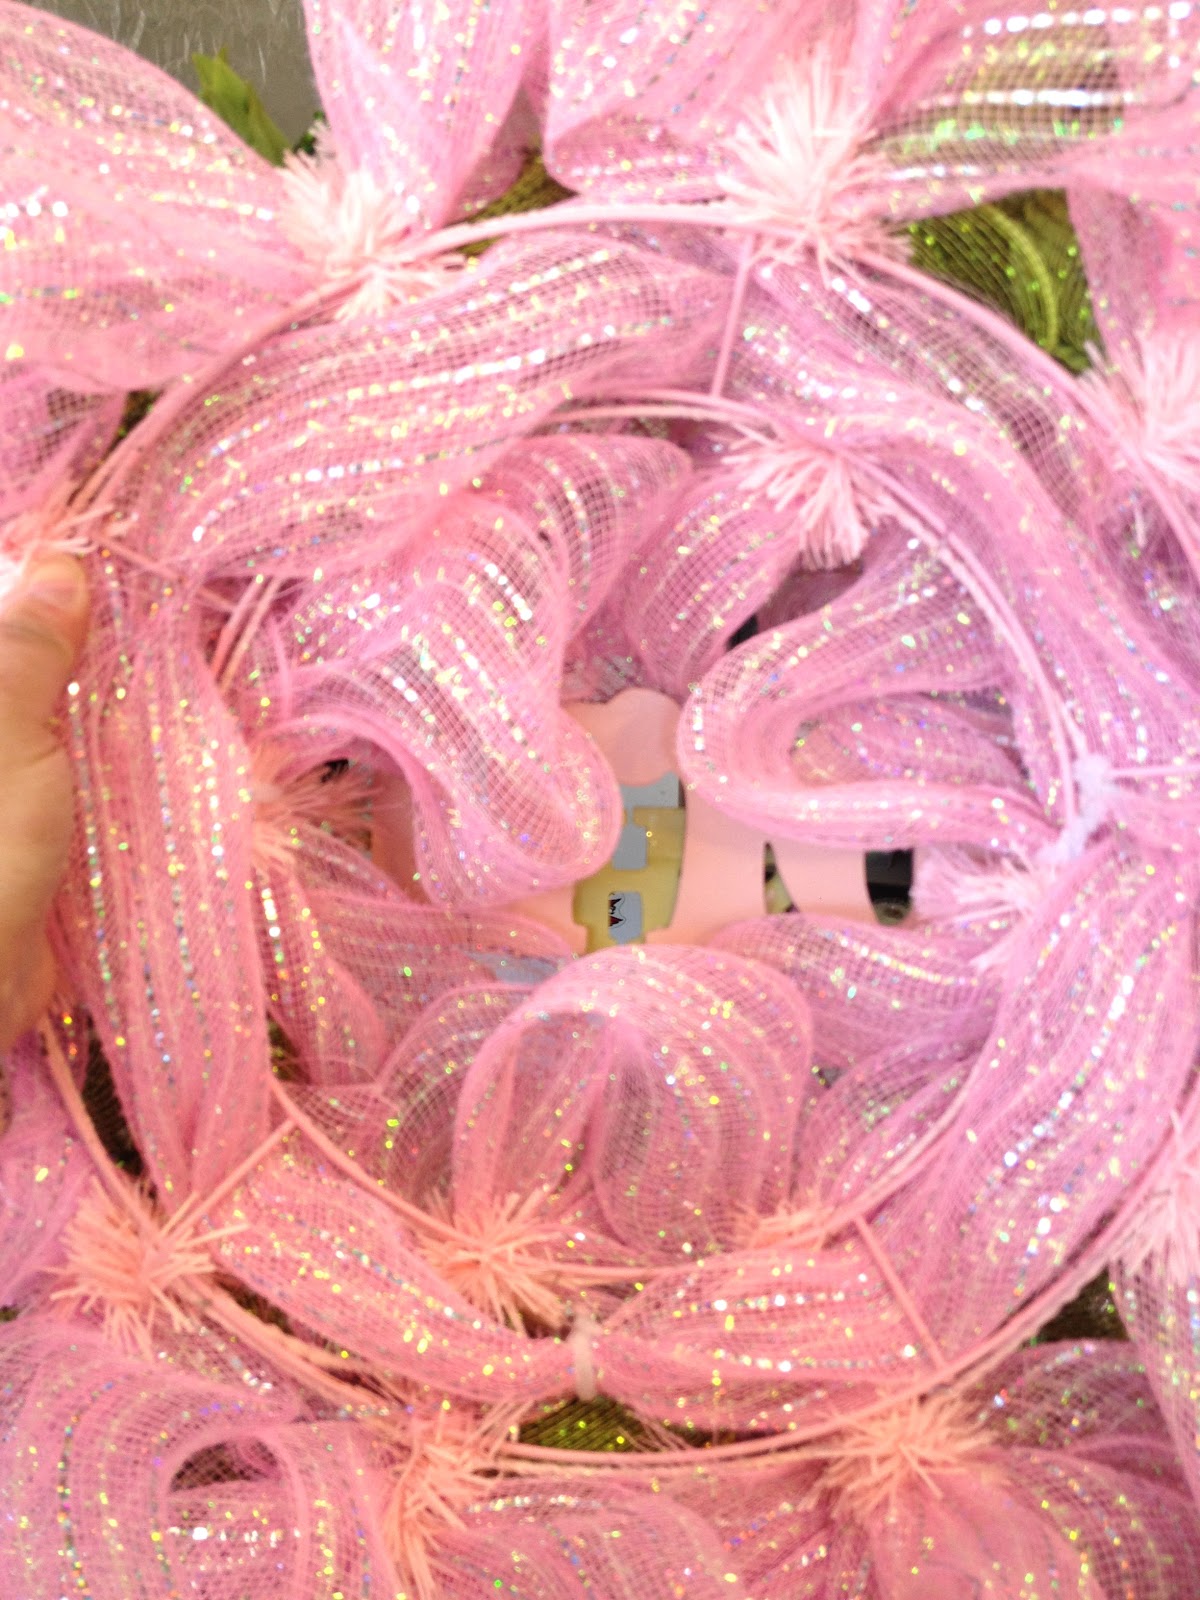
Below you can see a long piece that I’ve started weaving in behind the crossbars. As you can see in the picture, I’ve circled the additional mesh strip because it blends so well with the wreath it is hard to detect. The white pipe cleaner you see in the photo below is from the wooden sign I wired in on the front of the wreath.

Once you’ve gone all the way around the back of the wreath frame and used the two pieces of cut deco mesh, you will need to secure them to the wreath frame with pipe cleaners. Make sure the pipe cleaners coordinate with your wreath; I used white. I secured these pieces in three places but you may need to do four or five if it seems to pop out of the wreath frame. Trim up excess wire and excess mesh.

In the picture below you can see the completed wreath from the back and I’ve pointed out where I’ve secured it to the metal wreath form.

As you can see, it does clean up the back of the deco mesh wreath making it more polished.
I hope you find this little tip helpful…Happy Wreathing!
Note: Instead of 21″ wide mesh, you can use 10″ if that is what was used in the construction of the wreath but you will not divide it; just use the whole 10″ width and fold neatly. You can also just use 2.5 inch deco mesh ribbon but you may need two overlapping layers.
Thanks,
This is great!
I’m confused. I thought by paying $200 + gave me access to ALL tutorials? It says that I must pay $39 for the ebook in order to learn about Deco Mesh.
Please advise
All you need to do is search in the wreath of the month club portal “deco mesh” and you’ll receive all the tutorials covered in the ebook plus more.