DIY Fall Scarecrow Hat Centerpiece For Your Table
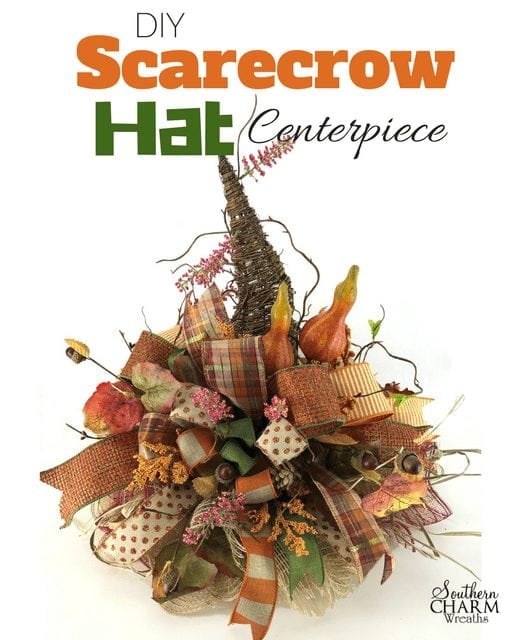
Today in the wreath shop, learn to make a Fall Scarecrow Hat Centerpiece for your table using a grapevine cone, wreath, mesh, ribbon and flowers. This post contains some affiliate links for your convenience. Click here to read my full disclosure policy.
DIY Fall Scarecrow Hat Centerpiece For Your Table
In this video I’m sharing how to make a scarecrow hat using a grapevine wreath and cone! You can create this cute centerpiece for your fall table in an hour. It makes a perfect hostess gift! Here’s how to make it:
Supplies
- Bowdabra
- Silicone mat
- 10 inch grapevine wreath (Hobby Lobby)
- Grapevine cone (Hobby Lobby)
- 3 rolls of mesh (Trendy Tree)
- Bind Wire
- Floral Zip Ties
- Florist Wire
- Raffia
- Variety of ribbons – different textures and widths
- Assorted silk leaves and pumpkins on a stem
- Glue gun
[Tweet “Make a Fall Scarecrow Hat Centerpiece for Your Table!”]
DIY Fall Scarecrow Hat Centerpiece For Your Table:
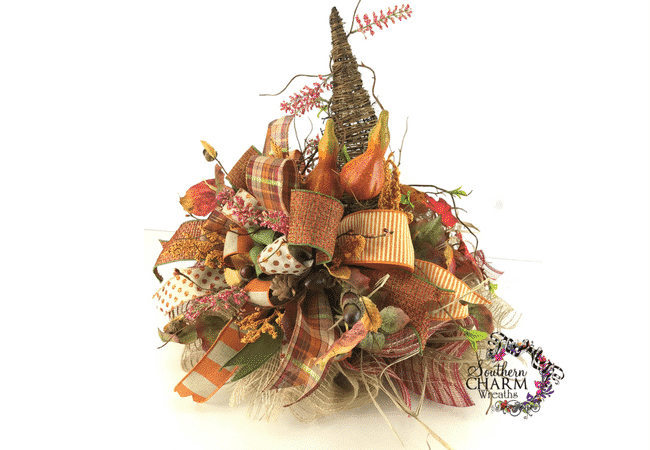
- Begin by attaching the cone to the grapevine wreath (base). I used 4 zip ties to attach.
- Next, roll out the first 10 inch mesh and cut it in 30 inch lengths. Then cut the burgundy 10 in mesh and frayed edge mesh into 12 inch lengths.
- To create poofs with the mesh, take a piece of the 30 inch length mesh and ruffle it up like a bow tie (see video below for details). Place it in the Bowdabra (optional) and add raffia over it (or you can hold it in your hand).
- Attach the mesh and raffia together with florist wire in the center.
- Add to the grapevine wreath by pushing the wire through the grapevine. Trim any extra wire.
- Continue adding the mesh poofs all the way around. Note: I alternated colors.
- To give the arrangement a focal point, make a bow with a variety of ribbons. Note: Check out the video below for detailed bow instructions and more information about how to choose the right ribbon.
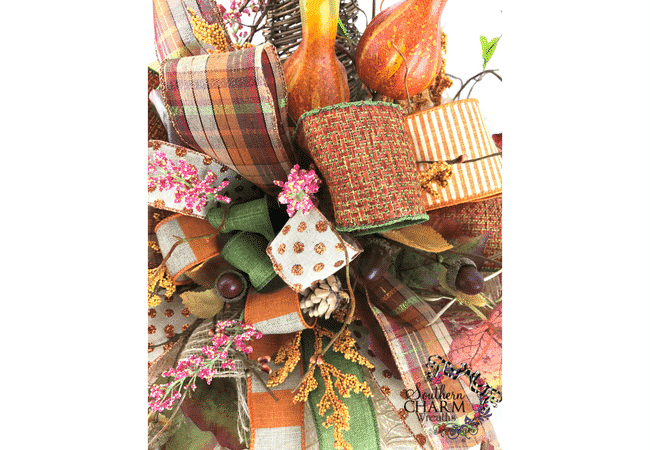
- Attach the bow to the hat by inserting the wire through the grapevine cone about 3-4 inches above the wreath base and twist underneath. Trim away any extra wire. Take time to spread out all of the bow loops and ensure they are laying the way you want.
- Optional step – bend the top of the cone just a bit to give the “hat” some character.
- Begin adding the small pumpkins on stems to the arrangement. Place everything first before gluing! I added the pumpkins between the bow and the cone.
- Next add in some of the leaves. The stems can be inserted at an angle into the grapevine and hot glued for extra adhesion. Continue adding until you’re happy with how full the arrangement is. Note: You don’t want to completely cover the arrangement – you want to be able to tell it is a hat.
- Lastly, I added some wispy fall grasses and stems with acorns to add texture.
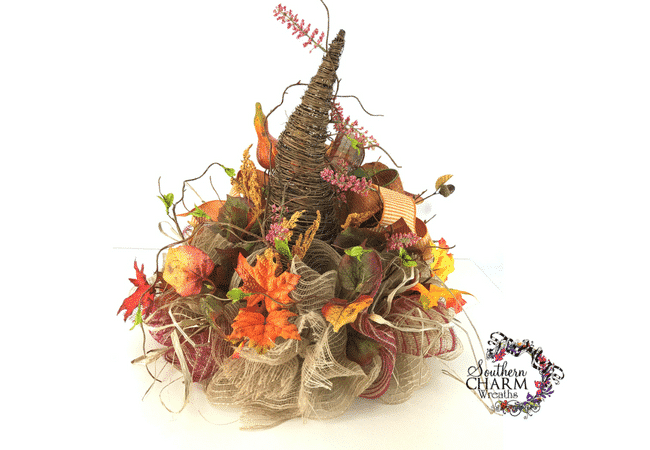
This is what the back looks like.
DIY Fall Scarecrow Hat Centerpiece For Your Table Video…
This fun centerpiece can be made with any colors you like for fall. You could even make one in your favorite team colors!
Let me know if you enjoyed this and don’t forget to join me on Facebook so you can watch me Live!
If you enjoy watching me and/or learning to make wreaths of various styles, join me in my Wreath Making of the Month Club, learn more here.

Happy Wreathing,
Julie
If you enjoyed this post, you might also like:
Top 15 Wreath Making Tools for Beginners
Love it! Such a cute and adorable idea. Love, love, love fall, Halloween, Thanksgiving, Christmas , all the holidays. Keep up the creativeness, love your work.
Thank you!
Just found you and I love it!!!! What is your club of the monthe? How do we buy those ribbons??
You learn more about my wreath making of the month club here https://southerncharmwreaths.com/product/wreath-making-month-club/
Beautiful centerpiece. I love all your tutorials and have been so glad I discovered your site. Keep up all the great work, you are a true inspiration!!
I love this centerpiece. I am going to make it for my niece who just bought a new house. Love everything you do. So thankful that you are willing to share your talent with us. Have a blessed holiday.
love, love, it wow very nice
The colors are exquisite. I love the lesson on layering with the use of different size and texture of silk flowers. Thank you for sharing your expertise! Soodie