Spectacular St. Patrick’s Day Wreath Tutorial
Everyone could use a little luck and this fun St. Patrick’s Day wreath is sure to bring it! Perfect for beginners, you can make this cute wreath in one afternoon. This post contains some affiliate links for your crafting convenience. Click here to read my full disclosure policy.
Spectacular St. Patrick’s Day Wreath Tutorial
In this video, we’re making a Spectacular St. Patrick’s Day Wreath. Your neighbors will think you’re the luckiest one on the block when they see this gem on your front door. Here’s how to make it:
Supplies
- Grapevine Wreath 18 inch (Hobby Lobby)
- Clover sign (Carolina Pottery)
- Assorted wired ribbon
- Spring silk flowers
- Assorted greenery
- Florist wire
- Wood floral picks
- Steelpix Stemming Machine
- Steelpix Steel Floral Picks
- Wire cutters
- Hot glue gun or Glue Skillet
- Glue sticks
- Craft mat
[Tweet “How to Make a Spectacular St. Patrick’s Day Wreath”]
Spectacular St. Patrick’s Day Wreath Tutorial
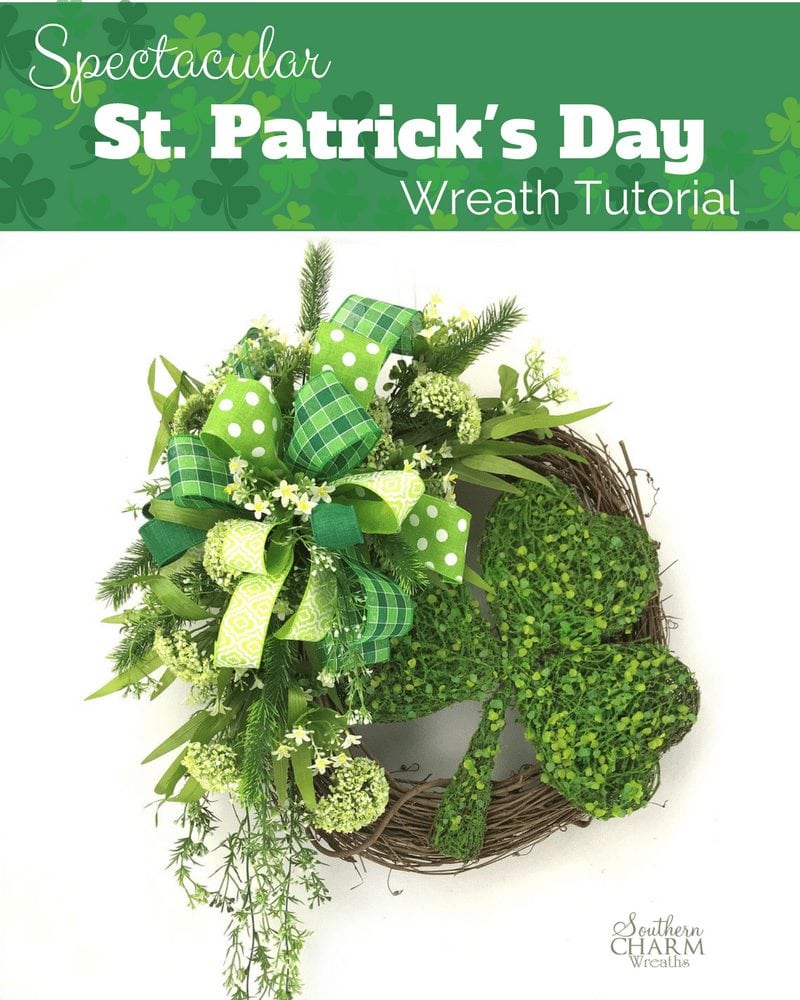
- Since all grapevine wreaths can vary a bit in their shape, take a moment to lay out your clover in various places and envision where it might work best while still leaving space.
- Attach the clover to the grapevine wreath using florist wire. Simply thread a piece of wire through the front of the clover through the grapevine wreath and twist. Then cut off any excess wire. Continue adding as many pieces of wire as needed until the clover feels sturdy.
- Next, add a bow. I made my popular funky bow out of 5 different ribbons with 12 inch loops following these instructions. Note: When you’ve finished your bow, secure with florist wire and push all the bow tails to the back and loops to the front.
- Add your bow to the wreath with florist wire. I added mine to the top left corner of the wreath. Don’t forget to fluff your bow!
- Now it’s time to add the greenery and silk flowers. I started with three long pieces of bamboo and secured them with hot glue under the bow.
- Next, I continued adding greenery and white flowers around and under the bow, attaching each one with hot glue. If you purchased greenery or flowers on a bush, cut each stem and attach them to the wreath separately. Note: Look for flower and greenery colors that compliment the ribbon you used in your bow and use a variety of textures.
- When you are finished adding your silk flowers and greenery, trim any picks that may have poked through the back and you’re done.
Spectacular St. Patrick’s Day Wreath Tutorial Video…
I hope you enjoyed this Spectacular St. Patrick’s Day wreath! It’s an easy way to brighten up your door for St. Patrick’s day. You could also hang this on a mirror over your mantle or in your entryway.
If you would like to learn more about wreath making, join my Wreath Making Club.
Don’t forget to join me on Facebook Live, for my other DIY tutorials. Even better, join our messenger bot HERE and we’ll send you a message on Facebook the next time we go live. It’s always more fun to join in on the conversation.
Happy Wreathing,
Julie
If you enjoyed this post, you might also like:
DIY Designer Easter Teardrop Swag Tutorial
Whimsical He Is Risen Easter Wreath Tutorial
Wreath Making – How to Choose Colors
Love your videos, thanks to you I have learn to make a funky bow which i just made my first one today for my Easter wreath…thank you again….
Love your wreath video. Your wreaths are beautiful, so eloquent, just over the top. Thank you for sharing. New to your site.
Beautiful wreath. I so enjoyed watching you make it. Thank you so very much. I have just become a fan of yours and I am really enjoying watching your videos. I have made the first wreath in your ebook and can’t wait to finish it so that I can send you a photo of how mine turned out.
Wow! For a funky bow it sure is beautiful and you did the wreath so quick love your work I would love to join your group but I belong to three already but love your work??
Such a cute wreath for St. Patrick’s Day! Loved your video and the easy tutorial. Thanks for sharing this with us. Will definitely need to try this.
I just love your video’s. It is amazing how you decide where to put a flower or something. You don’t seem to hesitate. It’s like you are being told from the wreath where to put everything. Thank you Julie, for all of your demonstrations. Helen
I think you are an absolute doll. This wreath is GORGEOUS. TALENTED!!!!!