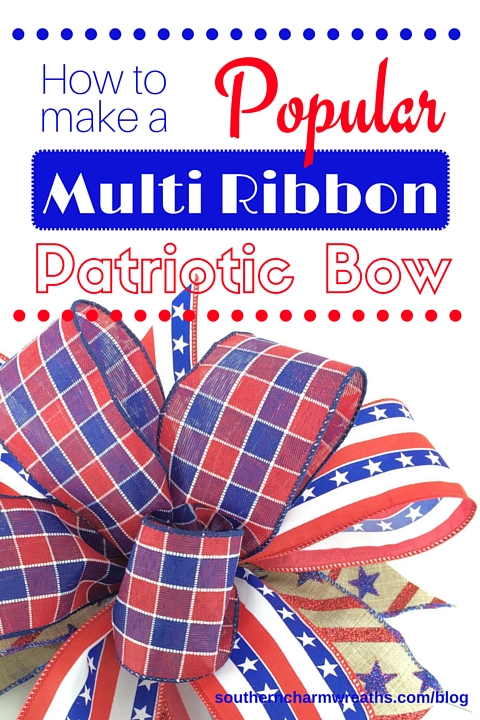
How to Make a Popular Multi Ribbon Patriotic Bow
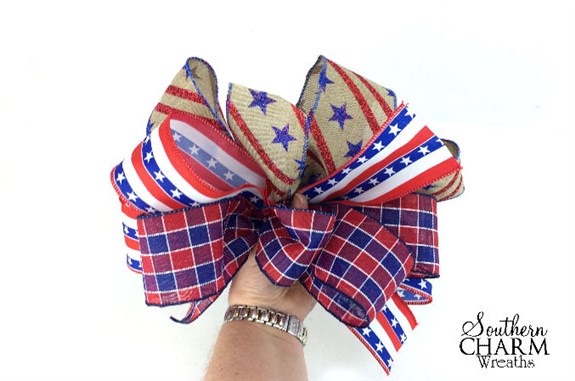
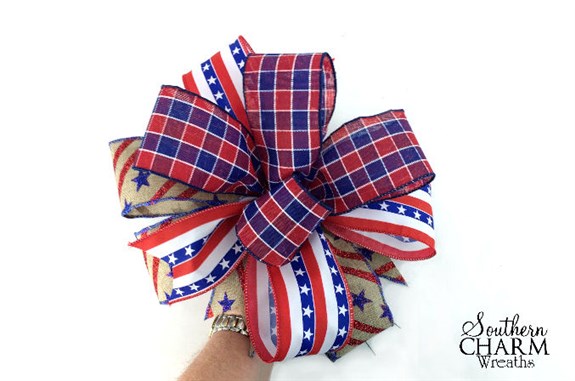
Independence Day celebrations are just around the corner and if you are like me, you like to decorate your home and make it look festive! To help you with your decorating, I thought I would show you how to make a popular multi ribbon patriotic bow to be used in a wreath. Of course you can use this bow also on your mailbox, on a garland, swag, etc. Make sure to scroll to the bottom of the post for a video on how to make this popular multi ribbon patriotic bow. This post contains some affiliate links for your convenience. Click here to read my full disclosure policy.
When I decorate my door for the Fourth, of course I like to hang a Fourth of July wreath and a matching bow to my mailbox which is located out by the street. I also like to decorate my urns that flank my door with live red and white flowers and spray painted tall Birch branches that shoot out of the center of the urns. I then place patriotic metal picks into the urns. I place shorter red geraniums beside each urn, and a tall outdoor lantern to the right topped with a beautiful patriotic lantern swag. My only problem is remembering to water the plants. Haha!
How to Make a Popular Multi Ribbon Patriotic Bow
Supplies
1.5 Yards wired ribbon 2.5″ wide print 1
1.5 Yards wired ribbon 2.5″ wide print 2
1.5 Yards wired ribbon 2.5″ wide print 3
Florist Wire
Scissors
[Tweet “How to Make a Popular Multi Ribbon Patriotic Bow”]
Instructions
Step 1 – Center Loop
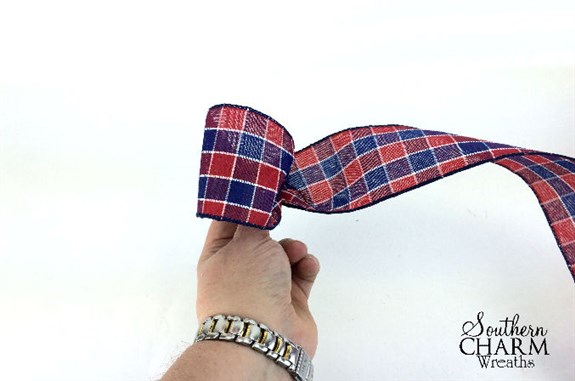
Make a center loop that measures 3″ tall and twist the ribbon tail to make sure the printed side of the ribbon faces forward. Pinch in your fingers.
Step 2 – Ribbon 1 Loops
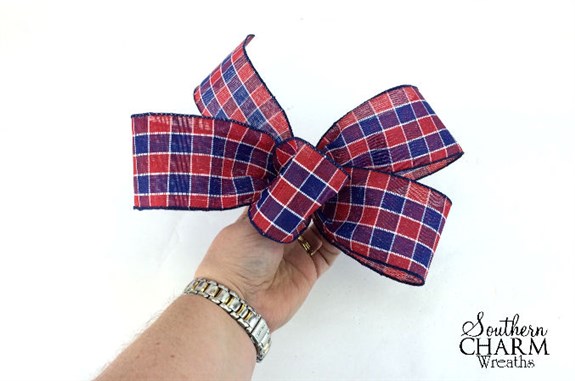
Measure out the tail 10″ long and loop it to the back making a 5″ loop, twist the ribbon and pinch it into your fingers. Measure out 10″ long and loop it to the back making a 5″ loop, twist ribbon and pinch. Do this step one more time. You should now have 2 loops below the center loop and 1 loop above the center loop. Cut the ribbon from the roll if you haven’t already to approximately 9″ long which we can trim up later.
Step 3 – Ribbon 2 Loops
While still holding the loops you just made with the first ribbon, pick up the second ribbon. Measure out approximately 9″ tail and pinch in your fingers and twist the ribbon so that the printed side faces forward. This new ribbon tail should be on the side of the two ribbon loops you made with the first ribbon. Measure out 12″ and fold it to the back making a 6″ loop and pinch and twist. You should now have a total of two loops on either side of the center loop. Make 2 more loops with the second ribbon both 12″ long and twisting in between each loop. Cut the ribbon loose from the bolt if it is still attached by measuring out 9″ and cut.
Step 4 – Ribbon 3 Loops
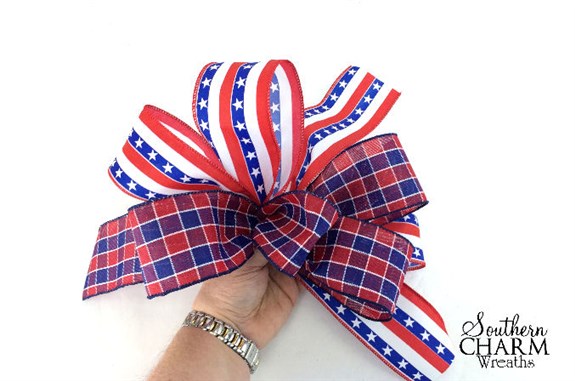
While holding the bow, pick up the third ribbon. Place the ribbon tail so that it points upward on the side of the two ribbon loops you made with the second ribbon. Measure out a 9″ tail and pinch in your fingers and twist the ribbon so that the printed side faces forward. Measure out 12″ and fold it to the back making a 6″ loop and pinch and twist. Make 2 more loops with the third ribbon both 12″ long and twisting in between each loop. Cut the ribbon loose from the bolt if it is still attached by measuring out 9″ and cut.
Step 5 – Secure with Wire
Run a floral wire inside the center loop over your thumb holding the bow and secure the wire tightly in the back. I find that it is easier to twist the bow rather than the wire to ensure a tight twist. Trim your ribbon tails to the same length as the bow loops.
There you have it, how to make a popular multi ribbon patriotic bow. Your bow is now ready to be added to your wreath. By just switching out the ribbon to different colors and patterns, this bow can adapt to various seasons or occasions. Can’t you just imagine a bow in this style for a wedding, Christmas, or Mardi Gras? How do you plan to use the bows you make?
Comment below and let me know how you liked this tutorial. Don’t forget to join my mailing list to have my blog articles sent directly to your inbox.
Happy Wreathing,
Julie
If you enjoyed this post, you might also like:
How to Make a Festive Patriotic Lantern Swag
30 Amazing 4th of July Wreath Ideas Roundup
How to Make a July 4th Door Wreath


Another great tutorial. Thank you for giving us a different style multi ribbon bow. I am so happy to be a member of your group. Love your generosity.
Thank you Donna! I’m so happy you’re a member of the group too!
Thank you for giving us another great video Julie! You are an inspiration to all of us!
Do you think this type of bow would look good using different size (widths) of ribbon?
(for example 2.5” ribbon with 1.5” ribbon)?
No thank you! My followers are the ones who inspire me. This tutorial request actually came from one of my ebook customers.
Yes adding in 1.5″ would work too! If you add a 4th ribbon you can make the next set of loops 7″ or measure out 14″ long.
Thank you so much for this wonderful tutorial, and right on time. I was just looking today for bow tutorials.
This is a great-looking bow, Julie! You’re such an inspiration with your creativity. Thanks for sharing. I, too, am glad to be able to learn from you.
Thank you for sharing your many talents. I have purchased all of your videos and your Ebook. I watch them over and over like movies. I would love to see a video for that beautiful yellow and white daisy wreath you had in your store. I would also love to see a video for a 2′-3′ christmas tree I bet you could make the best one ever. Thank you again for being a very loving, caring and talented person that you are. Keep up the good work. God be with you and your family.
Haha, that wreath was one I made many, many years ago and I still hang it on my door every summer. Thank you for your kind comments.
Thank you for all your free tutorial. You make everything look really easy for us.
Thank you Linda!
Jules, you’re the best, and thank you for always taking the time to teach us how to make that perfect wreath with a perfect bow. I’m always looking out for your tutorials – I look forward to watching them. I’ve learned more from you than from anybody else, and I’m grateful that you share your talents and gifts. You’re a huge blessing for me, and for all of us. Thank you!!!
Thank you Laurie!
You are such an amazing and giving person.my craft idol.!!! So enjoy how you create masterpieces and willing to share with us,thank you so much,
Thank you so much for this tutorial. I have not been able to make mine where they come out as pretty as yours but now I think I can…as Thomas the train says. Thanks again for all your wonderful tips.