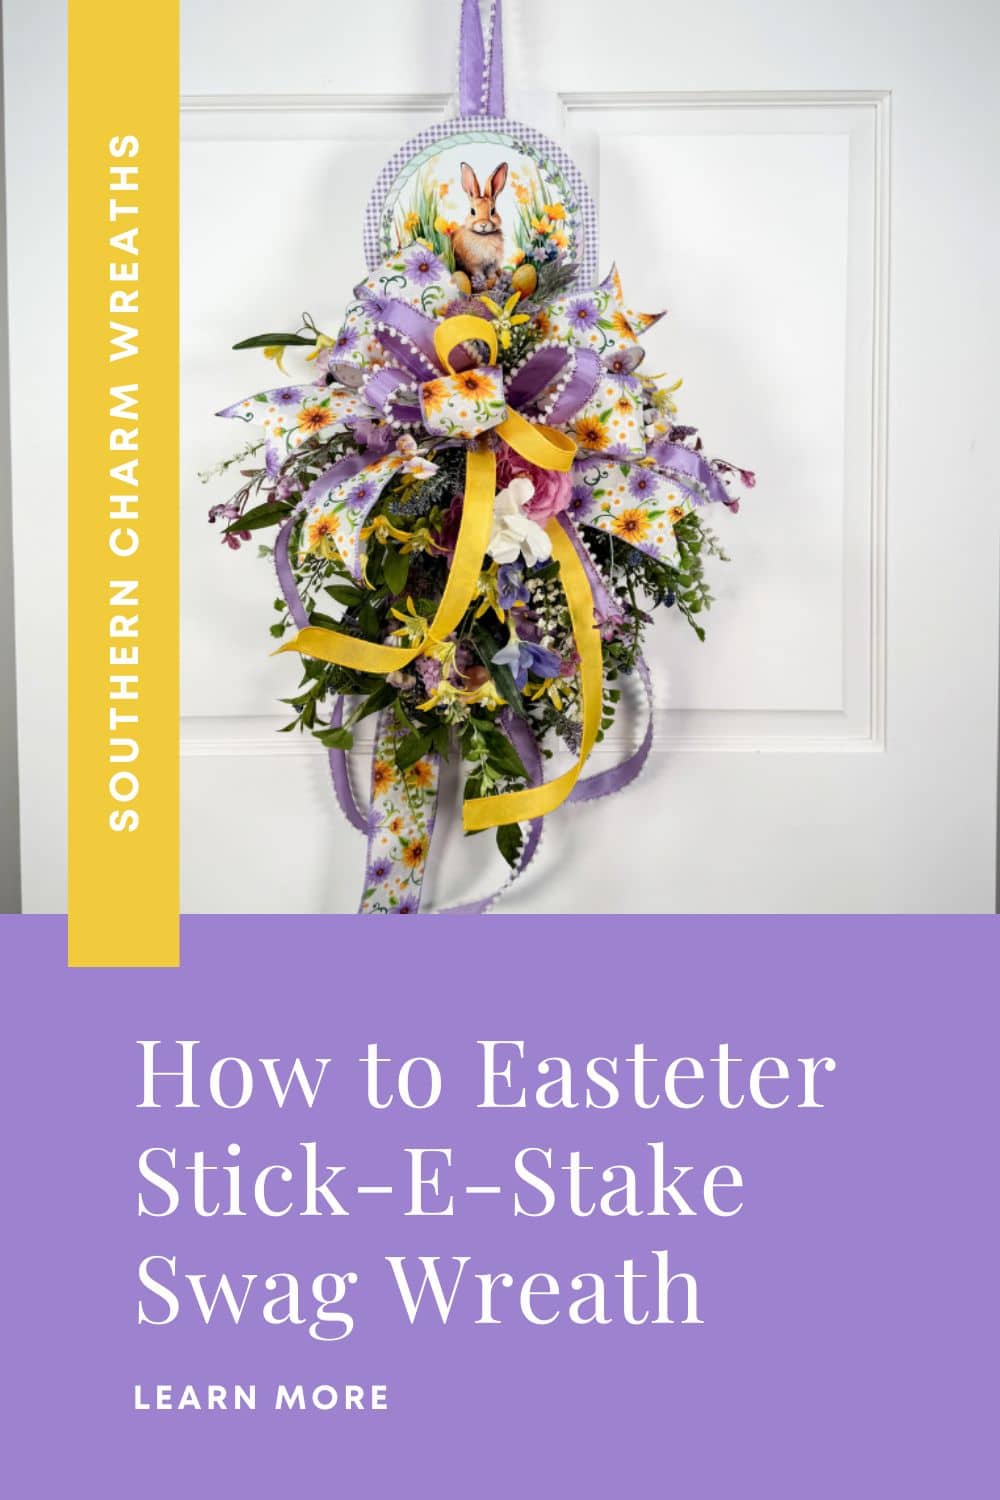
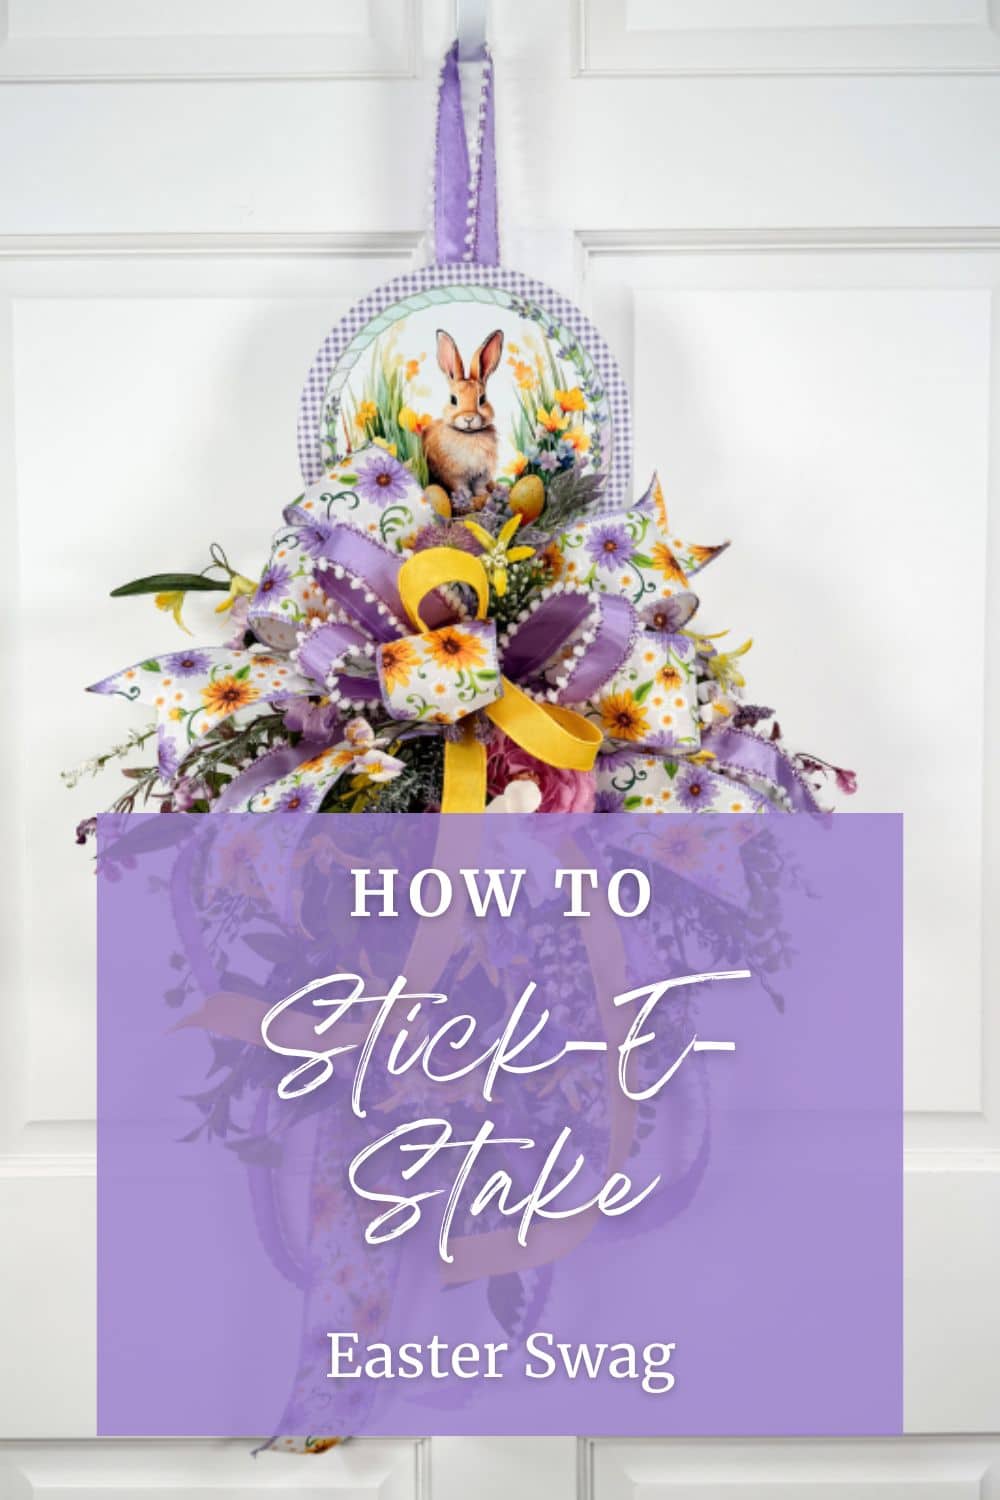
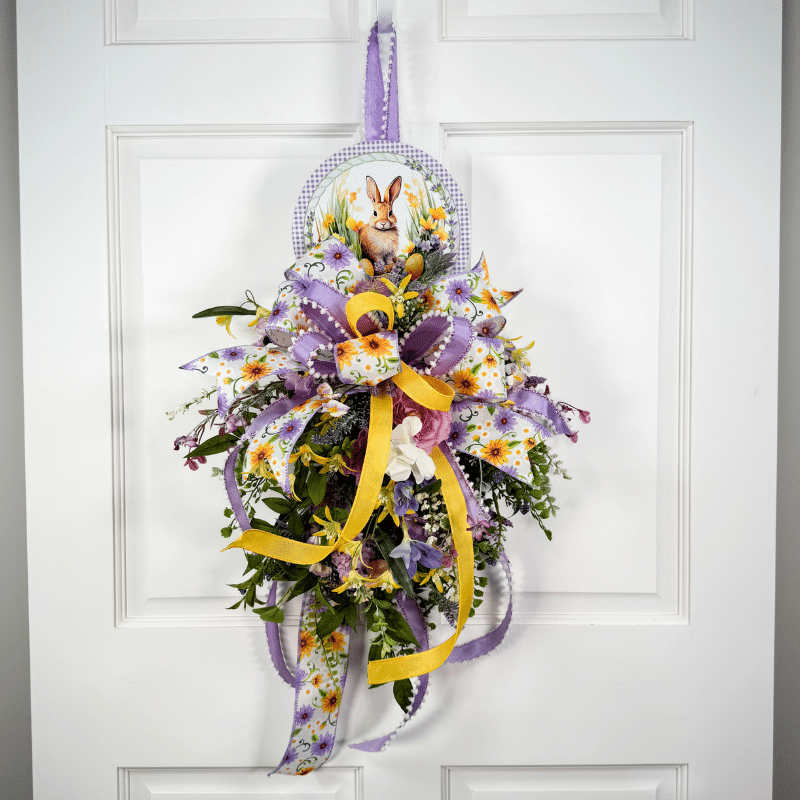
DIY Easter Swag Wreath for Your Spring Front Door
Today we are making something a little different, and honestly, so much fun. If you have ever wanted a wreath alternative that still gives you that full, beautiful look, this DIY Easter swag wreath is it.
We are using a Stick-e-Stake and an 8″ sign as our base and building a floral swag that is perfect for your front door for spring and Easter.
And let me tell you, this is one of those designs that looks fancy but is actually really forgiving. So don’t stress, it’s just ribbon.
What is an Easter Swag?
Before we jump in, let’s keep this simple.
An Easter swag is a vertical door decoration that hangs from the top instead of forming a full circle like a wreath.
It’s great when you want:
- Something a little different from a traditional wreath
- A design that feels more full and cascading
- A way to highlight a sign or focal piece
Think of it like a bouquet that hangs on your door.
How to Make an Easter Swag Using a Stick-E-Stake
Supplies You’ll Need
Here’s what we’re working with:
- Stick-E-Stake
- 8″ round Easter sign (bunny design)
- Foam
- 3 Different ribbon in coordinating spring colors
- Greenery stems (at least 2 to 3 types)
- Spring florals (yellow, purple, white, pink tones)
- Zip ties or floral wire
- Wire cutters
Floral Designer Tip: Choose ribbon first, then pull your colors from that. It makes everything feel cohesive without overthinking it.
Step 1: Attach Sign to the Stick-e-stake
Take the alcohol wipe and wipe the sign. (Wipe included with Stick-e-Stake)
Peel the stick cover off the Stick-e-Stake.
Secure to the 8″ round sign.
Step 3: Attach Stick-e-Stake to Foam
Insert your Stick-e-Stake into the floral foam.
I prefer to insert it closer to the back half.
Step 2: Build Your Bow
We always start with the bow.
Create a full, multi-loop bow using your ribbon. This becomes your anchor and sets the tone for the entire design.
Attach your bow right under the sign.
Floral Designer Tip: Leave your tails long. You can trim later once everything is in place.
Step 3: Add Your Greenery Base
Next, we build our foundation.
Start adding greenery behind and around the bow, working in a downward direction to create that swag shape.
Use a mix of:
- Different leaf shapes
- Different shades of green
- Different textures
This is what gives your swag depth and movement.
Floral Designer Tip: Let your greenery flow downward naturally. Don’t make it stiff.
Step 4: Layer in Your Florals
Now we bring it to life.
Start with your larger florals first, then fill in with smaller pieces.
Place your flowers:
- Around the bow
- Down the center line
- Slightly off to each side for balance
You want it to feel full but not crowded.
Floral Designer Tip: Step back often and look at your design. That’s where the magic happens.
Step 5: Highlight Your Focal Point
Your bunny sign is your star.
Make sure your florals and ribbon are framing it, not covering it.
Adjust anything that feels too heavy around the top so the eye naturally lands on the sign first.
Step 6: Final Shaping and Adjustments
Now we fluff.
- Adjust your bow loops
- Spread out greenery
- Trim ribbon tails if needed
- Fill any empty spots
This is where your swag goes from good to “look how gorgeous this is turning out.”
Fun Easter Swag Variation Ideas
You can easily switch this up depending on your style:
- Add Easter eggs or carrots
- Use pastel-only tones for a softer look
- Go bright and bold for a more playful vibe
- Swap the sign for a cross or spring message
Let’s Bloom!
Isn’t this fun?!
This Easter swag is such a great way to decorate your front door without needing a full wreath base. And the best part is, you can make it your own with whatever supplies you already have.
You don’t have to be perfect. Just have fun with it.
And once you make one, I promise you’ll want to make another.