How to Make a Winter Magnolia Wedding Arrangement
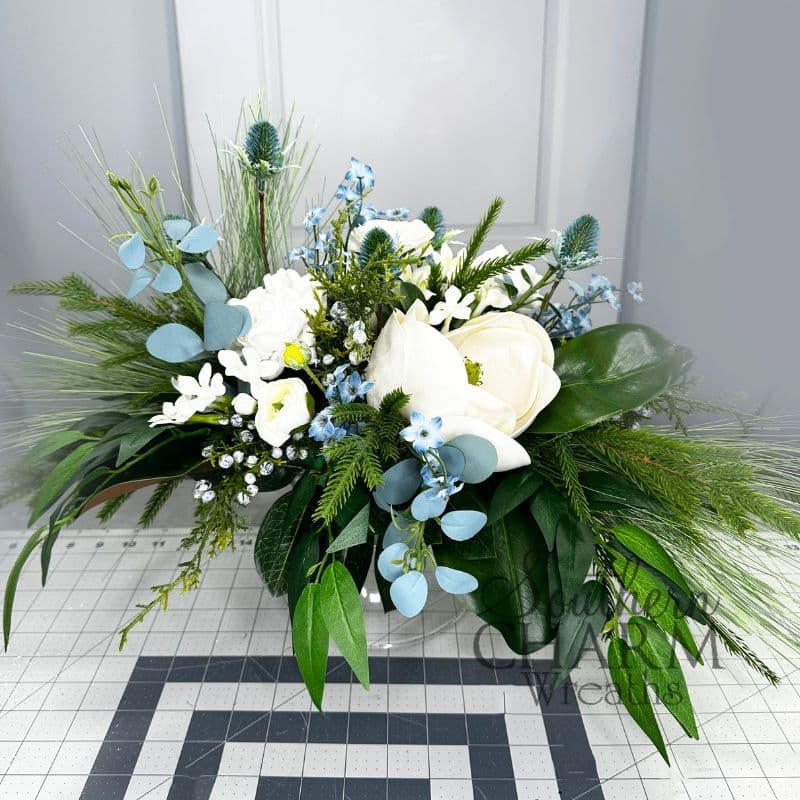
Get step-by-step instructions for this winter magnolia wedding arrangement. It’s made with lush white magnolias, subtle blue accents, and frosted berries for just a touch of sparkle.

Winter magnolia wedding arrangement
If you’re planning a winter wedding or simply seeking an elegant winter floral arrangement, this is the project for you.
This inverted design encapsulates the beauty of winter, from its textured greenery to its bright and clear color palette.
This post may contain affiliate links for your convenience. Click here to read my full disclosure policy.

Supplies for this project
You’ll need:
- 2 clear glass bowls
- Clear Gorilla glue
- Styrofoam ball
- Green floral paper
- Spray adhesive
- Floral tape
- Florist u-pins
- Scissors
- Steel picks (or wooden florist picks)
- Hot glue
- Needle nose pliers
- Greenery:
- Green Spanish moss
- Long needle pine
- Norfolk pine
- Italian ruscus leaf
- Dusty blue eucalyptus
- Florals:
- White magnolias
- White camellias
- White ranunculus
- Honeysuckle
- Blue thistles
- Blue forget-me-nots
- Frosted cedar berries
How to make a winter magnolia wedding arrangement
1. Prepare your arrangement base
The first step in this magnolia flower arrangement is to prepare the base. Start by gluing two clear glass bowls together, securing their bottoms with clear Gorilla glue.
Next, use green floral paper and spray adhesive to cover half of a styrofoam ball. Stick the foam into the top bowl, then secure it with florist tape wrapped in an X-shape.
Finish with a bit of Spanish moss, securing with u-pins.
2. Build the frame
Add long needle pine horizontally on either side of the arrangement, using steel picks as necessary. Include another piece on one side at a slightly higher angle.
Next, add three pieces of Norfolk pine on either side, framing the pine needle picks.
Finish with Italian ruscus leaf on both sides.
3. Include winter florals
Our focal flowers in this winter arrangement are white magnolias.
Create a hole in the foam using needle nose pliers on one side of the design. Use a steel pick to add your first magnolia bloom to this hole, securing it with hot glue. Add a second magnolia opposite and diagonal to the first.
Next, add white camellias on either side – make sure they’re on different planes than the established magnolias.
Evenly distribute the white ranunculus throughout the center design. Then, finish with a sprinkling of white honeysuckle.
4. Add hints of blue
For a hint of wintery blue, add blue thistles throughout the design. This will help define the shape and give it a bit of height.
Next, pepper in some blue forget-me-nots. This will break up the white florals and add more interest to the design.
Finally, add clippings of dusty blue eucalyptus for more height.
5. Finishing your winter magnolia wedding arrangement
Add a few large magnolia leaves to the design, using steel picks and hot glue to secure them.
Then, add some final clippings of frosted cedar berries throughout the arrangement. This will add texture and filler while giving that perfect wintery finish.
Fill in any last holes, finish the bottom with a collar of leaves, and your winter magnolia arrangement is complete!
Watch the video: How to make a winter magnolia wedding arrangement
If you enjoyed this post, you might also like:
- Ranunculus Winter Wreath with Coach Laurie Anne
- Black & White Winter Lantern Swag
- Winter Wedding Wreath
Like this post? Pin it for later!


This is attractive. The tutorial was free of charge and I enjoyed it. Some simple diagrams in pen or pencil sketch would be helpful throughout the tutorial. I appreciate that you provide video, audio and written tutorials. Still, there are learners who are divergent; likely they would appreciate a sketch or two throughout the discourse. Keep the artful ideas flowing like water over rocks! So grateful! V