Spring Beaded Hoop Wreath
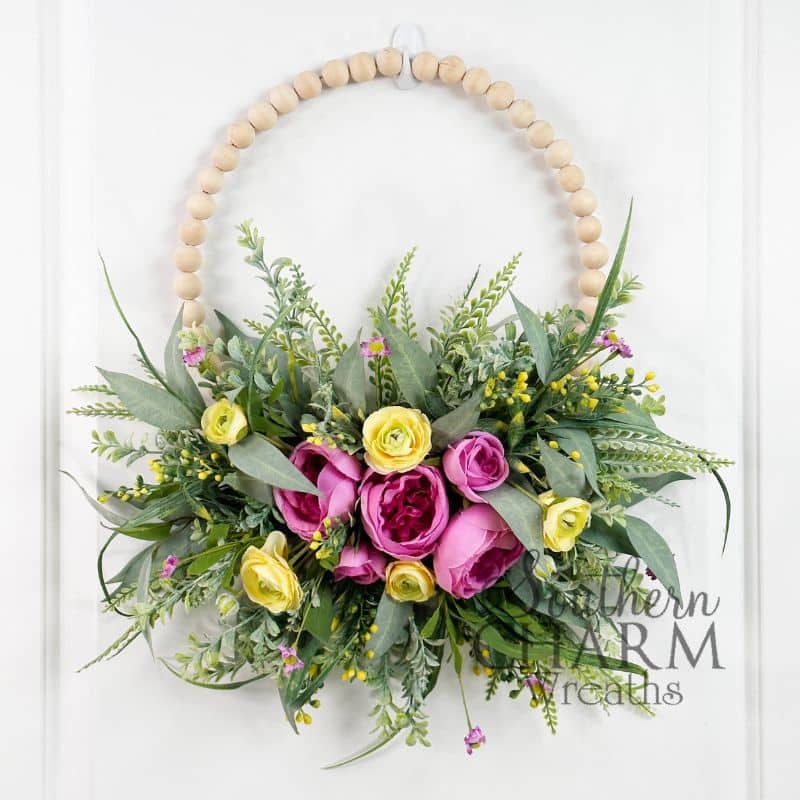
Join Coach Laurie Anne as she makes this minimalist, beaded hoop wreath complete with bright purple roses and yellow ranunculus. Each element of this simplistic design is perfect for springtime!

DIY beaded hoop wreath
Today, Coach Laurie Anne is making a spring beaded hoop wreath with colorful blooms, textured greenery, and lots of feathery filler.
I just love the way purple and yellow work together for spring. This style is more on the minimal side, with few materials and maximum impact.
That’s the power of a gorgeous color combo and artful design!
This post may contain affiliate links for your convenience. Click here to read my full disclosure policy.

Supplies for this project
You’ll need:
- Beaded hoop wreath form
- Faux flowers
- Purple cabbage roses
- Yellow ranunculus
- Faux greenery
- Dusted greenery with purple florals
- Yellow berry grass
- Eucalyptus
- Boxwood
- Styrofoam
- Zip ties
- Floral picks
How to make a spring beaded hoop wreath
1. Prepare the beaded hoop
First, we’re going to prepare the beaded wreath by cutting a piece of styrofoam that is 4” long, 2” wide, and 1” thick.
Zip-tie the styrofoam to the top center of your hoop using 2 ties.
Then, to ensure the beads don’t turn, put a bit of hot glue between each bead, just where the styrofoam is placed.
2. Build your form
Now, we’re going to build our form, determining the height and width of the design.
Start with pieces of ranunculus, sticking into the styrofoam on either side and securing with hot glue. Remember to keep a consistent line and design with symmetry.
Then, glue longer stems of eucalyptus on the lower portion of the styrofoam using the same method.
3. Add floral elements
The real star of this design is the flowers!
Add 5 cabbage roses near the center of your styrofoam, varying rose sizes to ensure there’s an equal amount of weight throughout the center.
Cut short stems of yellow ranunculus and add about 6 blooms around the cabbage roses, aiming for an even distribution of color.
4. Include filler
I use several types of greenery and filler in this design for a full, professional look.
Start with the dusted greenery, hot gluing clippings around the design anywhere you see a hole. If you’re adding single stems of the purple florals, use a floral pick.
Then, repeat this with yellow berry grass, remembering to keep the shape and seek balance.
5. Finishing touches
For the final steps, we’re just going to ensure that the entire design has an even wash of color. If there are any holes, you’ll need to fill them in!
Use clippings of filler greenery like bulky boxwood, as well as yellow berries, for more texture.
Finally, y’all can choose to finish the back of your design, covering the zip ties with moss or leaves.
And with that, your spring beaded hoop wreath is complete!
Watch the video: How to make a spring beaded hoop wreath
If you enjoyed this post, you might also like:
- Spring Easter Bunny Wreath with Coach Laurie Anne
- DIY Spring Rose Grapevine Wreath
- Spring Tulip Arrangements for Mother’s Day
Like this post? Pin it for later!


Absolutely gorgeous…I think I will make one on our next TikTok Live. Thank you Laurie!
Paula from Fancy Like That Wreaths
I love Laurie Ann . Her work is great and she takes time to be sure you understand.❤️
Thank you for sharing. This is very beautiful
First time watching Laurie Anne, I have two of the hoops, didn’t know what to do with them. Her instructions was very clear. Cannot wait to try it for myself.