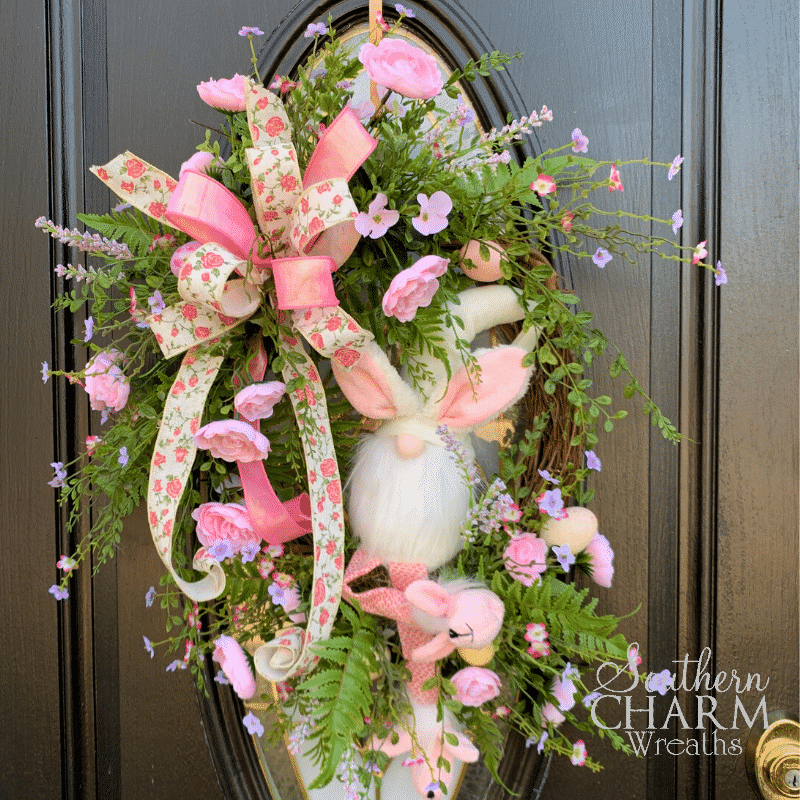
How to Make a Silk Flower Easter Gnome Wreath
Hippity hoppity… Easter’s on it’s way! And isn’t this gnome just the cutest Peter Cottontail? (Although if you watched the live video you’d know that my fellow wreath makers actually came up with some other fun gnome names for him!) Keep reading or watch the video below to learn how to make him into a beautiful Easter wreath for your front door.
This post may contain affiliate links for your convenience. Click here to read my full disclosure policy.

Let’s get started!
Supplies for the Silk Flower Gnome Wreath
All the floral supplies for this project came from one of my favorite online boutiques: Greenery Market on Etsy. And just to make it easier, they have a special category in their shop just for supplies I’ve featured in my videos.
You’ll need:
Grapevine wreath
Easter Bunny Gnome
1.5″ Ribbons (in different patterns)
Fern Bush
Greenery Bush
Ranunculus Bush
Filler Flower Bush
And:
Floral Styrofoam
Moss
Floral Pins
Floral Wire
Wire Cutters
Hot Glue Pan
Hot Glue
Steps for Making the Easter Gnome Wreath
Step 1 – The first thing you’ll need to do is prepare your gnome and give him a place to sit. But these gnomes are a little heavy for a wreath and we need to lighten his load! First, find where the bag of sand inside the gnome is, and cut through his bottom just enough to pull the bag of sand out. Be careful not to put a hole in the bag though! Close the hole back up however you like. You could sew it if you feel so inclined but I just used a regular stapler.
Now take a little scrap piece of styrofoam and use zip ties to attach it to the wreath where he’s going to sit. Then use some floral pins to cover the foam with moss. Then you can just use a few short lengths of wire to secure the little guy to his seat!
Step 2 – Next we’ll make a bow. I used 2 different 1.5” ribbons for this wreath. Make four 6” loops with the first color., two 6” loops with the second color, and then one more 6” loop or the first color. Watch the video below to see how I make my bows. Attach your bow to the opposite side of the wreath as your gnome to balance out the arrangement.
Step 3 – Now it’s time to add some greenery and flowers. Use hot-glue to attach some fern stems and any other greenery behind the bow and around the styrofoam seat. Add in your pink ranunculus and little filler flowers around the greenery. I also decided at the very end to add in some Easter eggs, so don’t be afraid to play around with
And that’s all there is to it!
How to Make a Silk Flower Easter Gnome Wreath
If you enjoyed this and want to learn to wreath the professional way, join me in our exclusive Wreath Making of the Month Club! and if you want more wreath making madness, join us in our Facebook community here.
Happy Wreathing,
Julie
If you enjoyed this post, you might also like:
How to Prepare a Gnome for Wreath Making
Easter Bunny Grapevine Wreath Tutorial
Liked this Easter Gnome Wreath? Pin it for later!


Thank you for your encouraging words. A warm loving reminder.
What the cutiest wreath. Thank you for sharing.
That was FUN to watch!! I have been making wreaths a few months and have been thrilled to learn from you. Very Enjoyable!! Keep it up!!
One question: tell me about that glue pot. It looks easier than a glue gun. I’ve never noticed it before.
Thanks for sharing with us your special talents!!
Smiley
Yeah what is that glue thing???
is this a 16″ grapevine wreath?