DIY All Floral Summer Hydrangea Wreath
This summer hydrangea wreath is nothing short of a masterpiece – made with complementary florals and silk ribbons. Learn how to make this summery wreath, complete with a color-theory-informed design.
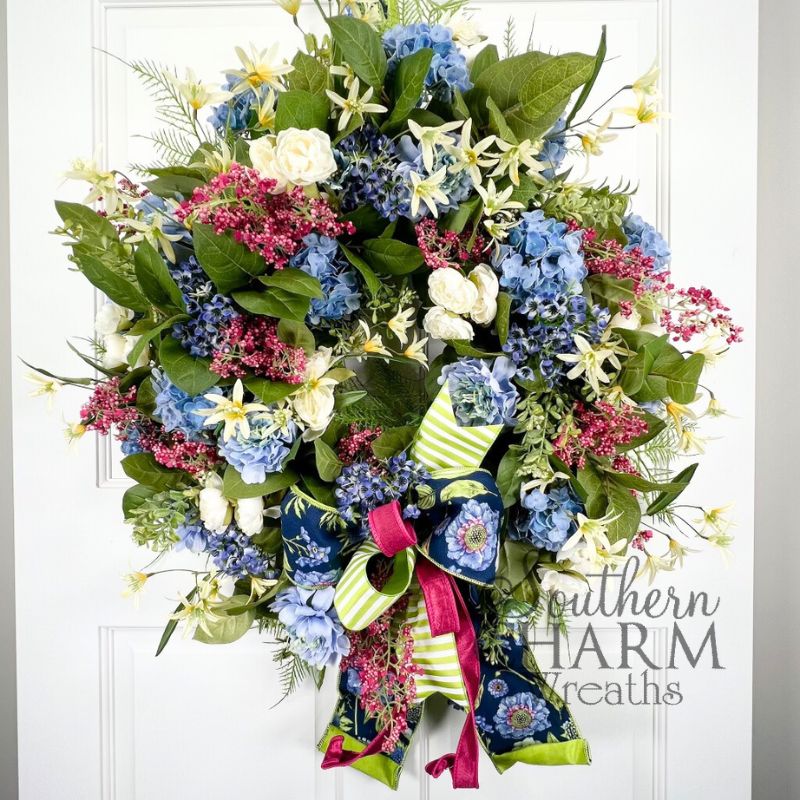
Summer hydrangea wreath
Today’s design is all about the color scheme.
This wreath was inspired by a single ribbon, containing lots of gorgeous colors including blues, pinks, greens, and yellows. In other words, the entire color palette is mapped out just on this ribbon!
If y’all enjoy delicious shades of blue, filled with depth and beauty, you are going to be OBSESSED with this project.
This post may contain affiliate links for your convenience. Click here to read my full disclosure policy.

Supplies for this project
You’ll need:
- Salal wreath base
- Faux greenery – 3 varieties
- Silk ribbon – 3 coordinating varieties
- Assorted faux flowers
- Miniature blue hydrangeas
- Light blue scabiosa
- Fuschia wax flowers
- Miniature white peonies
- Yellow honeysuckles
- Blue wax flowers
- Hot glue
- Wire cutters
- Florist wire
- Wooden florist picks
How to make a summer hydrangea wreath
1. Establish foundation
First up, we’re going to build out our base, working from the salal leaf form.
Add additional clippings of salal leaf to achieve a lovely, round wreath shape. Secure them with hot glue.
Then, take clippings of a second variety of greenery, adding them evenly throughout the base to break up the salal leaf.
2. Make the bow
For our bow, measure a 14” tail of your inspiration ribbon, Pinch, pleat, then measure 10” for a 5” loop. Pinch, pleat, and twist. Complete for a total of two loops, then trim a 14” tail.
For the next ribbon (I used yellow), repeat these steps, this time making a single loop and shorter streamers.
Finally, repeat these steps with a third ribbon (I used fuschia) for a total of two loops.
Use florist wire to secure the center and add the bow to the bottom center of the wreath.
3. Incorporate silk flowers
Now for the good stuff – the flowers!
Begin incorporating mini blue hydrangeas evenly throughout the wreath, securing each piece with hot glue.
Repeat this step with light blue scabiosa, then additional small blue floral buds, and finish with any other blue floral clippings you may have on hand.
Then, separate the fuschia wax flowers and add small clippings throughout the wreath. This is going to add stunning texture and color to the design. If stems get too short, use wooden floral picks.
For even more texture and contrast, add white pennies for contrast, yellow honeysuckles for airiness, and blue wax flowers for the final touch!
4. Finish with greenery
I always recommend using a minimum of three varieties of greenery for any wreath design to make it look expensive and professional.
For this wreath, include plumosa fern for a final, airy touch. Add this lime green fern around the outer edge of the wreath, securing pieces with hot glue.
And with that, your summer wreath is ready to enjoy!
Watch the video: How to make a summer hydrangea wreath
If you enjoyed this post, you might also like:
Like this post? Pin it for later!