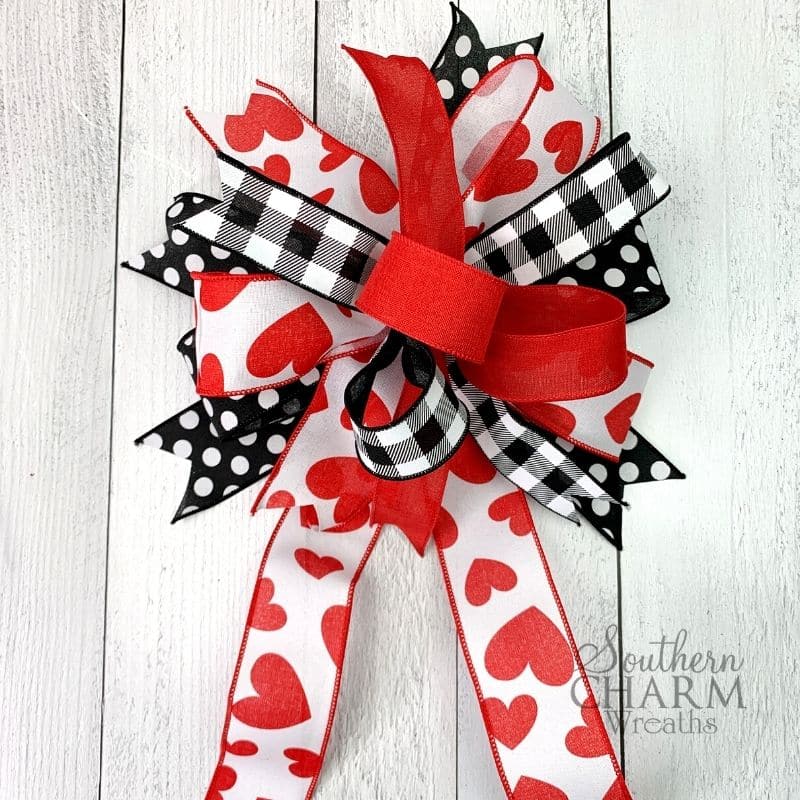
DIY Multi Ribbon Bow for Valentine’s Day
Now I know y’all know how much I love making bows by hand. That’s just how I like to do it, and it’s how I usually teach bow making. But you are never going to hear me say it’s the RIGHT WAY to make a bow. The right way to make a bow is just whatever method you prefer. So we are going to mix things up today and make a Multi Ribbon bow for Valentine’s Day with the EZ Bow Maker.
This post may contain affiliate links for your convenience. Click here to read my full disclosure policy.
A lot of people like like using the EZ Bow Maker because you don’t have to keep a constant grip on the bow while you’re piecing it together. That’s especially great for people with arthritis. Not to mention, being able to use both hands!
So let’s not waste any more time, and get this bow party started!
Supplies for This Project
EZ Bow Maker
2.5” Valentines Ribbon
2.5” Polka Dot Ribbon
1.5” Plaid Ribbon
1.5” Solid Red Ribbon
22 Gauge florist wire (or a pipe cleaner!)
Scissors
Craft Mat or ruler
All of the ribbon I used for this particular bow is wired ribbon that I got from Greenery Market.
Steps for Making A Multi Ribbon Valentine’s Day Bow
Step One: Adding the First Ribbon
Cut a 17” streamer from the polka dot ribbon and dovetail both ends. Pinch the middle and slide it into the EZ Bow Maker.
Then to start the first loops, dovetail the end of your working ribbon and slide that into place as well.
So far everything should be right side up. Now to form the loop, you’ll take the spool side of your ribbon and flip it over right at the base of the poles on the bow maker.
Every time you start a loop, you should have the right side facing DOWN. That way when you fold it over, the front of the ribbon will be on top.
Fold up a loop and press it into place so that the tip of the loop is at the 6” mark on the EZ Bow Maker. Make a second loop on the other side, and trim the end to make another tail.
Step Two: Layering Additional Ribbons
Next, using the same method, make a tail, three loops, and another tail with the Valentine’s Day ribbon.
Since you’re making an odd number of loops with this ribbon, both of the tails will be on the same side. Don’t worry, it will even itself out when you pull it off the Bow Maker and adjust the pools.
Now, take the plaid ribbon and make a tail, two 6” loops, and another tail. Repeat this step with the plain red ribbon.
Step Three: Tying Off Your Bow
And now we can get ready to finish the bow and take it off the EZ Bow Maker.
Start by puffing up the loops and adjusting them until they look about right.
Then lift the whole bow an inch or so up the poles. Don’t take it all the way out! Now take a piece of florist wire and slide it between the poles underneath the bow.
Pinch all the ribbon together in the middle and slide the bow and wire off of the EZ Bow Maker together.
If you decided part way through like I did that you want some longer tails, you can add them in at this point. Take a long piece of ribbon that’s twice the length you want your tails, place it inside the wire at the bottom of the bow before finishing.
Then just tighten up the wire and twist the ends to secure.
And that’s all there is to it!
If you’re more of a visual learner, watch the video tutorial below and see exactly how I made this bow.
Valentine’s Day Multi Ribbon Bow Video Tutorial

If you enjoyed this and want to learn more on how to get started with wreath making, try my Wreath Making 101 Workshop!
Happy Wreathing,
Julie
If you enjoyed this post, you might also like:
How to Tie an Multi Ribbon Bow for Valentine’s Day
Review: How to Use the EZ Bow Maker
How to Make a Deco Mesh Valentine’s Day Wreath
Liked this Easy Bow Making Tutorial? Pin it for later!

I just love watching you craft. Thank you so much for sharing your talents. I love the bow making. I have had the bow maker for several years but never tried it and now I cant wait to make these beautiful bows.
Great…?
Great tutorial. Thank you
New beginner here!! I’m love this bow! How many loops should there be total?
6 loops total
Great tutorial. Very easy to understand.
Love the beautiful bow, you make it seem so easy, very talented. I will definitely give this one a try, thank you so much
Beautiful bow, great instructions. Thank you.