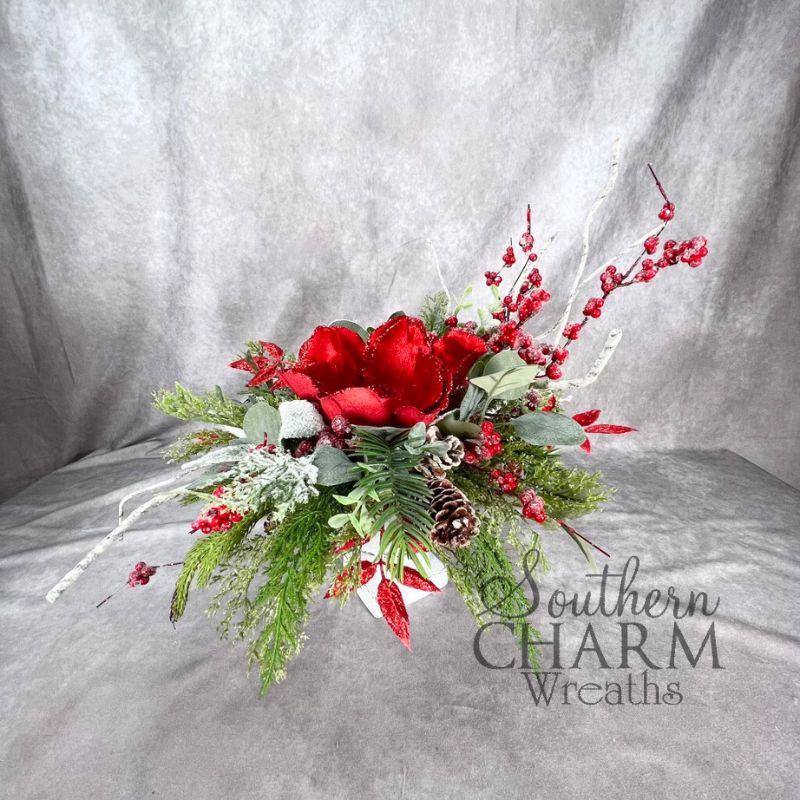
Red Magnolia Christmas Arrangement
This red magnolia Christmas arrangement is a classic holiday design, filled with winter greenery, bold reds, and frosted accents.

Red magnolia Christmas arrangement
Are y’all thinking about the holidays yet? Because in this wreath makers workshop, I’m headed for Christmas – full steam ahead!
To begin the season of glittery crafting and wintery designs, I’m creating a classic red magnolia Christmas arrangement.
Using a bold red magnolia as the star of this design, I’ve also included tons of winter greenery, frosted berries, and even glitter leaves to kick off my holiday crafting.
The results are super nostalgic and homey, with a touch of glittery glamour for an extra special touch.
Want to learn how to make this timeless Christmas design? Let’s get started!
This post may contain affiliate links for your convenience. Click here to read my full disclosure policy.

If you enjoyed this post and want to learn more, try our Holiday Arrangements Masterclass!
Supplies for this project
You’ll need:
- Neutral vase
- Spanish moss
- Desert foam
- Steel picks or floral picks
- Focal red magnolia
- Assorted faux winter greenery
- Frosted lamb’s ear
- Yellow-green pine
- Flocked pine
- Blue-green leaves
- Eucalyptus
- Frosted berries
- Frosted pinecones
How to make a red magnolia Christmas arrangement
1. Prep base
First up, start by prepping the base.
Cut a piece of desert foam to fit the opening of your neutral vase, ensuring it fits snuggly. This way, you won’t need to use any hot glue!
Then, add a layer of Spanish moss overtop. I recommend you don’t use hot glue as this can make it harder to add elements later.
2. Add focal red magnolia
Next, trim your red magnolia, sticking the stem deep into the center of the foam. This is going to be your focal point.
3. Fill in greenery
Now, it’s all about creating a gorgeous mixture of winter greenery, using several varieties to add texture and depth to the piece.
Begin building your shape using yellow-green pine, working your way around the red magnolia.
Then, start adding more greenery, including frosted lamb’s ear, flocked pine, clusters of blue-green leaves, and a bit of eucalyptus.
The goal is to ensure tons of visual interest while creating balance in the design. Make sure each type of greenery is evenly distributed throughout the arrangement.
4. Add winter accents
Now, it’s time for a few holiday additions to bring everything together!
Add two pine cone picks to the design in a small cluster.
Then, add tons of frosted berries throughout. These add a spindly quality to the piece, full of whimsy and shine!
Lastly, include an even distribution of red glittery leaves to tie the design together.
5. Final touches
This simple Christmas design is practically complete!
As a final step, make sure that your design looks full and varied, filling in any gaps with greenery clippings or other table scraps.
For an extra festive addition, you could even spray a few elements with a bit of glitter!
Once you’ve finished with the last couple of tweaks, it’s time to display your latest creation – a sparkly red magnolia Christmas arrangement.
Watch the video: How to make a red magnolia Christmas arrangement
If you enjoyed this post, you might also like:
- Make a Traditional Christmas Tree Topper Bow
- How to Make a Christmas Greenery Bell Wreath
- DIY Christmas Flower Market Deco Mesh Wreath
Like this post? Pin it for later!

