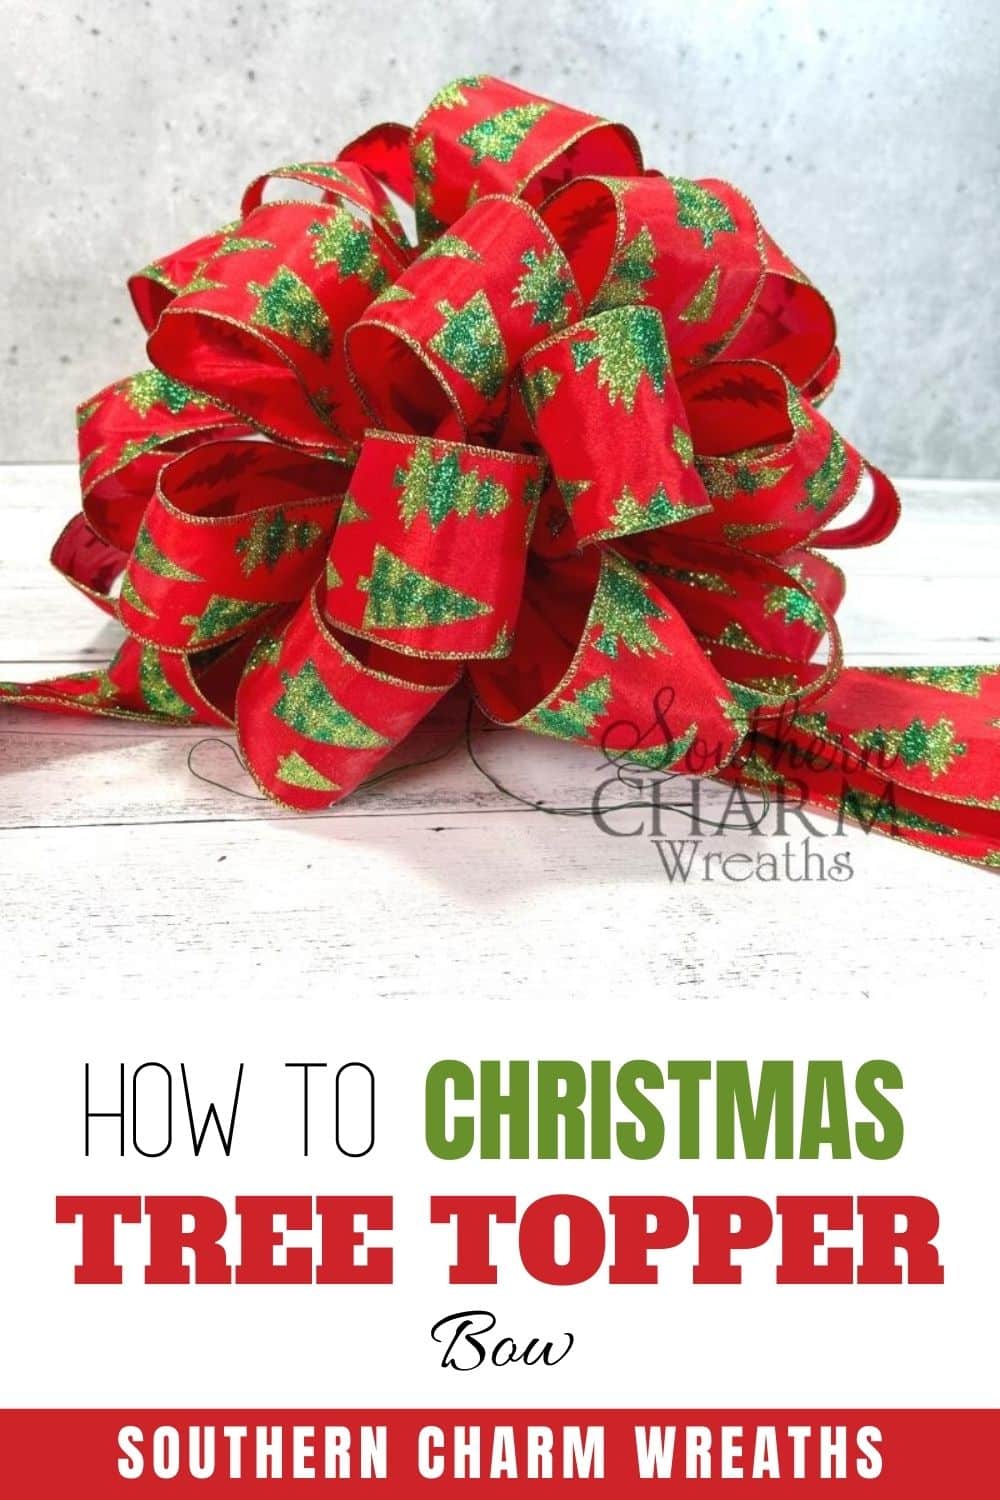
Make a Traditional Christmas Tree Topper Bow
There’s nothing more Southern than a big loopy bow on the top of your Christmas tree! Learn how to make this traditional Christmas tree topper bow in a few easy steps.
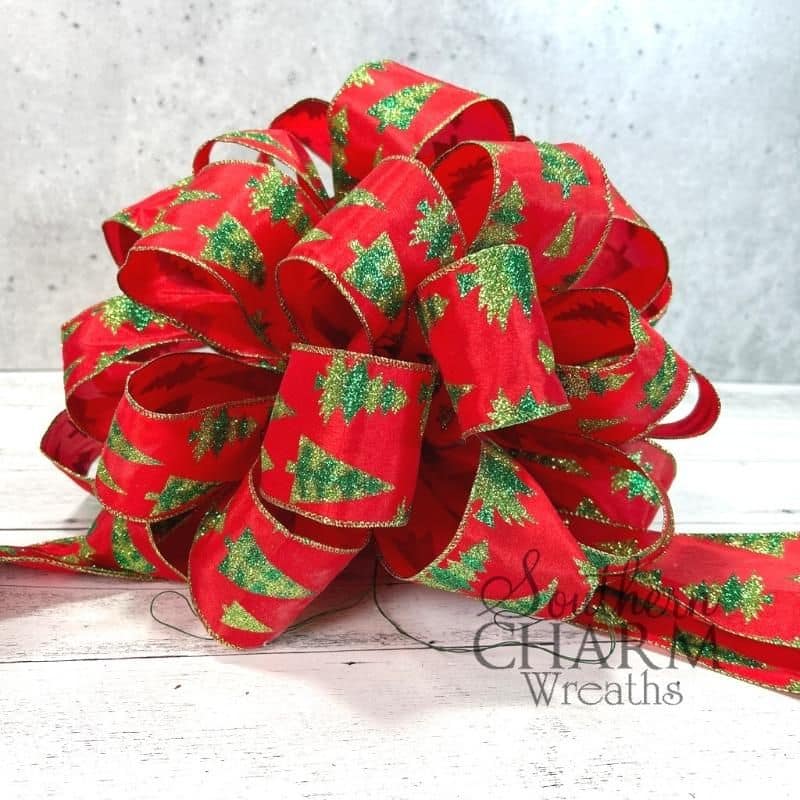
Traditional Christmas Tree Topper Bow
A beautifully decorated Christmas tree isn’t complete without the perfect topper, and if you love a classic, traditional look, a big, round bow might be just what you need.
A well-made tree topper bow is not only timeless, but it also adds that “wow” factor to your tree, making it feel finished and cohesive. Plus, creating your own topper allows you to personalize the colors, textures, and style to match your holiday decor.
There is a special place in my heart for classic, southern-style decor. And this loopy tree topper bow perfectly fits the bill!
Supplies for this project
You’ll need:
- 25 Yards 2.5” Wired Ribbon: I recommend a high-quality, wired ribbon in a color and texture that complements your tree decor. Wired ribbon holds its shape well, which is perfect for creating those big, voluminous loops.
- Florist Wire or Zip Ties: These will secure the bow and help attach it to your tree.
- EZ BowMaker (optional)
- Scissors: A good, sharp pair of scissors will help you make clean cuts through your ribbon.
Using the right materials will not only make the bow-making process easier, but it also ensures your bow looks full and polished for the entire holiday season.
How to Make a Traditional Christmas Tree Topper Bow: Step-by-step tutorial
1. Measure your ribbon
Begin by using your tree to measure your ribbon.
Take your ribbon and measure from the top to the bottom of your tree (a little extra never hurts!). Fold the ribbon in on itself, then cut.
Repeat the process by measuring, looping, and cutting. You should now have four ribbon tails.
Hold ribbons all together, fold them in half to find the center, and twist. Place on an EZ BowMaker if you’re using one.
2. Make loops
Start with a seven-inch streamer, twisting around the center of your EZ BowMaker. The tail should have the good side of the ribbon up.
Then, it’s time to make our loops!
Measure a 7-inch loop and twist it to complete the loop. Note that thicker a ribbon will be easier to use.
Then, repeat on the other side. Hold the loop twist in the center of your bow to keep things even and secure.
Repeat for a total of 36 loops, with 18 on each side. Cut the end of your ribbon once all of your loops are complete.
3. Secure your center
Start by measuring about twenty inches of florist wire. I recommend doubling it up by wrapping them around each other to thicken the wire. Then, set aside.
Add your zip tie to the center of your bow, tightened loosely for now. Make sure your zip tie lines up with the crease your bow maker made for even loops – guaranteed!
Feed your florist wire through the zip tie, going around twice for extra stability. Tighten your zip tie a little more.
4. Fluff your ribbon
Hold your ribbon in your hand at the center. Then fluff out your loops, fluffing in several directions for a full look.
Be careful that you don’t pull too much. If your loops feel like they may slide out of the zip tie, tighten it a little bit more.
5. Finishing touches
Now for the finishing touches. Make sure your zip tie is at the back of your bow, and tie it as tight as you can. Clip the end.
You can trim your end streamer short, make it the size of your loops, or add a dovetail… whichever option you prefer.
Attach your tree topper bow to your Christmas tree and weave your four streamers throughout for a festive, southern display!
Watch the video: How to make a traditional Christmas tree topper bow
Why a Traditional Bow Makes the Perfect Tree Topper
The round bow style is a timeless choice that brings balance and elegance to any Christmas tree. Its simple, classic look complements a wide range of themes, from rustic and country-style trees to more formal holiday decor. Plus, by making your own bow, you can adjust the color, size, and style to perfectly match the rest of your decorations.
Tips for Decorating Your Tree Like a Pro
Creating a traditional bow is just one part of styling a beautiful Christmas tree. If you’re ready to take your tree decorating skills to the next level, I invite you to join my Christmas Tree Decorating Masterclass. In this self-paced course, you’ll learn:
- How to pick the perfect tree and decorations to match your style
- Pro tips on ribbon placement and layering techniques
- How to incorporate picks, sprays, and other embellishments for depth and texture
- Strategies to make your tree look full, balanced, and professionally styled

Imagine standing back and admiring a tree that looks as if it belongs in a holiday magazine—without the stress or guesswork.
If you enjoyed this post, you might also like:
- DIY Holly Jolly Deco Mesh Christmas Wreath
- How to Make a Simple Traditional Christmas Teardrop Swag
- DIY Traditional Christmas Santa Wreath
Like this post? Pin it for later!
beautiful bow , thanks for instructions i definitely would love that on my tree
Beautiful! Thank you for the instructions.
It’s beautiful. I do have a suggestion though.the ribbon on the tails two is going the right way.but the other two are upside down.so you would have to cut the ribbon in half and turn the two tails around.i make alot of bows myself.just giving you a little tip.
Louise, That’s a good point. I hadn’t even thought of that. Thanks.
Going to try bow this. First time using a bow as a tree topper. Your instructions were very clear and easy to follow. I do have an EZ Bow Maker so we will see how it goes. Thank you for the video.
#replay. Beautiful bow.
Excellent tutorial!
Waiting for my board and ribbon. Wish me luck. Never made a bow.
Loved it! Been wanting to learn to make a tree topper!