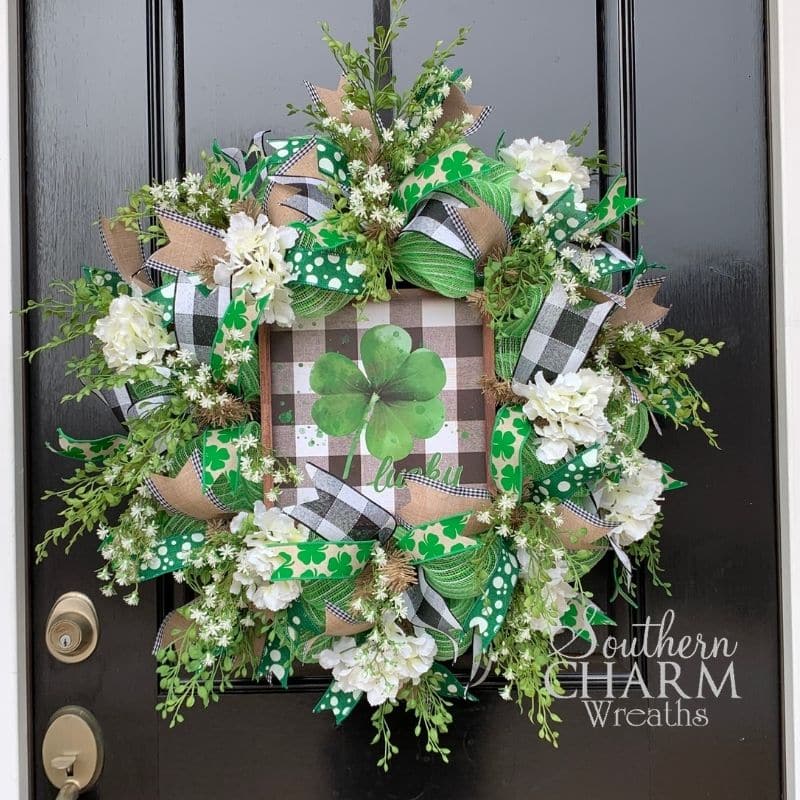
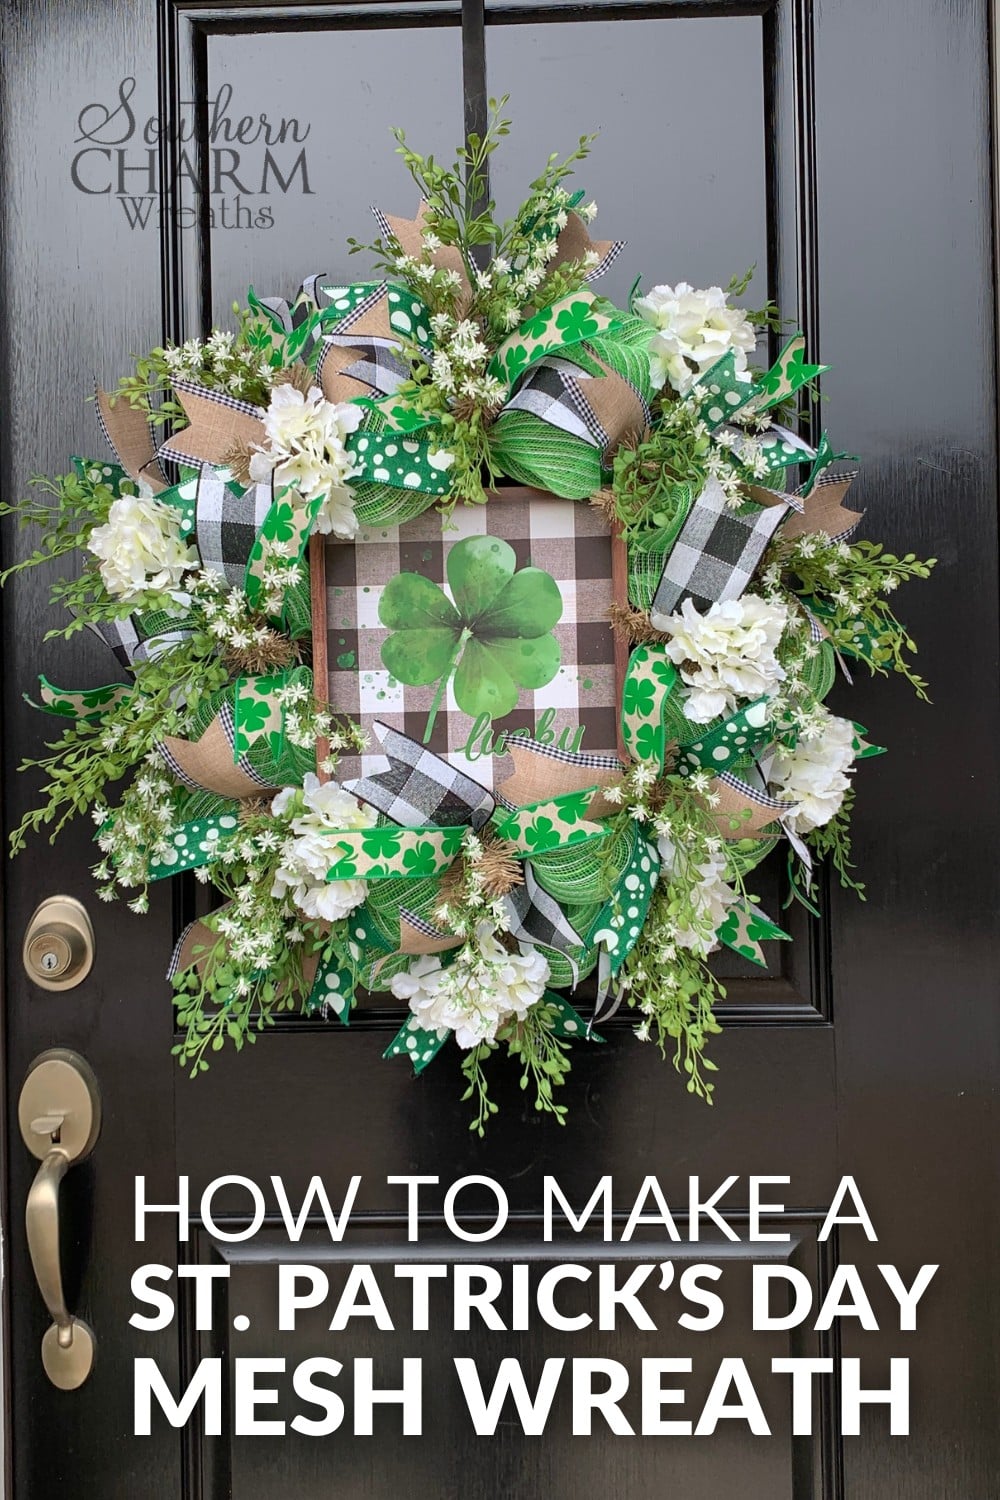
DIY St. Patrick’s Day Door Wreath With Deco Mesh
Feeling lucky? 🍀 Bring a festive touch to your door this St. Patrick’s Day with a vibrant and cheerful deco mesh wreath! With the right supplies, a little time, and some creativity, you can make a professional-looking wreath to brighten your front door.
In this tutorial, I’ll walk you through how to make a St. Patrick’s Day wreath step by step. Plus, I’ll share tips on selecting the best materials to make your design stand out!
How to Make a Deco Mesh Wreath for St. Patrick’s Day
This wreath is literally bursting with happy green colors! Pick out your favorite ribbons along with a lucky sign and get ready to make a cheerful wreath for your front door.
Supplies
- 24-inch Work Wreath
- 10-inch Jute Poly-Mesh
- Ribbon Streamers
- Shamrock Lucky Sign
- Staple Gun
- Flower and Greenery Picks
- Hot Glue Sticks
- Glue Pan
Lucky St. Patrick’s Day Door Wreath: Step-By-Step Tutorial
Here’s how to make this festive Deco Mesh St. Patrick’s day door wreath.
1. Prepare The Deco Mesh
Unroll your deco mesh to give yourself plenty to work with. Start by curling the edges under to create a neat, 3-inch tail.
Attach this tail to the inner frame of your wreath using the twist ties.
2. Create Loops on the Inner Wreath Frame
Using the inner ring of your work wreath, form 10-inch loops with the deco mesh. Secure each loop to the frame using the twist ties. Once the inner ring is covered, fluff the loops to create a full and voluminous base.
Pro Tip: Think of the loops like puffy sleeves—they should look full and rounded, adding texture to your wreath.
3. Repeat for the Outer Ring
Without cutting the deco mesh, move to the outer ring of the frame.
Repeat the process, creating 10-inch loops and securing them with the twist ties.
Once the entire frame is covered, trim the mesh and tuck the end securely under the wreath.
4. Attach Ribbon Streamers for Extra Color
Next, attach strips of festive St. Patrick’s Day ribbon streamers. I used 9 strips of each of these styles:
- 2 1/2-inch black and white plaid
- 2 1/2-inch tan
- 1 1/2-inch green and white
- 1 1/2-inch shamrock
I cut them 13 inches long but you can make them longer or shorter, depending on how you like them to look.
I used a darker color for the bottom (larger) streamer and the smaller one on top is a green pattern.
Pinch them in the middle and add the streamers to every-other needle tie.
After you wrap the needle tie around the streamers, pull the streamers apart so they aren’t laying directly on top of each other anymore. Adding ribbon to deco mesh wreaths adds so much color and texture don’t you think?
5. Add A Sign To The Middle Of The Wreath
Trim 1-inch pieces of ribbon – you will use them to attach the wire to your sign so you can attach it to the wreath.
Then, with your staple gun, staple the wires to the back of the sign. Staple the middle of the wire so you have plenty of length to use to wrap around your wreath. I stapled one piece of wire in each corner of the sign.
Then, center the sign in the wreath and use the wires to attach it to the wreath.
If you want to stop here, you can! Or, you can keep adding some more greenery and flowers.
6. Add Greenery And Flowers
For this step, I suggest hanging the wreath on a wreath easel or door so that you can see where you want to place the flower picks.
Choose your favorite vibrant-green picks. The more green, the better! Depending on how big you want your wreath to be, trim them pretty short so that they don’t stick out too much from the wreath.
Keep adding flowers and greenery all around the wreath until it looks as happy and beautiful as you want it to!
Watch The Video: DIY St. Patrick’s Day Door Wreath
Optional: Add Greenery and Flowers
For an extra pop of texture and color:
- Trim vibrant greenery and floral picks to your desired length.
- Use hot glue to attach the picks around the wreath, filling in any gaps.
- Hang the wreath on a door or easel as you work to see how the design looks from a distance.
If you enjoyed this and want to learn more on how to get started with wreath making, try my Wreath Making 101 Workshop!

Thanks for joining me today in the wreath workshop! Comment below and tell me what’s your favorite part or let me know what I should make next!
Happy Wreathing,
Julie
More St. Patrick’s Day Projects
If you enjoyed this green and black shamrock wreath, then here are some more St. Patrick’s Day projects you will enjoy too.
- How to Make a St. Patrick’s Day Wreath for your Front Door
- Spectacular St.Patrick’s Day Wreath Tutorial

Hello, I just saw a video of yours from 4 years ago. You made a grapevine shamrock wreath. It was absolutely gorgeous. I was wondering if you can make the same and how much would it cost. It was beautifully
Hey Loretta – It would depend on the availability of the supplies. As far cost, it would depend on how much the supplies cost. You can find out how to price a wreath for sale here: southerncharmwreaths.com/how-to-price-wreaths-to-sell