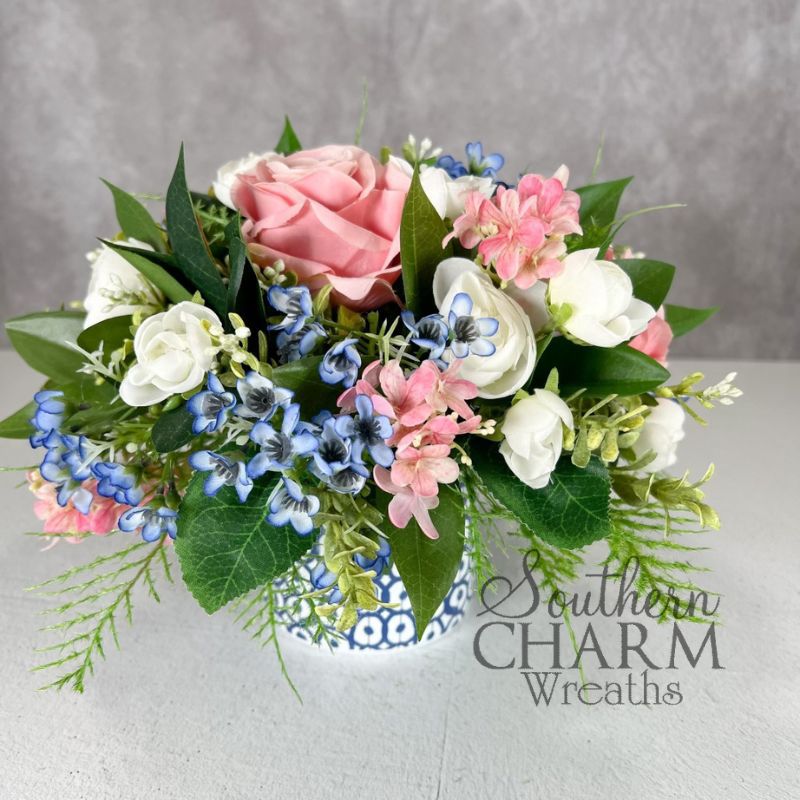
DIY Rose Mug Centerpiece
Gift a little bit of joy with this DIY rose mug centerpiece. Textured florals with pink, blue, and white come together for an adorable arrangement that anyone would be happy to receive.

DIY coffee mug silk rose centerpiece
Sometimes, the smallest gestures can make the biggest impact.
This is definitely true for today’s project – a sweet mug centerpiece with roses, ranunculus, and forget-me-nots.
I love the idea of giving this coffee mug arrangement as an end-of-year gift to teachers, as a hostess gift, or as a small gesture to a friend in need.
Small arrangements are very popular both on Etsy and at craft fairs because they’re a compact and beautiful way to show your appreciation.
Gifting handmade products is a special way to use your God-given talent to brighten someone’s day.
Make this DIY rose mug centerpiece with me today to spread a little bit of joy, one person at a time.
And if you’d like to learn more about the basics of wreath making, try my Wreath Making 101 Workshop!
Supplies for this project
You’ll need:
- 4-inch ceramic coffee mug
- Desert foam
- Artificial moss
- Hot glue
- Scissors/clippers
- Steel pick machine (optional)
- Mixed greenery
- Dark green
- Variegated boxwood
- Fern
- Silk faux flowers
- Light pink roses
- Pink forget-me-nots
- Blue wax flowers
- White ranunculus
How to make an easy silk flower DIY rose mug centerpiece: Step-by-step tutorial
1. Prep your container
Our first step is to prep our container. In this case, we’re preparing a coffee mug!
Fit a piece of desert foam snugly into the mug and cover the top with a little bit of artificial moss.
No need to hot glue – this will make it trickier to get your stems in later on.
2. Create a base with greenery
Next, we’re going to form the shape of our arrangement using various types of greenery. This will be the base for your flowers.
Begin your base with dark green leaves, dipping the ends in hot glue and adding them to your desert foam.
Once you’ve established a base of dark greenery, add some variegated boxwood throughout. This lighter shade will help with depth, creating dimension in the piece.
3. Add silk flowers
Now, it’s time for the flowers!
Add three pink roses, evenly spaced throughout your established greenery, to your arrangement. You can use steel picks to secure or hot glue.
Add variety with blue wax flowers, pink forget-me-nots, and white ranunculus, spaced evenly and secured with hot glue or steel picks.
4. Fluff and add finishing touches
Go through your arrangement and trim any excess greenery that is hiding your flowers. Fluff up your materials and fill in any holes with scraps of greenery or flowers.
Clean up your sides, trimming any unruly bits. Then, add fern around the entire base of your arrangement for a final bit of texture.
And with that, you’re finished!
Watch the video: DIY coffee mug silk flower arrangement
If you enjoyed this post, you might also like:
- DIY Summer Silk Flower Arrangement for Beginners
- Spring Flower Wine Bottle Bouquet
- DIY Faux Poppy Floral Arrangement For Mother’s Day
Like this post? Pin it for later!


Love the mug arrangement. I should try something small like this to start.
You do such beautiful work. I’ve always played around with making things for myself, family and friends. I love giving gifts. LOL. I’m so glad that I found you.
Love this!!
I also love all your floral arrangements. I watch your videos. Thank you for sharing.