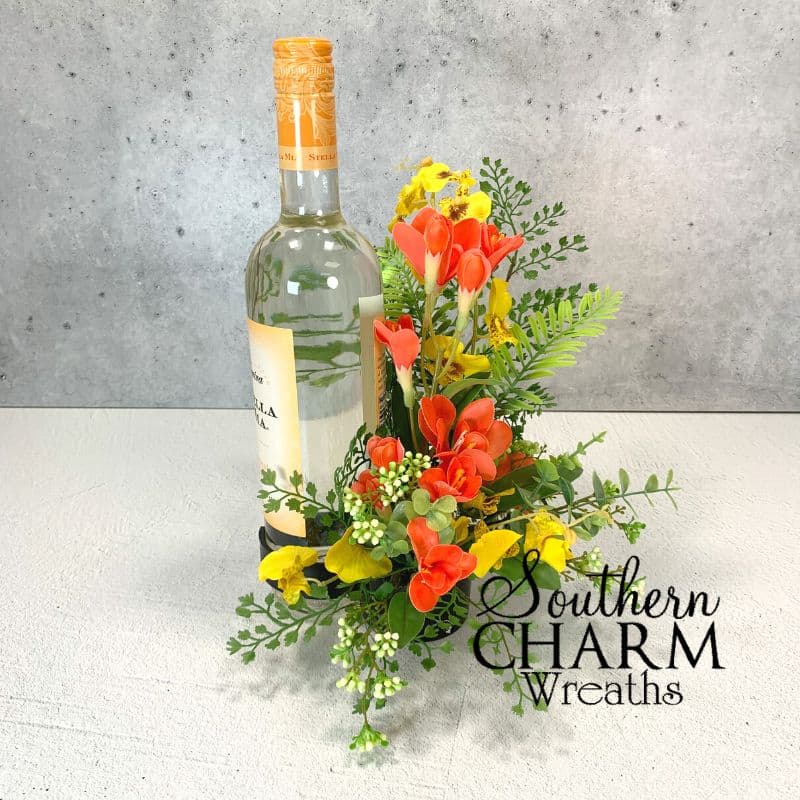
Spring Flower Wine Bottle Bouquet
Welcome the new season with a stunning spring flower wine bottle bouquet. This arrangement makes a gorgeous table centerpiece, event decor, and gift for any occasion!

Spring flower wine bottle bouquet
When I first introduced my wine bottle bouquets, they caused quite a stir! And I love them just as much as y’all do.
So today, I’m sharing how to make a seasonal version of this classic design.
This small arrangement is perfect for springtime with silk peach roses, pincushion protea, and bright yellow orchids.
Best of all, you can easily customize this design to fit any season or holiday.
Make this wine bottle bouquet for a hostess gift, mother’s day brunch, or any special event this new season brings.
This post may contain affiliate links for your convenience. Click here to read my full disclosure policy.

Supplies for this project
You’ll need:
- Plastic bouquet clip
- Desert foam
- Spanish moss
- Wine bottle of your choosing
- Coordinating artificial flowers (silk or plastic)
- Peach roses
- Pincushion protea
- Yellow orchids
- Mixed greenery
- Clippers
- Hot glue
How to make a spring flower wine bottle bouquet: Step-by-step tutorial
1. Prep your plastic bouquet clip
Your first step is to prep your plastic bouquet clip by cutting a round of desert foam and placing it in one side of the container; this is going to be the base of your bouquet.
Then, cover your foam with a smidge of Spanish moss to help camouflage.
Clip the other side of your bouquet clip to your bottle, and you’re ready to decorate!
2. Establish your line
Build your foundation by establishing your line or “form” with greenery clippings.
I start with trimmed maidenhair fern, placing it in my desert foam and hot gluing to secure it. I make sure to bend my greens as I go to create a shape that compliments the wine bottle.
Add two more pieces of maidenhair fern, evenly distributing it through your base.
Then, add some shorter fern clippings for visual interest – I chose a slightly more yellow variety; this is a great chance to use leftover clippings from previous projects.
3. Add focal flowers
Now for some real beauty – the florals!
Trim your pincushion protea and add to your bouquet, hot gluing to secure. You’ll want to add flowers at different heights for even distribution in the bouquet.
Curve your flowers to suit the bouquet and the shape of the wine bottle. Your wine bottle bouquet should look even and beautiful from all sides!
Next, trim and add peach roses using the same method.
Finally, add yellow orchids for a bright pop of interest; this flower will stand out from the peachy orange tones of the first two flowers.
4. Fill in with greenery
Finally, use small bits of greenery to fill in any gaps in your bouquet.
I use scraps from previous projects, including small bits of fern and eucalyptus. The result should be full and beautiful from all angles without distracting too much from your wine bottle.
And just like that – your spring flower wine bottle bouquet is ready to be displayed!
Watch the video: How to make a spring flower wine bottle bouquet
If you enjoyed this post, you might also like:
- DIY Spring Rose Grapevine Wreath
- How To Make A Pink Spring Bicycle Wheel Wreath
- DIY Mesh Spring Welcome Wreath
Like this post? Pin it for later!


Saw the clips on another site/ bought them and tried one that sold in our thrift store. Planning on another after watching your video!! Thank you🙏
I love this. You are so creative. I will forsure try this for my sister as she loves her wine as much as I do so I’ll be doing two. Thank you for sharing this.
Julie, where did you get your pin cushion flowers? I can’t find any as pretty as yours.
From Amazon.