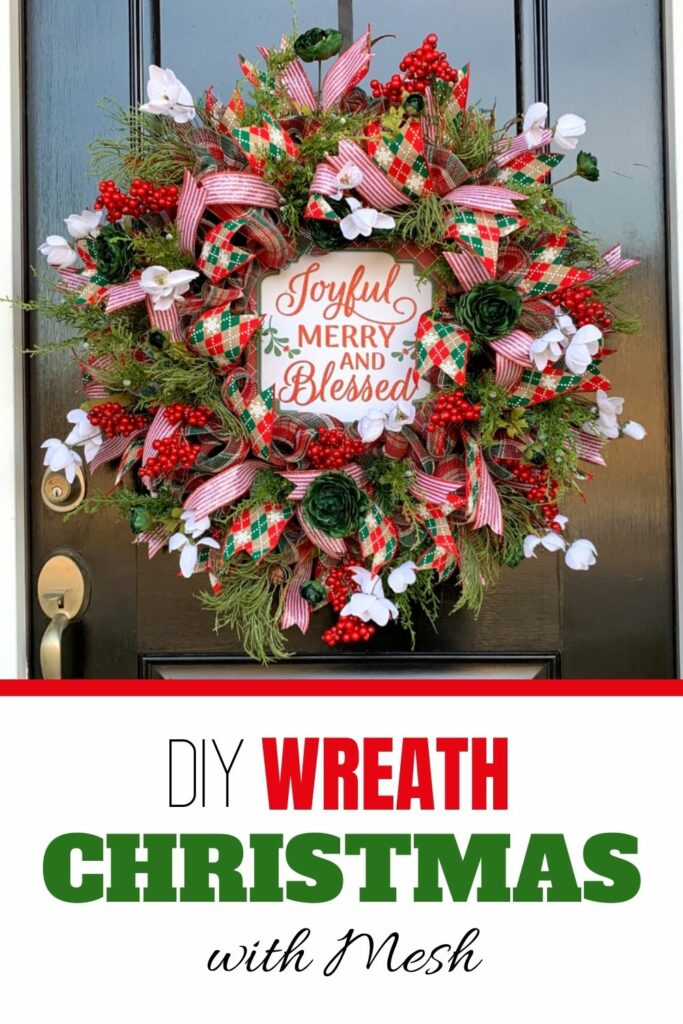
How to Make a Deco Mesh Christmas Wreath
Make this deco mesh Christmas wreath in traditional Christmas colors like I did, or change it up to go with the rest of your decor!
This post may contain affiliate links for your convenience. Click here to read my full disclosure policy.

Let’s get started!
Supplies List
You can find most of these materials at your local craft store, but if you’d like to look at the shops I get my materials from, I’d suggest starting with Greenery Market and Trendy Tree.
Materials:
Evergreen wreath base
12” deco mesh
Square Christmas Sign
2 spools of coordinating ribbon
Juniper Greenery
Cyprus greenery
Silk flowers and berries
Tools:
Scissors or Rotary Cutter
Craft Mat
Wire Cutters
Florist Wire
Rustic wire (for hanger)
Hot Glue Pan or Glue Gun
Gluesticks
Steps to Make a Deco Mesh Christmas Wreath
With a little bit of prep work at the beginning, this is an easy wreath to put together that looks really impressive once it’s complete.
And if you like how it looks you can pretty much stop after any step. Like a lot of wreaths, we make together, we’re just going to build up a good base and keep adding on layers until it looks how we want it.
Step One: Prepping your Materials
First, you’ll need to prep your sign, ribbon and deco mesh.
You’ll want to prep the sign first because there’s hot glue involved and it needs to dry completely before you attach the sign to the wreath.
Start by hot gluing a piece of florist wire to the back of the sign in each corner. If your sign is thick enough, you can staple it into place for a little extra security, but usually these signs are too thin for that and the staple would pop out the front.
Next, cut 14″ streamers with dovetailed ends out of the two ribbons. You’ll want about 18 of each ribbon.
For your deco mesh, you’ll want to cut the roll into 10″ pieces. You can do this with scissors, but it goes a lot faster if you use a rotary cutter and your cutting mat. The lines don’t have to be perfectly straight, so no need for an acrylic ruler.
You can also prep your florals and greenery at this point if you want, but I like to wait until I’m ready to add them before cutting, that way I can have a better idea of what I’m actually going to use.
Step Two: Building the Base of the Wreath
Deco mesh is always the first thing that gets placed on these kinds of wreaths. Grab one of your cut pieces and pinch it right in the middle.
Then press it down into the branches of your evergreen wreath. The branches are made of wire, so you can use them to attach the mesh rather than glue or more wire. Just twist the branches around the middle of your mesh piece to secure it in place.
Continue adding mesh around the entire wreath using this method.
Next, make sure the glue on your sign is fully dried and the wires are secure.
Place the sign in the center and flip your wreath over while holding the sign in place.
Twist each wire snugly around the base of the wreath.
This is also the time I would add a hanger if you want one. You can read my wreath hanger tutorial here if this isn’t something you’ve done before.
Step Three: Building up the Decorations
From here on out, you can feel free to stop at any point. But y’all know I like to make my wreaths nice and full, so I’m gonna go ahead and use ribbons greenery, flowers, AND berries.
So let’s start with the ribbon, which goes on almost the same way that the deco mesh does.
Since you’ve got two coordinating ribbons, grab one of each and lay them together, both facing up. Pinch them together in the middle and press in between two branches on your wreath base. Then twist those two branches together a couple turns and spread the tops back out. You’ll now have four streamers coming out from that spot on your wreath.
Continue adding ribbon streamers until it’s as full as you like, and nice and even around the wreath. Just be careful not to cover up the sign.
Next, pull out your greenery nd start snipping it with your wire cutters into smaller branches. These will be attached with glue, not wire.
Dab a bit of hot glue onto the base of each branch and press it down into the wreath. Make sure the glue is sticking to the wreath base itself, not just the ribbon and mesh. Continue adding greenery all around the wreath.
Then add in layers of silk flowers and berry stems in the same way: just trim and glue.
Make sure each layer of decoration is spread out evenly so you don’t have any clsters that are too busy, and no big empty spaces/
And that’s how you make a Deco Mesh Christmas Wreath!
Watch the video below to see me do it in real time and share some of my wreathmaking tips and tricks along the way!
How to Make Christmas Deco Mesh Wreath – Video Tutorial
If you enjoyed this and want to learn to wreath the professional way, join me in our exclusive Wreath Making of the Month Club!
Happy Wreathing,
Julie
If you enjoyed this post, you might also like:
Elegant Deco Mesh Christmas Wreath
Silk Flower Nutcracker Christmas Wreath
Whimsical Elf on the Shelf Christmas Wreath
Liked this Deco Mesh Cristmas Wreath? Pin it for later!


Absolutely Beautiful ???
I think it’s beautiful. Like you said, every artist has their own style. Keep on making your art your way, I know I will. For every art critic there is an art admirer. God bless artists that dare to be different.
Love it!!! Keep doing what you are doing!!
Thanks!
Cindy
Love it! So full it looks joyful!
I just love your design style. Never let people put you down. You have a wonderful talent and I have learned so much from you. Keep up the GOOD job.
Julie, I absolutely love this wreath and everything you make! You have been such an inspiration to me in forming a style and having the courage to open an Etsy shop, one month old tomorrow, and I know soooo many others feel the same as I do. You do you and we’ll do us! Why some people have such strong opinions about such things goes right over my head. You’re awesome!
Hi Julie,
I think the wreath is Beautiful!! Congratulations on your new home. The garland and wreath are absolutely breathtaking!!! Thanks so much for all of your skill, knowledge and creativity that you share for FREE. Happy Holidays and blessings to you and your family
Carol
So Julie….so beautiful!
I think your wreath is just beautiful. In fact All the wreath that I have seen of yours are all so beautiful I do make wreath but I don’t think I am as talented as you are thank you so much for the tutorials
What is there to say that is negative about this wreath? I just love it. I have to admit that I personally don’t like lots and lots of ribbon but you use just the right amount and with the flowers the wreath has jut the right amount of beauty and zing! Just wonderful. Keep on doing it your way!!!!!
Crying with the comfort of prayers!
I absolutely love this wreath it is beautiful and no way is it to much!
Thank you for all the beautiful
wreaths you share with us.
Have a very Merry Christmas!
I love your wreaths and you’re right it’s how you do it. Not to criticize, but many wreath makers simply pile on the mesh and ribbons
Fantastic!!! The colors…everything is absolutely beautiful
Beautiful as always!!! keep your style !!!
That wreath just makes me happy!!! It is so festive and just. makes. me. HAPPY!! Thank God we are all individuals and how we decorate and what we decorate with is the way it should be… to each their own!! But to criticize another’s decorations, etc. because it doesn’t fit our lifestyle, for me, is wrong. If it doesn’t fit yours, just don’t say anything. These posts are only meant to be shared in case they do fit one’s lifestyle or to help another person get the confidence to try a project they never imagined they could ever do. There, I’m done!!
Julie, I love this wreath and can’t imagine why someone would say anything negative about it, or about another person’s style. This is your style and it’s who you are. Fortunately for me, your style brings out the inspiration in me, and has helped me bring out my style when decorating. I’m very whimsical, and I also live in a warm weather state. Can you create a Christmas wreath with bold coastal colors such as turquoise, ocean blue, green, creams, and golds? Sometimes traditional colors can seem to be suffocating when its 90 degrees outside. Lol.