Multi-Ribbon Summer Bow Using the EZ BowMaker
This multi-ribbon summer bow is the perfect project to give your floral arrangements extra beauty! Get step-by-step instructions, made with a dazzling summer color palette.

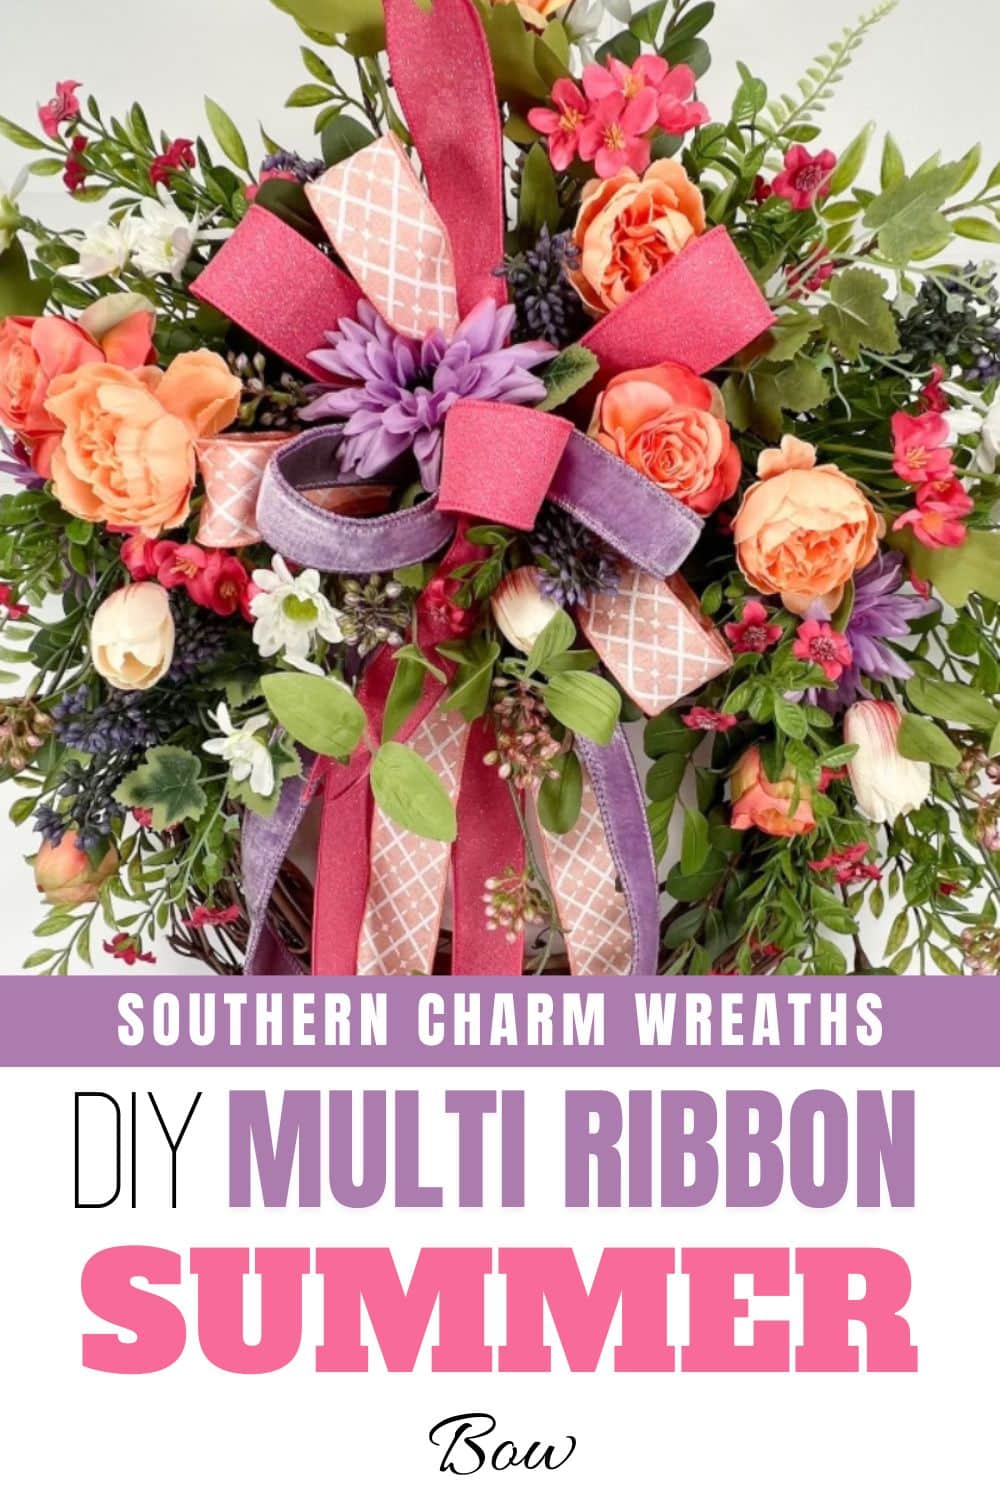
Summer multi-ribbon bow
While I’m usually pretty loyal to hand-tying bows, today I’m sharing how to use an EZ BowMaker for a multi-ribbon bow design.
This is a great basic skill for all of your faux floral designs, from wreaths to arrangements.
It can be used for any color palette. I’m working with a feminine collection of hot pink, lilac, and peach ribbons that is perfect for summer.
This post may contain affiliate links for your convenience. Click here to read my full disclosure policy.

Supplies for this project
You’ll need:
- Silk ribbon
- Hot pink
- Peach
- Lilac
- Florist wire
- Scissors
- EZ BowMaker
How to make a multi-ribbon summer bow
1. Start with a hot pink ribbon
The first step in your multi-ribbon bow is to measure a 21” streamer of hot pink ribbon.
Feed it vertically between 2 dowels on your EZ BowMaker. Pinch and pleat, then measure out a 6” loop, twisting it towards yourself to showcase the outside of the ribbon.
Repeat this on the opposite side of the bow maker for two loops.
Move back the other way, measuring a 6-inch loop. This time, don’t twist, simply push down in the center, measure a 21” streamer, and trim.
2. Add peach patterned ribbon
For your peach ribbon, complete the exact steps above, but on reverse sides.
For example, if you started on the left of your bow maker, this time start on the right.
You should have a total of 3 peach loops and 2 streamers. Separate your peach and pink sections for color variation.
3. Include lilac ribbon
We’re going to repeat these steps once more with a final lilac ribbon, this time making loops 5” long and creating only two loops.
4. Create the final loop
Bring back your hot pink ribbon, this time measuring an 8” streamer facing away from you (moving upwards).
Feed it vertically through the dowels, twisting it towards you to create a 4” loop. Push the center down and trim an 8” streamer.
Then, take a piece of florist wire and pull it under the bow, using it to pull the bow off the EZ BowMaker.
5. Secure the multi-ribbon summer bow with florist wire
Loop the wire around the center, spreading out each loop and streamer before securing. When you’re happy with the shape, pull the wire tight to secure it.
Ensure the long streamers are at the bottom of the bow design, and dovetail a couple of your shorter streamers.
Your smallest hot pink loop should be at the center of the design, with alternating colors throughout the bow. You’ll likely keep fidgeting with your complete multi-ribbon summer bow once you’ve added it to your arrangement.
Watch the video: How to make a multi-ribbon summer bow
If you enjoyed this post, you might also like:
- How Do You Make a Bow with Multiple Colors of Ribbon?
- How To Make a 3 Ribbon Wreath Bow Two ways
- Review: How to Use the EZ BowMaker
Like this post? Pin it for later!
So I paid 9.97 for what to be able to read
Hey Dianna – I am not sure I understand your question. Please email us for assistance if you have any questions about a product you have purchased.