Quick Christmas Bow Hack For Your Seasonal Wreaths (Video)
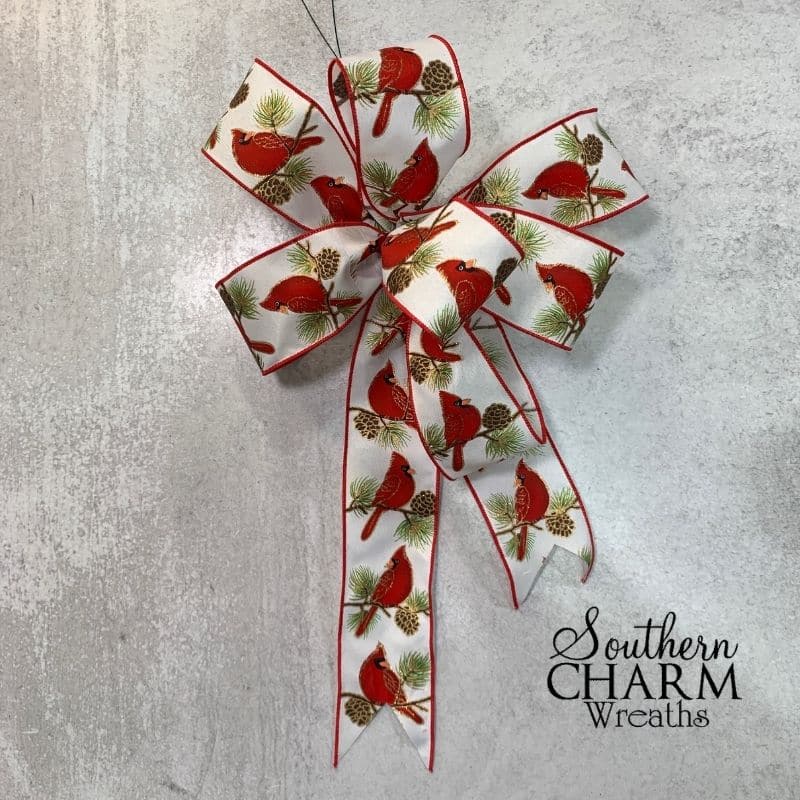
Create a Christmas wreath bow in no time with this easy hack! Bows are so easy to make once you learn a few shortcuts.
This hack will show you how to tie a ribbon that has a pattern. I’ll even share how to make a ribbon that keeps the direction of the pattern going the right way so it doesn’t go upside-down.

Quick Christmas Wreath Bow Hack
Directional patterns are so beautiful and you can use them to create themed wreaths – like my cardinal wreath. The only problem is that if you aren’t paying attention, the prints on the ribbon can be upside down.
This hack prevents this from happening.
Here’s how!
1. Unroll A Lot of Ribbon Onto the Floor
Don’t fight the ribbon when it is coiled up on the roll. Leave a lot of ribbon on the floor that you can use to measure your bow.
2. Use Wired Ribbon
It is so much easier to make beautiful bows if you use wired ribbon. The wire helps the loops stand up loud and proud!
3. Put Wire or Pipe Cleaner To The Side
You are going to need this wire later on, so put it somewhere you can reach easily.
4. Trim The Ribbon
I trimmed 12 inches off the bottom of my ribbon but you can cut off any length that you want. This will become a ribbon tail. Set it to the side.
5. Make the Bow
To see how I made this bow, watch the video a little further down in this post. Basically, I measured out 12-inches for the first loop since that is the length of ribbon I cut for the tail in the previous step.
Use your non-dominant hand to hold the ribbon and your dominant hand to guide the ribbon into the bow loops and shape.
6. Pinch And Loop To The Front
Normally when we make bows, we pinch the ribbon and twist it, looping it around to the back of my hand, pulling it forward. Since this ribbon has a print that we want to maintain, we need to do this step differently.
Instead, we are going to pinch the ribbon, we will not twist it, and we will loop it around the front. If you twist it, the print will turn upside down.
7. Make Smaller Loops
Next, repeat the pinch and loop method, but measure smaller loops. I went from making 12-inch loops to 10-inch loops. This gives it depth.
8. Trim The Final Tail Off
At this point, the final tail has the print upside down or backwards, depending on how you face it. To fix this, just trim it off, leaving 2 inches of the tail.
9. Attach The Tail To the Bow
Remember that tail we trimmed at the beginning of this tutorial? Pick it up, make sure it is facing the correct way, and hold it in your hand so that it forms the final tail of the bow.
10. Secure It With Wire
Grab the wire you set aside earlier and secure the bow together with it. This will keep your new tail as part of the bow too.
That’s it! The entire print is all facing the right way now.
See The Christmas Bow Hack In Action
I made a quick video showing you how to do this hack. If you are visual learner, you should watch this. I show you exactly how to do each step.
More Christmas Posts:
- How To Make A Deco Mesh Christmas Wreath
- DIY Christmas Cardinal Wreath On Grapevine
- How To Make A Christmas Lantern Topper
Liked this Christmas Bow Hack? Pin it for later!


I love your videos, I have learned so much from watching you! Hope you have a very Merry Christmas!
I would like to show me to make bows. Your bows that you made was so pretty. Thank you. I can’t get the instructions to show up or I’m may not be doing it right.
Thank you for this video. I was shying away from directional ribbon because of certain patterns. I have been making bows for years and now have gotten more particular in how they look. I always wanted and made pretty bows but are making more bows with patterns. You are always so very helpful.
Sincerely,
Carol Blair
Thank you so much for sharing this video.
You make it a lot easier.
Thanks I enjoyed your video very much.!! I am so thankful for all the information!!!
Thank you I I enjoyed learning a new technique . Blessed holidays to you and family.