DIY Rustic Reindeer Christmas Wreath
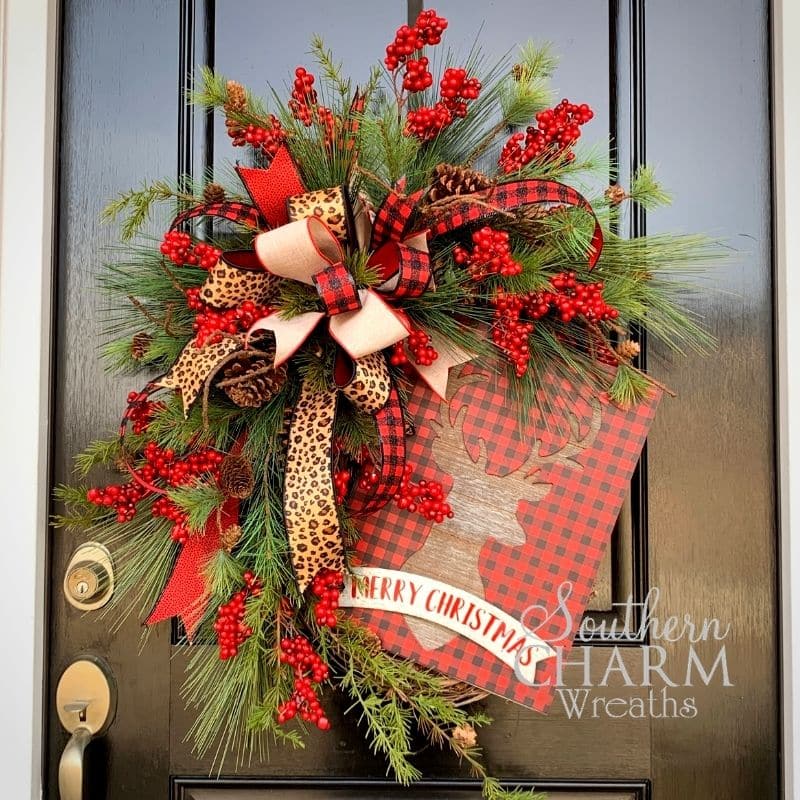
Buffalo Plaid has been popular for Christmas decor for years, and the good news is that it doesn’t look like it’s going anywhere any time soon! Now, to me, red and black buffalo plaid just screams “rustic” so thats the route I decided to go when I was buying the materials for this Christmas wreath.

The combination of the classic pine branches and pinecones and red Christmas berries was perfect for the look I wanted to achieve. Then I thought, let’s dress this baby up a bit!
After all, who doesn’t love cheetah print? (Psst.. Wreath sellers… Keep that in mind when you’re designing. Cheetah print is IN right now!)
Anyway… have I convinced you to make this wreath yet?
Than let’s go!
This post may contain affiliate links for your convenience. Click here to read my full disclosure policy.
Supplies for this Wreath
Grapevine Wreath
Rustic Reindeer Sign
Two 2-½” ribbons
1.5” ribbon
Two winter greenery sprays
Winter Berry spray
Wire
Hot Glue Gun
Hot glue pan (optional)
Zip Tie
Scissors
Wire Cutters
Wooden Picks or SteelPix machine
I got most of the materials for this wreath at Greenery Market. Check out their wide variety of quality wreath-making supplies here!
How to Make a Rustic Reindeer Christmas Wreath
Prepare and Attach the Rustic Reindeer Sign
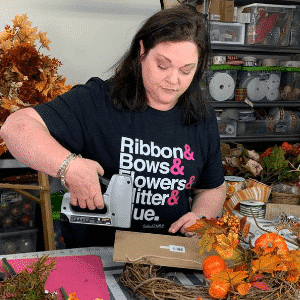
Staple a piece of wire to the back corners of your sign. You may need to fold up a little piece of ribbon underneath to give it some bulk if you have a thin sign, that way the staple doesn’t pop through the front. Add a dab of hot glue over top and let it dry if the wire doesn’t feel as secure as you’d like.
Use the attached wire to secure the sign to your grapevine wreath in place. Since this is a pretty big sign, I’m going to place mine off to the side a bit so that there’s room on the grapevine to attach bows and greenery.
Shake the wreath around a little as you work to make sure the sign doesn’t move around. If it does, tighten those wires!
Note, if you shake your wreath and a bunch of dead leaves and twigs come out like mine did in the video, you might want to take a look at my tutorial on how to prepare a grapevine wreath.
My sign had a wall hanger on the back, so I decided to use a zip tie in that spot to give it a little more security. This is a heavy sign, and I want it to stay on through any wind or door slamming it may have to go through!
Make and Attach Bow to Wreath
For your bow, make three 14” loops with the 2.5” ribbon with an extra streamer to make four tails total.
Next, make two 14” loops with the second 2.5” ribbon and add a second streamer. At this point you should have five loops and eight tails.
Finally, make two 14” loops with the 1.5” ribbon and add a third streamer. Now you should have seven loops and twelve tails.
Shift the loops and tails around until everything looks how you want it, then secure the middle of your bow with florist wire.
Use that same florist wire securing your bow to attach it to the grapevine.
Then go through and fluff up the loops and trim dovetails into all the tails until your bow looks just right.
If you’re using a double sided ribbon, I like to just fold the end over a little instead of making a dovetail so that you get a little pop of the back color in the tails.
Add Greenery and Berries to Wreath
Trim your winter greenery sprays into smaller pieces so you can spread them around your wreath.
Bend each piece a little a bit just to “fluff it up” and give it a more natural look. Careful not to break them though!
Then use hot glue to attach the greenery to your grapevine with the ends coming out from underneath the bow.
Fill in with even smaller pieces of greenery until your desired fullness.
You can also add pinecones by wrapping wire around the inside of a pinecone and twisting the ends together to make a stem, and then attaching a steel pick of a wooden floral pick to the wire. Then just glue that into the wreath like the rest of your greenery.
Add in some berry stems for a pop of bright color.
Finish Off With Extra Streamers and Greenery
Cut a ribbon streamer or two from your 2.5” ribbon and attach a pick to the end of them. Hot glue the pick end in place making it look like it’s coming out from the actual bow.
You can also add some greenery underneath the sign if you like.
Finally, glue some small leftover greenery pieces in between the loops of the bow. To make the whole arrangement a little more seamless.
And that’s all there is to it!
To see exactly how I make this wreath and learn all my professional tips and tricks along the way, watch the video tutorial below. Then get to wreathmaking!
Rustic Reindeer Christmas Wreath Video Tutorial
If you enjoyed this and want to learn more on how to get started with wreath making, try my Wreath Making 101 Workshop!

Happy Wreathing,
Julie
If you enjoyed this post, you might also like:
DIY Rustic Farmhouse Christmas Centerpiece
How to Make a Designer Tree Topper bow with Multiple Ribbons
DIY Buffalo Plaid Snowman Wreath
Liked this Rustic Reindeer Wreath Tutorial? Pin it for later!

