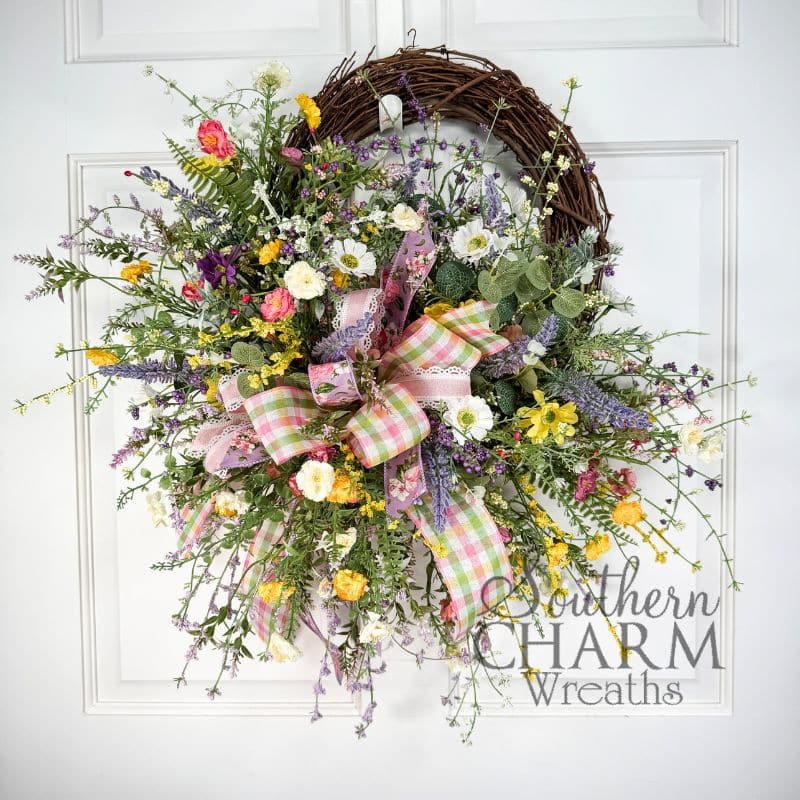
Spring Wildflower Grapevine Wreath
Are you feeling the spring fever yet? Whip up this darling spring wildflower grapevine wreath, complete with pastel spring florals and ribbon accents.
DIY Spring Wildflower Wreath
Spring is almost here and I don’t know about y’all, but I’m ready to celebrate.
Today’s design is a lovely spring wreath with wildflowers. It’s quick and easy to make, looking lush without being over the top.
So let’s get into the spring spirit and start crafting!
This post may contain affiliate links for your convenience. Click here to read my full disclosure policy.

Supplies for this project
You’ll need:
- 14” grapevine wreath
- Wired ribbon
- 2 ½” spring plaid
- 1 ½” purple floral
- 1” pink with lace trim
- Spring floral picks
- Lavender, yellow, white
- Pink, yellow, white
- Boxwood
- Wire cutters
- Florist wire
- Hot glue
- Wooden floral picks or steel picks
- Ruler or measuring board

Want to level up your Spring design knowledge? Our Spring Arrangement Masterclass is self-paced so you can learn on your schedule.
How to make a spring wildflower grapevine wreath
1. Tie a spring bow
The first step in our spring grapevine wreath is to tie a bow.
Begin with your 2 ½” plaid ribbon, measuring a 12” tail, pinch, and pleat. Then, measure 12” for a 6” loop, pinch, pleat, and twist. Repeat for a total of 3 loops, then trim the tail.
Next, take your pink ribbon and repeat these steps, working on top of the plaid base.
Finally, repeat this process with your purple floral ribbon, this time creating just a single loop and an extra streamer to the back of your bow.
Secure the center of your bow with florist wire, and weave the ends through the bottom-left corner of your grapevine wreath. Twist at the back to secure it, then finish by angle-cutting your streamers.
2. Add spring florals
Next up, the florals!
Start with your first variety of spring picks (lavender, yellow, and white), dipping them into hot glue and adding them behind the top of your bow. Add a second pick behind it, moving upwards in the direction of your wreath.
Next, add a pick to the bottom-right of the bow. Then, add two additional picks moving in the same direction.
Now, take your second floral variety (pink, yellow, and white) and add short clippings to the bottom of the bow. Repeat on the top of the bow, as well as the outer edge of your design.
3. Add ribbon accents
Include two plaid streamers just below your bow centerpiece, using floral picks and hot glue to secure them.
4. Fill in with boxwood
Fill in any holes with a divided boxwood bush, securing each piece with hot glue. Try to cover as much grapevine in the established design as possible.
5. Finish your spring wildflower grapevine wreath
Take a step back and admire your art. Search for holes and any uneven displays of color.
Add final clippings of boxwood or blooms as necessary. And with that, your full and lush spring design is complete!
Watch the video: How to make a spring wildflower grapevine wreath
If you enjoyed this post, you might also like:
- 5 Spring Wreath Ideas with Tulips
- 10 DIY Spring Wreath Ideas to Refresh Your Front Door
- Spring Pink Hydrangea Wreath
Like this post? Pin it for later!

Beautiful wreath love ❤️ your designs
Absolutely beautiful !!!😇
It is beautiful and I really enjoyed seeing it being made.
what is the metal tool you are using after separating the stems?
Hey Kieran – I believe you are referring to the Steelpix machine. You can learn more about it here: https://southerncharmwreaths.com/steel-pick-machine/