How to Make a Christmas Wreath Bow (Video)
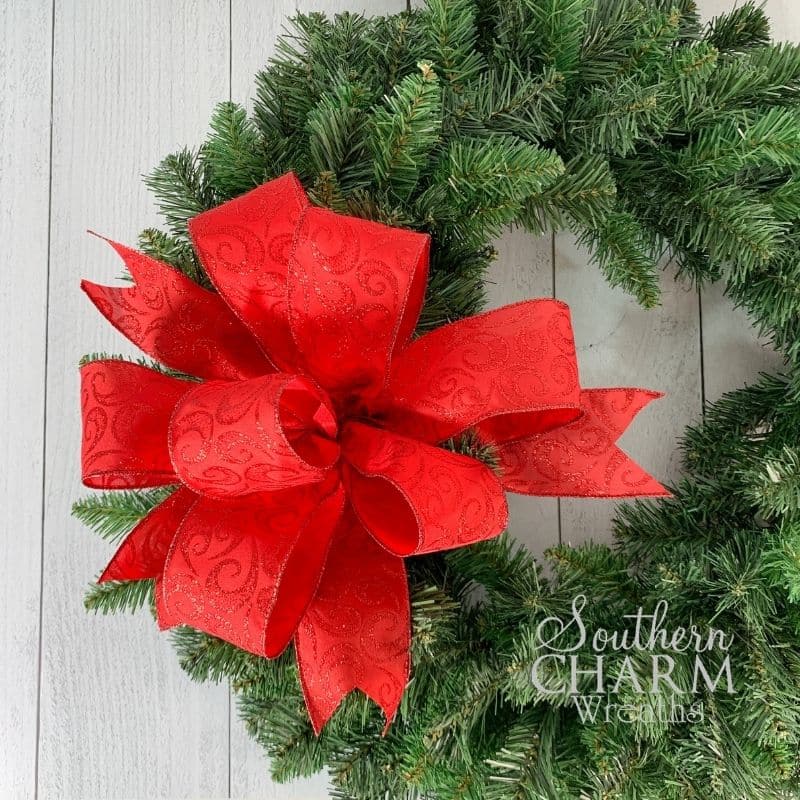
The classic Christmas Wreath Bow is one of those that I think all wreathmakers should have in their arsenal. There’s just something about a big, full, bright red bow that really brings out the Christmas spirit, don’t you think?
But the beauty of making your own is that you can have them in any color or pattern you want! Not to mention you can make them from coordinating ribbons and to help give the decor throughout your whole home a more cohesive look.

Because once you’ve got this wreath down, there’s no limit to what you can do with it. Use it to decorate not just wreaths, but also banisters, lamp posts, mailboxes, even the Christmas tree!
Ready to get started?
This post may contain affiliate links for your convenience. Click here to read my full disclosure policy.
Supplies for Christmas Wreath Bow
3.5 Yards Double Wired Ribbon
Florist Wire
Scissors
Craft Mat or Ruler
Steps for Making a Christmas Wreath Bow
Before you start forming your bow, make sure to get your wire ready and set it off to the side. It will be much harder to get it ready once you have a handful of ribbon.
Step One: Forming the Base of the Bow
To start the bow, measure a 7” tail, and pleat into your thumb and index finger.
Next, you’ll form the seven 6″ loops. To do this, start by measuring 12″ of ribbon from where you pleated the tail. Loop the 12″ away from you, and pleat the end in the same way.
Remember, when you’re making bows, don’t try to hold the pleats too tightly in your fingers. As you add more loops to your bow, the ribbon will naturally shift back toward your palm. That is normal!
Once your loop is formed, you’ll twist the working end of the ribbon around so that the pretty side of the ribbon is facing up. Then make the other six loops the same way, each in the opposite direction from the last.
When you’re done, you should have three loops on one side of your thumb, and four on the other side.
Trim the bow off of the working ribbon with another 7″ tail.
Cut an 18″ streamer from the remaining ribbon and pinch into place in the back of the bow.
Step Two: Form the Center of the Bow
Now to form the center of the bow. You actually aren’t going to add any more ribbon for this though. You’re going to rearrange the existing loops to make the bow appear fuller!
To do this, look over to the side of your thumb that has four loops. Evaluate the existing loops and try to determine which one naturally comes to the top.
This isn’t always going to be the same loop. If you’ll notice, in the video tutorial, the second loop was the one I chose on the first bow, but that’s not always the case.
(You may have a hard time with this step if your fingers are pinched too tightly or too loosely around the ribbons. Don’t get discouraged. It can just take a little practice, sometimes.)
Pull the chosen loop up toward the center and then spread the other loops out around it. Don’t worry too much about making it perfect right now, just get everything close to the right place.
Step Three: Finish Off the Bow
Now all that’s left is to secure everything in place. Take a piece of wire and slide it in place underneath your index finger. Pinch the wire together around the center of the bow, and twist the wire in one direction while simultaneously twisting the bow in the other direction.
Twisting the bow allows you to get the wire tighter around the ribbon than if you were to twist the wire only.
Now just spend a minute fluffing and arranging the loops to your liking.
And that’s all there is to it!
Watch the video below to see the process for yourself and learn all my extra tips and tricks!
How to Make a Bow for a Christmas Wreath

try our Wreath Making 101 Workshop!
Happy Wreathing,
Julie
If you enjoyed this post, you might also like:
How to Make a Bow with Two Pieces of Ribbon
How to Make a Funky Christmas Bow
Christmas Lantern Topper DIY Tutorial
Liked this Bow Making Tutorial? ? Pin it for later!


You are a great teacher. Thanks so much.
Wow……awesome instructions dumbed down for this begy
Great teacher! Love it!