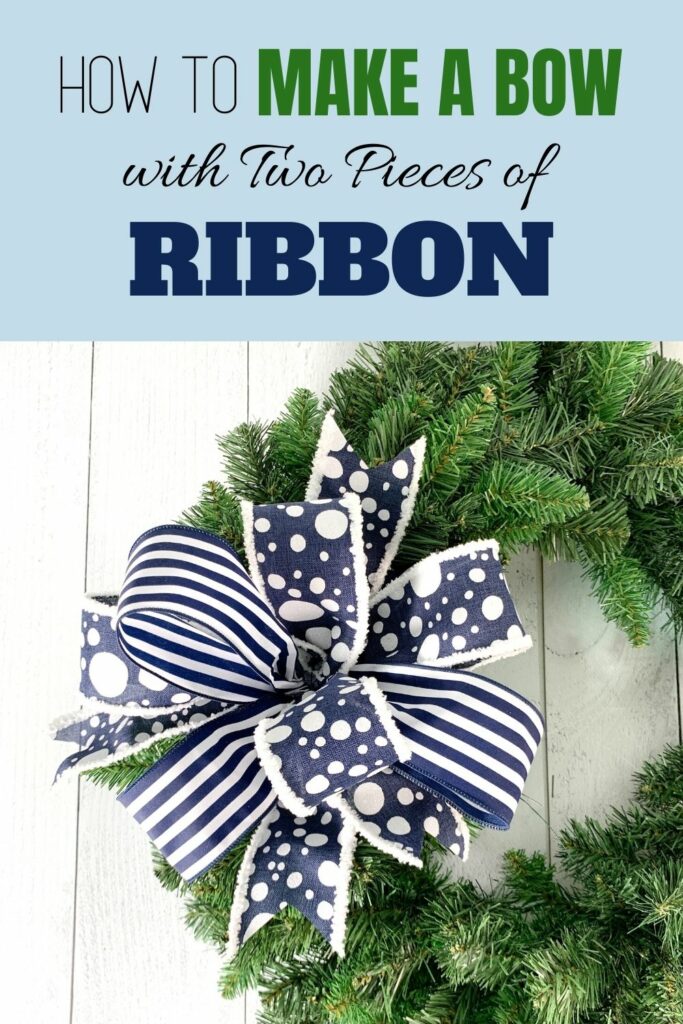
How to Make a Bow with Two Pieces of Ribbon
For many beginner wreath makers, making a bow is one of the hardest new skills to tackle. I’m sure part of it is because we over criticize our own work, but I think a big part is that there’s just so many ways to do it and so many variables to think about when you’re planning on making a bow.
But I’m here to tell you right now: There’s no wrong way to make a bow!
In today’s tutorial, I’m going to share with you not just how I make a simple bow, but part of my process in deciding how I’m going to work a bow based on the materials I have and the look I want to achieve.
I’ve got a written tutorial for you on making a basic two-ribbon bow, but I also want you to dig into the video at the end where I make four different variations of this basic bow so you can see what I’m talking about and hopefully gain a little confidence in your bow making!
This post may contain affiliate links for your convenience. Click here to read my full disclosure policy.
How to Choose Quality Ribbon
Before we go straight into the tutorial, I want to talk to you a bit about the supplies you’re using.
I know you’re thinking it’s “just ribbon” but I’ve been bow making for over ten years now and I can confidently tell you that the quality of your ribbon really does have an effect on the quality of your bow.
You’re generally going to want a ribbon with wired edges. If you try and use something with no wire, or with a thin, flimsy wire, the loops are not going to hold their shape the way you want them.
You can definitely find the right wired ribbon at the big craft stores, but sometimes they are just not going to have what you really need.
I recommend looking at ribbon and wreathmaking boutiques online.
They specialize in ribbon for your purposes and you know they will have high quality products to give your bow or wreath the perfect touch.
Read the next section to find some of my favorite places to get ribbon for bow making!
Where to Purchase Quality Ribbon Online
Greenery Market
Greenery Market (formerly TrendzAndGemz) is a wreathmaking supply shop based out of Pennsylvania. I purchase supplies for a lot of the wreaths that I make and sell from Greenery Market, including some of the ribbons used in this tutorial. Check out their Etsy shop here!
Trendy Tree
Trendy Tree is another shop that a lot of my supplies come from for these tutorials and for my own shop. In addition to my ribbon, I also love their selection of Deco Mesh! Check out their online store here!
Carolina Pottery
And of course, if you’ve been around here for any length of time, you know how much I love Carolina Pottery! They’re a shop that’s local to me, but the good news for y’all is that they’ve also got an online store! Check them out right here!
Let me know in the comments where your favorite place is to buy great ribbon!
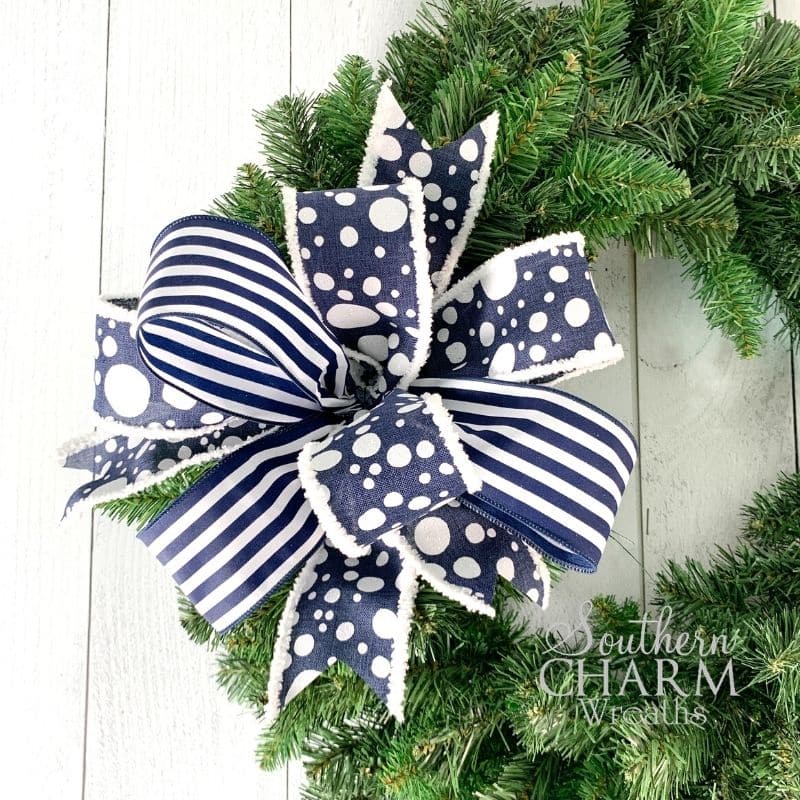
Basic Steps for Making a Bow with Two Pieces of Ribbon
In addition to two different ribbons, you’ll also need:
Florist Wire
Scissors
Wire Cutters
Craft Mat or Ruler
Let’s begin!
Step 1 – Start with a wired ribbon. Measure out a 7” tail, then measure 12” for the first loop. Pinch those two points together, pleating it as you go. Hold the pleated section between your thumb and index finger. For now, you need to hold it fairly tightly. As you work and keep adding more loops, the pinched sections will gradually shift back and fill the space between your thumb and index finger.
Step 2 – Next, twist the ribbon so that the right side of the working end is facing up.
Quick “rule of thumb” (get it?) – Anything below your thumb, twist the ribbon toward you. Anything above your thumb, twist the ribbon away from you.
Measure another 12” section and form another loop, pinching and pleating at the 12” mark and bringing it back to the center where you are still holding the other loop.
Step 3 – Repeat Step 2 one more time. You should now have 3 loops. One below your thumb, and two above.
Step 4 – Now it’s time to add the second ribbon. Measure another 7” tail. This time, place it in your fingers the opposite direction of the first tail. That will help make sure the loops on your bow are spread out and not all clumped to one side. Measure 12” to form your first loop.
Step 5 – Form the other two loops the same as you did with the first ribbon. You should end up with 6 loops total – 3 of each ribbon.
Step 6 – Now just take a minute before we add the last piece, to make any adjustments. Fluff up the loops. Move them around to make the bow nice, even and pretty. Finally, take one last piece of either ribbon, and pinch a 12” loop into place right in the center of the bow to fill it out.
Step 7 – Check that everything is in the right place and all the tails are in the back of the bow. Now take a piece of wire and twist it around the center to secure everything. And then just roll the tails to give them a finished edge, or trim a dovetail into them. And you’re done!
Now remember, this is just ONE way to make a bow with two ribbons. I always say there’s no wrong way to make a bow. You have to just experiment and find out what works best with you. But you also have to figure out what works best for the kind of ribbon you’re using.
Watch the video tutorial below and I’ll show you how I go about making the same bow with variations like different ribbon sizes, and double sided ribbons.
Let me know what you think!
Bow Making Video Tutorial
If you enjoyed this and want to learn to wreath the professional way, join me in our exclusive Wreath Making of the Month Club!

Happy Wreathing,
Julie
If you enjoyed this post, you might also like:
How to Make a Double Ribbon Bow the Easy Way
Review: How to Use the EZ Bow Maker
Liked this Bow Making Tutorial? Pin it for later!
love love your bow making instructions. I would like to know how big your rotary mat is and where to purchase.
Thanks,
Portia
Hey Portia – Here is Julie’s affiliate link to the mat she uses: https://amzn.to/2vfqhzJ
Thanks for your expertise! I love the 2 navy blue ribbons used, can you share where you got them?
That was the best bow tutorial I have ever watched. Thank you for sharing.
Everything you do comes out perfect. I wish you were my neighbor! Yikes, that sounds like’ ‘Mr. Rogers Neighborhood’! No, really, don’t you want to move to SanDiego? Seems like everyone else has, perfect example is our freeways. Anyway, you’re fantastic and your directions are always spot on. Thank you!
It would be nice if you included pictures of each step. I like watching the videos but sometimes it’s easier for beginners, (like me) to see the pictures step by step. I have to pause & rewind the videos a lot. You explain everything so nicely!
Thanks for the feedback
Julie, I struggle with making a bow but this tutorial really will be helpful. I’ve always wondered about the quick rule of thumb. Thank you so much for this very helpful tutorial!