DIY Christmas Tree Topiary for Your Table

Today in the wreath shop I’m sharing a fun snow-themed Christmas tree topiary I made for a custom order. This post contains affiliate links for your convenience. If you click a link and make a purchase, I could earn a few pennies in commission. Click here to read my full disclosure policy.
DIY Christmas Tree Topiary for Your Table Tutorial
In this video, I’m sharing how to make a Christmas Tree Topiary for your table! This one is snow-themed but you can change the theme and colors to fit your home. These would be beautiful on a mantle, porch or entryway. You could even stand them on either side of a fireplace. Let’s get started:
Supplies
- 4″ silver pail (Hobby Lobby)
- White Christmas Tree (Hobby Lobby)
- White garland
- Chalk Couture Snowflake Transfer
- Chalkology White paste
- Fine glitter
- Clear sealant spray
- Weights for the container (can use aquarium gravel, small rocks, etc.)
- Styrofoam
- Deco Flex Tubing
- White & silver feather picks
- Christmas picks
- Snowflake ornaments (Hobby Lobby)
- Pearl garland (Hobby Lobby)
- Awl
- Hot glue gun or Glue Skillet
- Glue sticks or glue pillows
- Craft mat
[Tweet “How to make a DIY Christmas Tree Topiary for Your Table”]
DIY Christmas Tree Topiary for Your Table Tutorial:
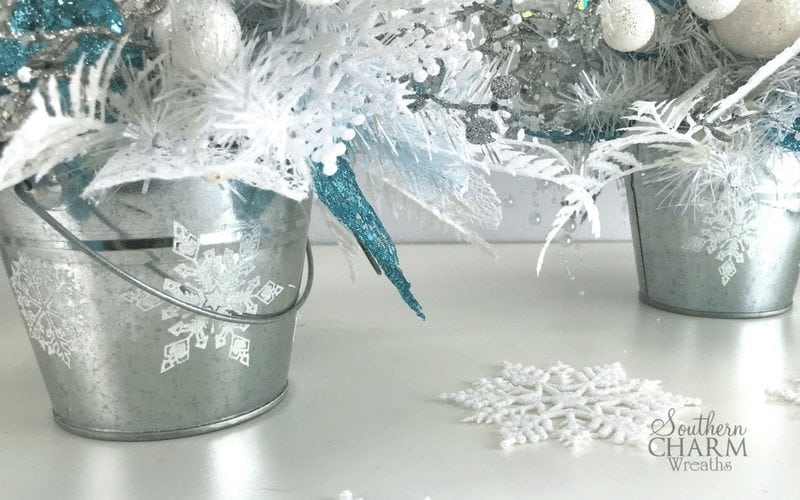
- Start by prepping your pail with Chalk Couture snowflakes.
- Next, because of the size of the arrangement, you’ll need to add weight to the pail. I used aquarium rocks and add hot glue over it to seal it in the container.
- Trim Styrofoam to fit the pail and add hot glue to the bottom of it to ensure a snug fit.
- Prep your Christmas tree by fluffing it and trimming any branches that are too long. Then remove the base/stand.
- Wrap the white garland around the tree to fill it in as an optional step. Fluff it again to intertwine the garland and tree so it looks like one piece. Note: There is a slight color difference between the tree and garland but this will not be noticeable once the topiary is complete.
- Place a hole in the center of the Styrofoam using an awl.
- Add hot glue to the stem of the tree and insert into the hole you made in the Styrofoam.
- Prep the Christmas picks by cutting the individual stems apart.
- Begin by attaching the larger ornaments to the bottom as if you’re decorating a full 7 foot Christmas tree. Add hot glue to the stems and attach into the tree.
- Work up the tree inserting the various ornaments around the tree.
- Next, I added some of the leaves from the Christmas picks around the bottom of the tree. Be sure to add hot glue to the stem before inserting into the tree for better adhesion.
- Tie a bow out of Deco Flex Tubing and attach to the top of the tree.
- Since this is a snow themed topiary, I added snowflake ornaments. Hot glue an edge to adhere in the tree (I cut one side to help it fit in the tree).
- Next, add the silver and white Christmas picks. The order I recommend is the white snowball picks first, then the white feather picks and silver feather picks. I added the longer pieces towards the bottom of the tree and moved up the tree with the smaller pieces.
- Lastly, wrap the pearl garland around the tree. Start at the bottom, attaching to a branch. Then continue wrapping around the tree, attaching to some branches as you go.
DIY Christmas Tree Topiary for Your Table Video…
Are you ready to make a topiary out of a Christmas tree? Wouldn’t this be cute for a buffet table at a party?
Don’t forget to join me on Facebook Live, for my other DIY tutorials. Even better, join our messenger bot HERE and we’ll send you a message on Facebook the next time we go live. It’s always more fun to join in on the conversation.
If you enjoy watching me and/or learning to make wreaths of various styles, join me in my Wreath Making of the Month Club, learn more here.
Happy Wreathing,
Julie
If you enjoyed this post, you might also like:
30 Minute Christmas Wreath Tutorial
Step by Step Deco Mesh Christmas Wreath Tutorial
How to Make a Funky Bow – Christmas Edition
Just Beautiful! I am wondering how you would ship such an item? Blessings Julie
I shipped mine by wrapping in bubble wrap and fitting snugly into a box.