DIY Holly Jolly Deco Mesh Christmas Wreath
Make an attention-grabbing Holly Jolly wreath this year! This is a really easy deco mesh Christmas wreath that even beginners can make.
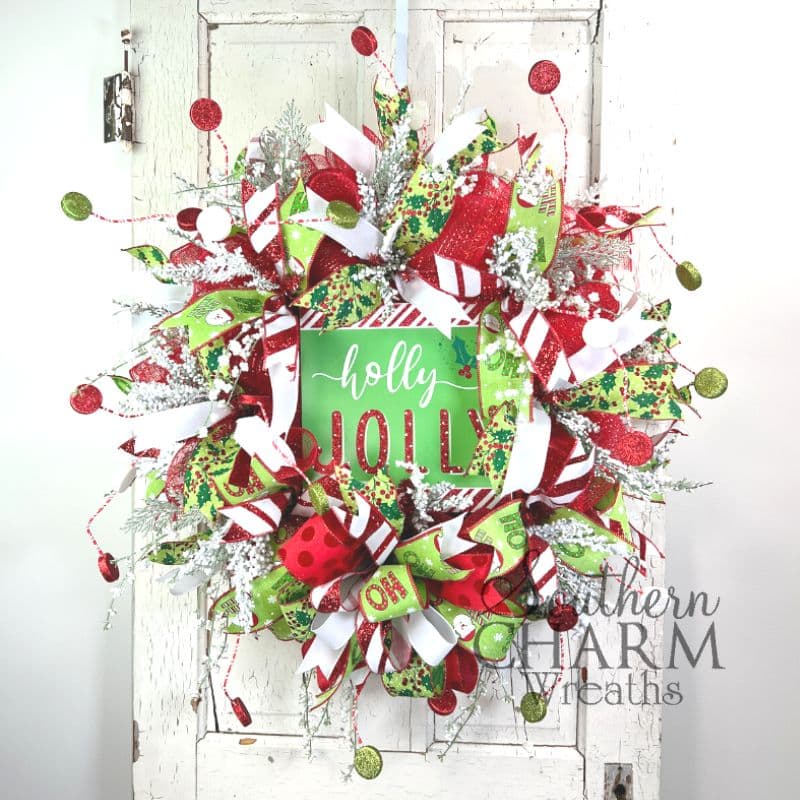
DIY Holly Jolly Christmas wreath
We’re going for a more playful look today! Just thinking about Santa Clause reminds me of elves, Christmas trees, Rudolph, and fun Christmas carols.
In the spirit of old Saint Nick, I grabbed some fun little red and green floral picks, lots of bright red and green ribbons, and my favorite Holly Jolly sign.
This deco mesh Christmas wreath is perfect for kids at heart, anyone decorating with kids in mind, or if you want to sell wreaths. A bright wreath will bring people to your shop or craft show table.
The best thing about it is that you can put it together in less than an hour. How’s that for quick? Grab your tools, and let’s get crafting.
This post may contain affiliate links for your convenience. Click here to read my full disclosure policy.

Supplies for this project
- 24” Elevated Work Wreath Frame
- 10-inch Holly Jolly Sign
- 10.5” Red Deco Mesh
- (2) 1.5” Ribbons
- (2) 2.5” Ribbons
- Flocked Greenery
- Candy Button Christmas Picks
- Florist Wire
- EZ Bow Maker
How to make a deco mesh Holly Jolly wreath: Step-by-step tutorial
1. Add the deco mesh
The very first step is to add the deco mesh to the work wreath frame. You’ll see the frame has a bunch of twisty ties on it – here’s how to add the mesh to those twisty ties.
Grab the very end of your mesh and put it on the first set of ties, and twist the ties around it, so it’s nice and secure. Then, measure about 10 inches, make a pouf, and twist it into the next tie.
Keep measuring 10-inch poufs and adding them to each needle tie. Continue all around the inner ring, making any adjustments to poufs as you go.
Once you’re finished adding poufs to the needle ties in the inner ring, transition to the outer ring by pulling the mesh to the closest needle tie and securing it in. Then, measure more 10-inch poufs as you rotate around the outer circle, securing the mesh at each needle tie.
Open the first needle tie you started with and secure the end of your last pouf on the outer ring. Repeat the same process adding 20” poufs again along the outer ring.
Untwist each needle tie before you add the new pouf, then twist and secure. This will fill in any holes around your wreath base. Cut the end of your mesh and tuck the tail into the center to hide any edge.
Since my mesh is thinner, I rolled the mesh out and used a rotary cutter to cut a few 10-inch rectangles out of the mesh. I cut out 18 rectangles – enough to add one to each twist tie.
Ruffle the rectangles and use each needle tie to hold them. Adding the deco mesh this way makes the wreath look fuller. This is completely optional.
2. Add ribbon streamers
Cut all four colors/patterns of ribbon that you have into 13-inch ribbon streamers. Use scissors to cut dovetails into both ends.
Layer the smaller ribbon on top of the larger one, pinch them in the center, and add each pair of streamers into each needle tie. Then, pull them apart, so the ribbons form an X shape.
3. Insert the Holly Jolly sign
Now you’re ready to attach the sign!
If it doesn’t already have wire on it, add some florist wire to the top and bottom of the sign. Then, attach the sign to the base of your work wreath by fishing the wire through the mesh and securing it onto the metal base on the backside. Trim off any excess wire.
Once you get your sign placed, if you need to punch any new holes on the sides to help it lay flat, go ahead and attach it with more florist wire.
You can stop here or keep adding more layers of different picks and greenery.
4. Add flocked greenery & a bow
Get some flocked greenery and begin cutting it apart into individual pieces. Then, dip the end of the greenery pick into some melted hot glue and stick it into the wreath. Keep adding flocking all the way around the wreath.
Next, you can also add a bow to really emphasize the sign. I had a bow pre-made with the same ribbons I used to make the deco mesh Christmas wreath.
I placed the bow at the bottom of the wreath to draw the eyes to the sign. Use the wire on the bow to go through the work frame and twist it around the wires in the frame.
5. Insert candy buttons
At this point, you could add ornaments, fairy lights – anything that matches the theme of how you want this wreath to look.
I picked out some glittery red and green candy buttons and added them around the perimeter of the wreath.
6. Add finishing touches
That’s it! Go through your wreath and fluff out any bows, adjust the candy buttons…basically make it look perfect.
Watch the video: How to make a Holly Jolly Christmas wreath
If you enjoyed this post, you might also like:
- How To Make A Christmas Wreath With Flowers
- How To Make A Multi-Ribbon Funky Christmas Bow
- How To Make A Traditional Christmas Wreath
Like this post? Pin it for later!

Thank you for always thinking of your fans/friends while you are handling your many responsibilities. We appreciate you!
Love it