How To Make A Multi-Ribbon Funky Christmas Bow
Jazz up your next Christmas wreath with a bright-colored funky Christmas bow. Learn how to use ribbons of different sizes together to create a fabulous focal point for your next holiday wreath.
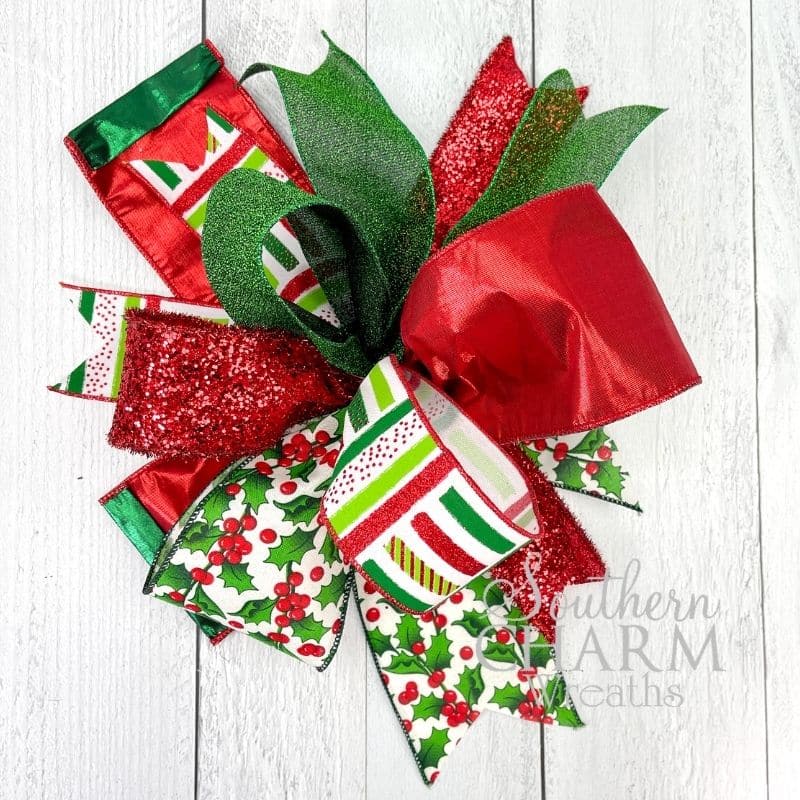
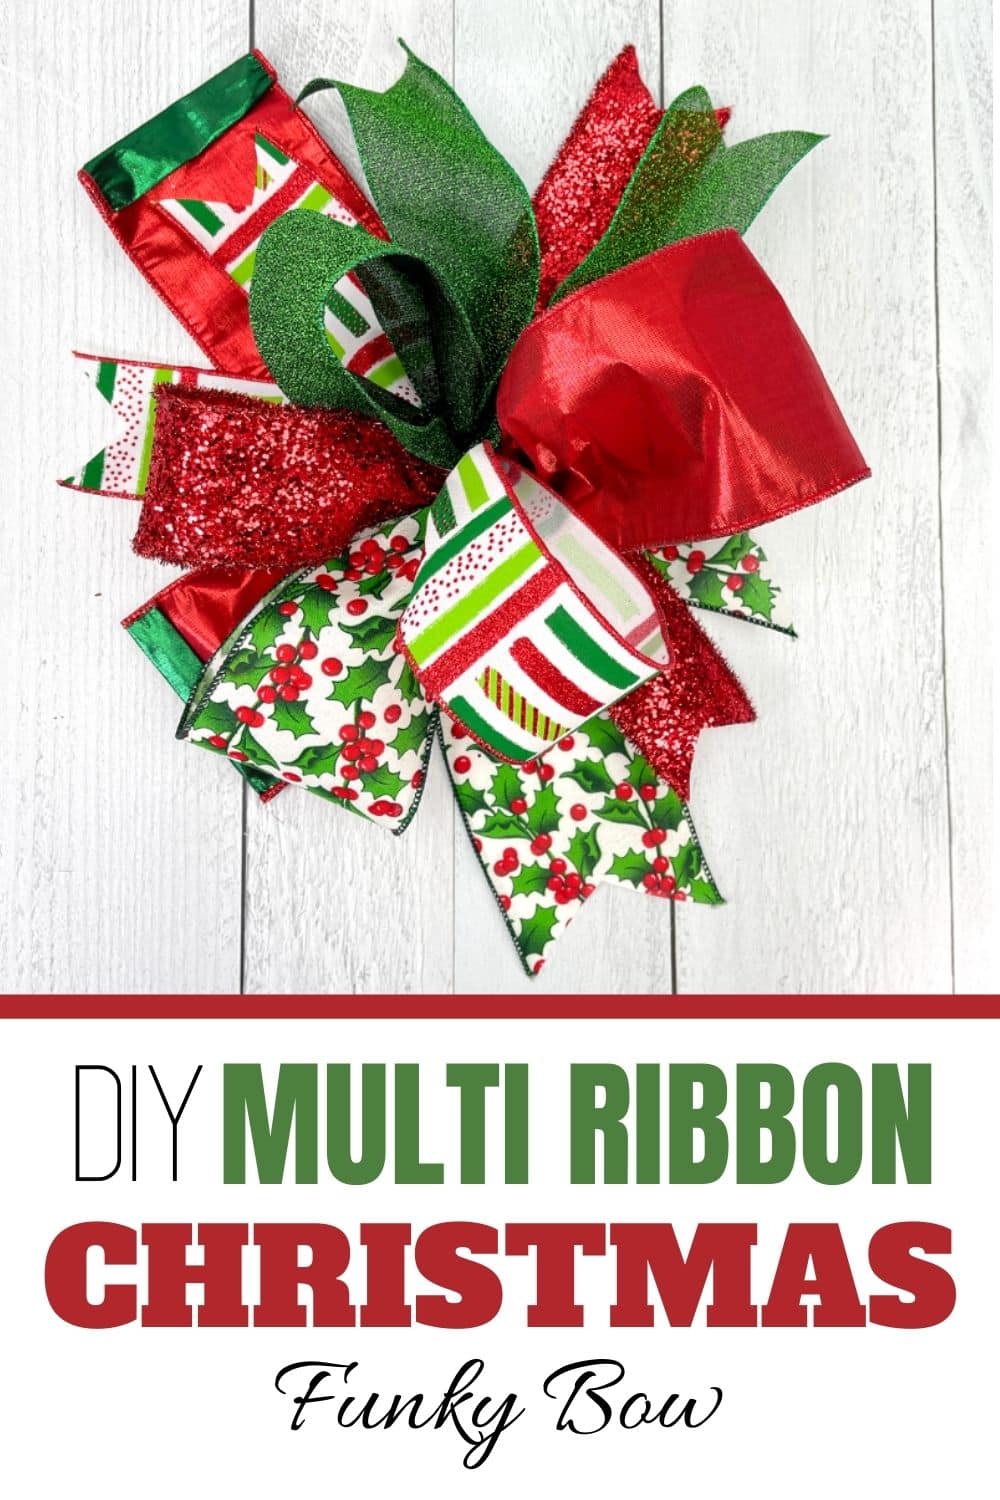
DIY Multi-Ribbon Funky Christmas Bow
Hooray for holiday wreath-making! It is one of the busiest times of the year for crafters – and for good reason. Christmas wreaths and centerpieces decorate front doors, business doors, and even inside building hallways.
Every wreath needs a focal point, and I think multi-ribbon bows make the best focal points! They are super-easy to make, so I suggest spending an afternoon creating a bunch of bows at once. Then, you will be able to design your wreath around your bow.
In this tutorial, I will demonstrate and teach you how to make a multi-ribbon funky Christmas bow that you hand-tie. You could use an EZ Bow Maker, but after you see how easy it is without one, you won’t need it.
This post may contain affiliate links for your convenience. Click here to read my full disclosure policy.
Supplies for This Project
- 2.5” Red Wired Ribbon #40 (of various shades and prints)
- 1.5” Green Wired Ribbon #9 (of various shades and prints)
- 22 Gauge Florist Wire (or a pipe cleaner)
- Scissors
- Craft Mat Or Ruler
How To Make A Multi-Ribbon Funky Christmas Bow – Step By Step Tutorial
1. Pick Out Five Different Ribbons
There is no rule for what colors, shades, or width the ribbons need to be. They can all be the same print or color, they can be coordinating, or they can be in complementary colors.
The sizes are up to you as well. It’s ok to use all 2.5″ wired ribbons or mix up the sizes. If you are following along my video below, these are the ribbon sizes I used:
- 2 of the 4″ wide ribbons
- 3 of the 2.5″ wide ribbons
Cut your ribbons the same length – I cut mine to be 30-inches long. Then, fold them in half and dovetail the end. Dovetailing is optional, but it really gives the bow a nice finished look.
2. Fold The First Ribbon
Use the largest ribbon first. For me, that was the 4″ ribbon. Fold it and leave a 9” tail to begin. Pinch it in between your two fingers in your non-dominant hand. As you fold your bow, the folds will move towards the palm of your non-dominant hand. Always maintain that section of the bow in the same hand, using your dominant hand to create the loops.
On your mat, measure out 12” from your pinched section, holding the ribbon away from you to create your first loop. The loop will be 6”. Remember to keep the good side of the ribbon facing towards you.
If you cut your ribbon 30″ as I did, you will only have enough ribbon for one loop. Keep it pinched in your hand and grab the next ribbon.
To make the second loop, do the opposite actions. Make your loop by pulling the ribbon away from you to gather it with your non-dominant hand. You will pleat and pinch the ribbon in your fingers.
You should now have two nice loops. Twist the ribbon so the bad side is facing towards you again, and keep it pinched in your hand.
3. Reposition As You Go
Keep repeating this process with each ribbon that you add to your bow. After you add a ribbon, pause and reposition the tails, so they are behind the loops. The loops should match in height, and the tails should be both above and below the loops.
You might also notice that your loops twist or fold over. Just take a second to flatten them out, so they are smooth. Always twist the tails so that the pretty side faces outward.
Remember not to switch hands – always keep your pinched and pleated ribbons in your non-dominant hand. Adjust your lengths and placement with your dominant hand.
4. Add The Wire
When you are satisfied with how many loops and tails you have, you are ready to secure everything together with the florist’s wire.
To do this, move your wrist in the same motion you make when you are looking at your watch. The ribbons should be firmly in your hand, the tails are facing the top, and the loops are underneath.
Hold the floral wire in your dominant hand. Lift up your pointer finger (in the hand that’s holding the ribbon) and add wire underneath it. Then, rotate the wire around.
Before I twist the wire off, I double-check my loops to make sure everything is where I want it to be. When you are happy with how your bow looks, twist the bow, holding your wire as it tightens.
That’s it! You now have a funky Christmas bow!
If you’re more of a visual learner, watch the video tutorial below and see exactly how I made it.
Watch The Video: DIY Multi-Ribbon Funky Christmas Bow
If you enjoyed this post, you might also like:
- How To Make A Funky Bow – Christmas Edition
- How To Make A Bow With Two Pieces Of Ribbon
- Quick Christmas Bow Hack For Seasonal Wreaths
Like this Post? Pin it for later!
OMG!!!! I just might be able to pull this off!!!!!!! I’m watching while I’m at work so I don’t have ribbon in front of me right now but you can bet I’m making a bow at home tonight!!
Julie you are an angel. Thanks for the tutorial