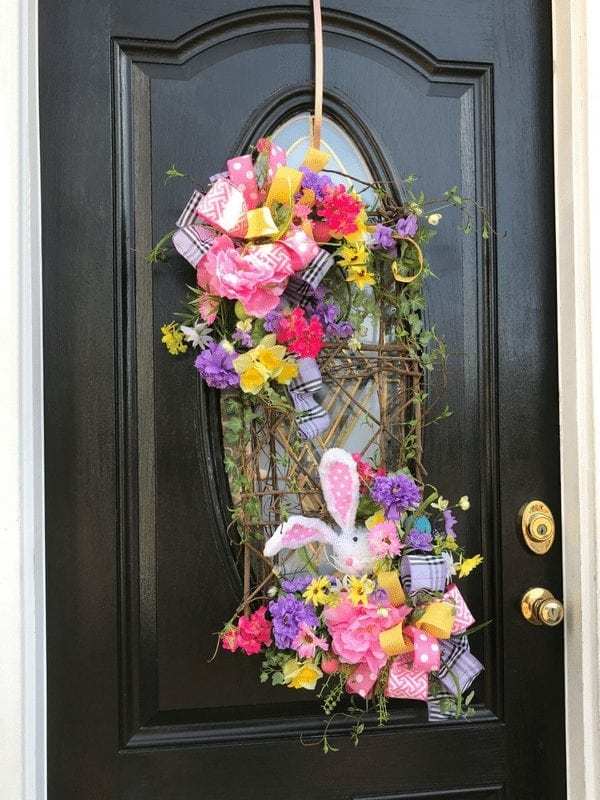
DIY Silk Flower Easter Door Hanger
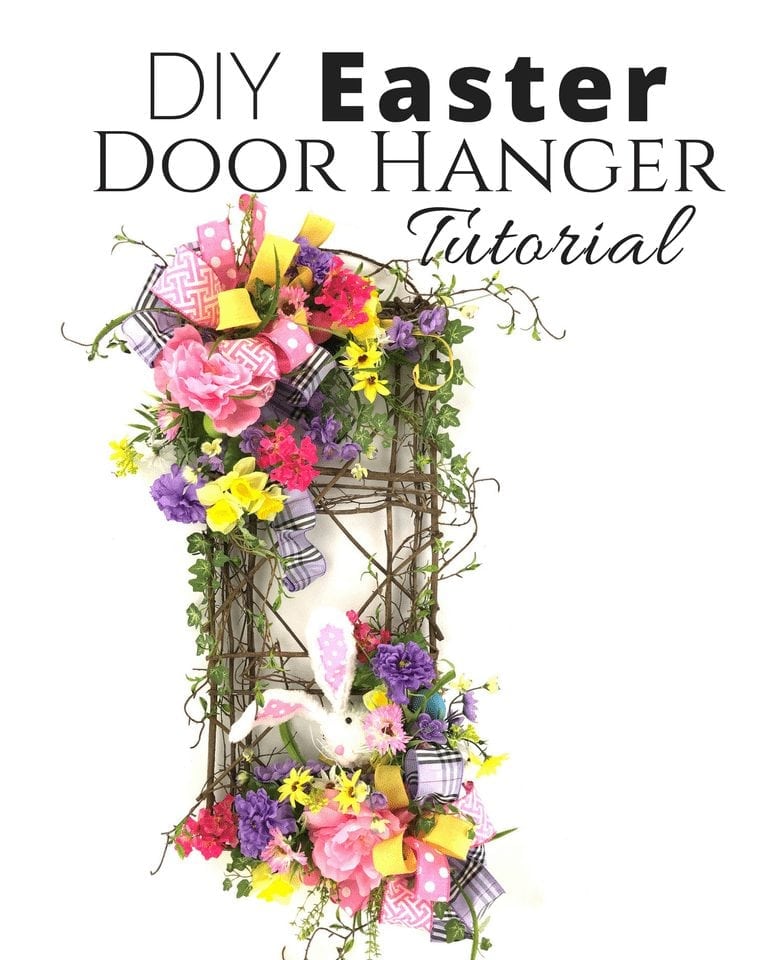
Are you getting ready for Spring? Today we’re breaking out beautiful Spring colors to make this fun DIY Silk Flower Easter Door Hanger! This post contains some affiliate links for your crafting convenience. Click here to read my full disclosure policy.
DIY Silk Flower Easter Door Hanger
In this video, we’re making a DIY Silk Flower Easter Door Hanger on an angel vine base that is sure to inspire thoughts of Spring! Here’s how:
Supplies
- Angel Vine Base 12″x30″ (Carolina Pottery)
- Wired Ribbon (Carolina Pottery)
- Assorted silk greenery and flowers
- Zip ties
- Bunny pick
- Decorative Easter eggs
- Pipe cleaners
- Florist wire
- Wire cutters
- Hot glue gun or Glue Skillet
- Glue sticks or glue pillows
- Craft mat
[Tweet “How to make a DIY Silk Flower Easter Door Hanger”]
DIY Silk Flower Easter Door Hanger Tutorial
- To begin, make two bows using my funky bow technique. I used 4 different ribbons in spring colors with 12 inch loops. Set them aside when done.
- Next, gather a variety of greenery and flowers together in your hand. I started with a woodsy stem from Carolina Pottery and then incorporated flowers in purples, yellows and pinks. Stagger the stems to make sort of a bouquet.
- Attach the bouquet of greenery and flowers together using a zip tie. Trim excess stems.
- Now it’s time to make more bouquets – you’ll need 3 more similar to what you just made (4 total).
- Lay out your bouquet and bows on the angel vine to determine placement. I used one in the top left corner and one in the bottom right.
- When you are happy with your layout, attach the bouquets with zip ties and the bows with florist wire.
- Next, add the bunny pick to the bottom right bouquet. Attach with zip ties or florist wire and then trim off any excess from the stem.
- For a finished look, hot glue ivy pieces into the bow and anywhere else on the angel vine that needs to be filled in. I added some greenery to trail off to the sides of my arrangements.
- Finally, to attach the decorative Easter eggs, make a hole through the egg and thread a pipe cleaner through to attach it to the angel vine. You can also use hot glue.
DIY Silk Flower Easter Door Hanger Tutorial Video…
I hope you enjoyed this Silk Flower Easter Door Hanger tutorial! You could easily use this same concept for any season by changing out the flower and ribbon colors and accessories.
If you would like to learn more about wreath making, join my Wreath Making Club.
Don’t forget to join me on Facebook Live, for my other DIY tutorials. Even better, join our messenger bot HERE and we’ll send you a message on Facebook the next time we go live. It’s always more fun to join in on the conversation.
Happy Wreathing,
Julie
If you enjoyed this post, you might also like:
I started making decomesh wreaths from your ebook awhile ago. Love watching your tutorials and I wish I could join your wreath making club but due to a illness I financially had to drop out of a lot of things! I will continue to watch and be inspired by you!