DIY Summer Farm Floral Grapevine Wreath
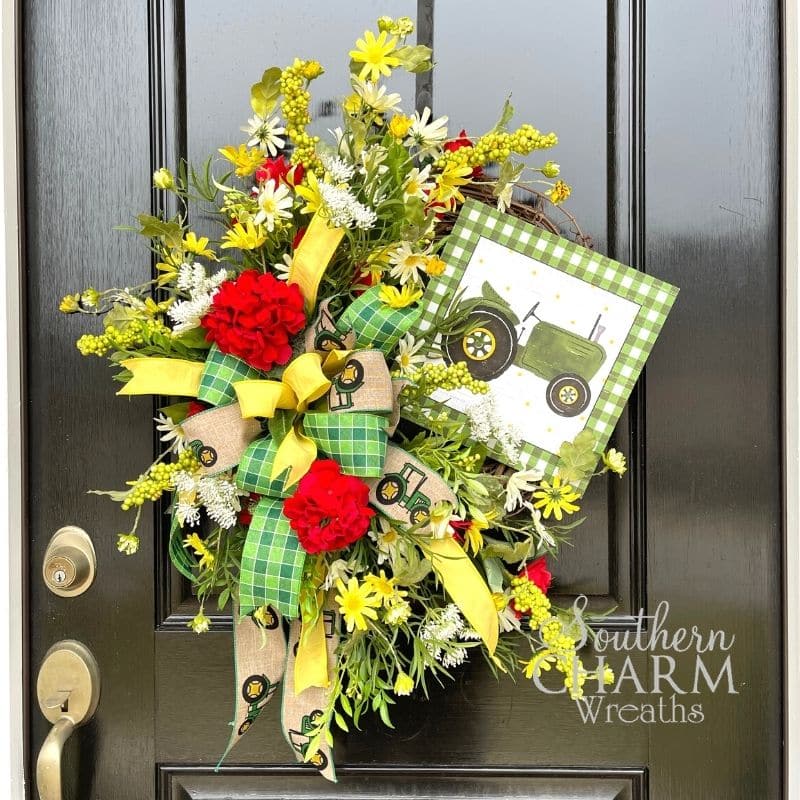
This summer you can welcome those who come to your front door with a bright colorful farm wreath by following this DIY Summer Farm Floral Grapevine wreath tutorial. This wreath is super simple and quick to put together. I just love how this wreath turned out and you will too! Keep reading or watch the video at the end to learn how to make your own Summer Farm Floral Grapevine Wreath!

DIY Summer Farm Floral Grapevine Wreath
This DIY Summer Farm Floral Grapevine Wreath is the perfect way to brighten up your door for summer! I’m sharing with you how you can make this for yourself to keep and hang on your own door or sell in your shop!
This post may contain affiliate links for your convenience. Click here to read my full disclosure policy.
Supplies for this Project
- 16″ grapevine wreath form
- Tractor Sign
- Tractor printed Ribbon
- Green Plaid Ribbon
- Yellow Ribbon
- Yellow and red floral bush
- Greenery
- Red geranium stems
- Floral Wire
- Glue Pan
- Wire Cutters
- Scissors
- Staple Gun
DIY Summer Farm Floral Grapevine Wreath: Step-By-Step Tutorial
1. Prep and Attach Sign
Start by laying your sign down on your wreath and placing it around to find a nice place for your sign to go so it does not wobble back and forth. Using a pen to mark the back of the sign where you want it to attach to your wreath. This will help you know where to staple your wire to attach the sign to the wreath form.
Lay your wire down on the back of your sign. Use a small piece of ribbon to lay under your wire where your staple will be placed so the staple doesn’t pierce through the front of your sign. Once you have secured both wires to the back of the sign you are now ready to attach your sign to the wreath!
Attach the bottom of your sign to your grapevine first by threading the wire through the wreath form. It is best to use wire when attaching the sign because it is more secure. Also, you will want to thread your wire through the wreath instead of around. This helps you, later on, be able to place your florals and greenery pieces into your wreath. If you wrapped the wire around your wreath you are squishing your wreath form tight together and you will find it is much harder.
2. Make Bow
When it comes to making a bow for your wreath there is no right or wrong way to make a bow. You can have as many loops as you want. We are going to make this bow a two loop bow.
Measure your tail out, make a loop and twist, and measure out 12 inches and make a loop, twist it and make another loop, and pull your tail down. Repeat this process with your two other ribbons. Be sure to hold each ribbon tight in the middle as you add your layers.
Cut and add additional pieces of ribbon strands to be streamers to the back of your bow. Next with a wire twist it around the center of your bow to make it nice and secure. Once secure dovetail the ends of your ribbon tails.
3. Attach your bow
Using your wire that you used to secure the bow together, thread that wire through the grapevine at the bottom left of your wreath. Twist the wire together and then make sure you take the time to fluff and arrange your bow. This step is what really makes your bow look pretty!
4. Attach hanger
Hangers are nice to have to help offset the weight of your wreath. You do not need one but I personally prefer them. Thread your wire loop through the top of your grapevine and pull the ends through the loop. There you have a hanger!
5. Add greenery
To define the wreath boundaries for your floral design in this wreath we are going to use a line type of greenery.
Start placing individual pieces of greenery around the bow by dipping the ends in hot glue before placing them working your way alternating between the top and bottom of the bow.
Once you have those in places start adding a different type of greenery placing them
6. Add Floral Stems
Take your yellow and red floral bush, I got mine from Hobby Lobby and separate it into two separate stems. One stem with just daisies and then the other stem with the other flowers.
Using your yellow daisies place them by first dipping the ends into your hot glue. Start by placing them on top of the greenery you just placed and spreading them out working your way placing them around your bow. Once you have them in place and secure give them a nice tug towards you. You do not want anything to lay flat on this wreath.
I had two red geraniums leftover in the shop and decided to add them to this wreath. I trimmed down the stems on both of those and added them right on top of the bow and one a little to the bottom right of the bow. This helps add a little pop of red around that bow.
Working now with your floral pieces that have the red flower on the stem you will want to place them around your daisies you already placed. Once you place them if you can not see the red flower on this stem and it is covered up by a streamer just trim your ribbon streamer down a bit to be sure you can see those pops of red.
7. Add ribbon streamers
Taking the ribbon you used for the bow cut some ribbon streamers to add to the bottom of the wreath. Measure out the length you want before cutting. You can use a floral pick to add an attachment to the ribbon so you are able to place these into the wreath. Once you have your ribbon streamers placed go back and dovetail the ends.
8. Final touches
With your leftover greenery, and ribbon tails start filling the empty holes you see on your wreath. You may find that all it needs is a nice ribbon streamer or a piece of greenery to make it look complete and finished.
Watch The Video: Summer Farm Floral Grapevine Wreath
If you enjoyed this post, you might also like:
- DIY Summer Sunflower Door Hanger
- How to Make A Ladybug Summer Geranium Wreath
- Deco Mesh Bumblebee Wreath DIY Tutorial
Liked this DIY Summer Farm Floral Grapevine Wreath? Pin it for later!

