Frosty Winter Lantern Swag Tutorial
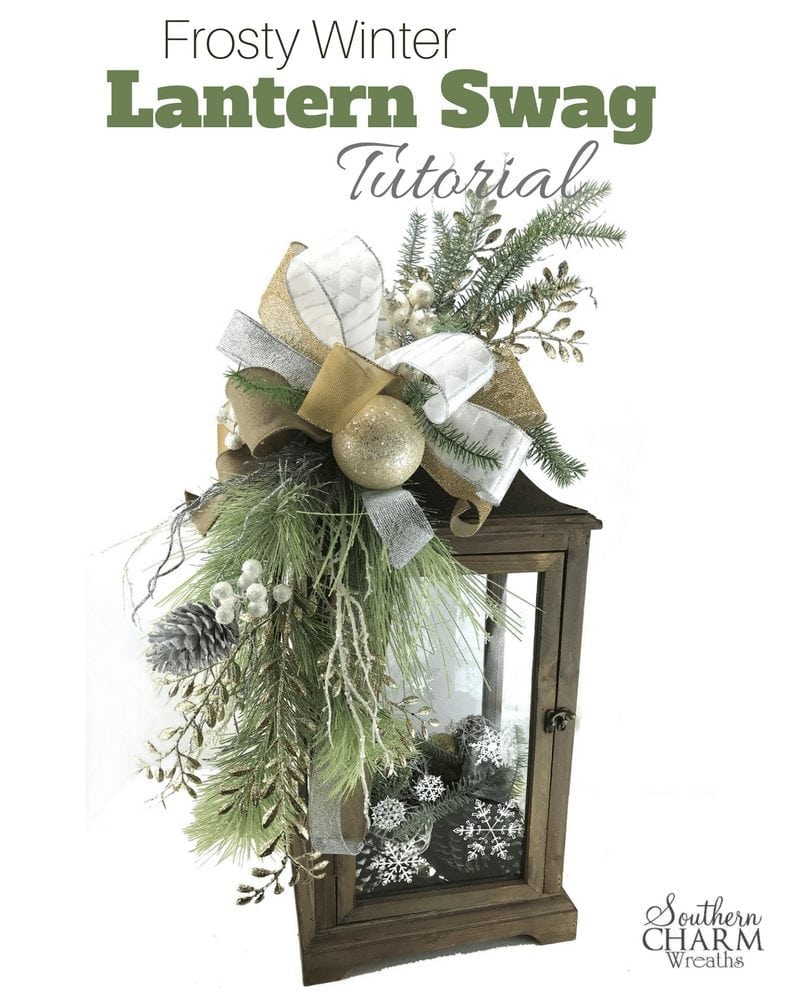
Today I’m showing you a quick way to customize a lantern with a swag and some fun snowflakes on the glass for winter. Plus, everything can be removed after the season and changed for another holiday! This post contains some affiliate links for your crafting convenience. Click here to read my full disclosure policy.
Frosty Winter Lantern Swag Tutorial
In this video, I use my Chalk Couture transfers to make snowflakes on my lantern. Don’t worry, it can be washed off once winter is over. Then watch as I show you how to make a frosty floral swag to hang down the side. Here’s how:
Supplies
- Large lantern (Carolina Pottery)
- Chalk Couture snowflake transfer
- Chalk Couture White Chalkology Paste
- Winter silk greenery stem (Hobby Lobby)
- Assorted silk greenery
- Wired ribbon
- Florist wire
- Rustic wire
- Wire cutters
- Hot glue gun or Glue Skillet
- Glue sticks or glue pillows
- Craft mat
[Tweet “How to make a Frosty Winter Lantern Swag”]
Frosty Winter Lantern Swag Tutorial
- First, start by adding the snowflakes to the lantern glass with Chalk Couture. Simply follow the Chalk Couture instructions and don’t forget, it dries fast! You can watch when I did my first Chalk Couture project here.
- Now we’ll begin the lantern swag. For this swag, I started with a premade Winter Silk Greenery stem.
- In addition to the premade stem, we will add our own elements. Start by gathering up the pieces you want to include in your hand. I used pieces of a bluish greenery, some silver and some gold. When you have a grouping you like, bundle it together with florist wire.
- Next, add some pieces of the elements you used in the grouping above to the premade stem so they flow and go together. Note: If you have a short stem you want to make longer, simply reuse a long stem you’ve removed from something else and wire it on.
- Attach the top (the bundle you put together in your hand) to the stem of the premade stem with zip ties. It should face the opposite direction. Leave room for a bow in between.
- It’s time for a bow! I made my Christmas Funky Bow using 5 different ribbons and 12 inch bow loops. For bow making details, click here.
- Secure the bow with florist wire between the two swag elements.
- For a beautiful finished product, hot glue silk leaves to the back of the swag where you have zip ties etc. showing. Note: Anytime I am cutting apart silk flower stems I keep all of the elements I’m not using. This way I have extra leaves to use for this anytime.
- Next, cut the long stem off from the premade stem.
- Attach the swag to the lantern with rustic wire. Note: Normally I attach it to the top of the lantern but because this one was so large, I attached it to the handle.
- Once the swag is attached, bend and shape your swag. You don’t want it looking like it is flying off! Gently bend the swag down so it sweeps along the side. Don’t forget to fluff your bow as well.
- Lastly, glue small sprigs of greenery throughout your bow to make everything blend together.
- Now all that is left is to fill your lantern!
Frosty Winter Lantern Swag Tutorial Video…
I hope you enjoyed this Frosty Winter Lantern Swag tutorial! Have fun filling it with things you love. You could use pinecones, grapevine balls, flameless candles, LED lights, ornaments and more!
If you would like to learn more about wreath making, join my Wreath Making Club.
Don’t forget to join me on Facebook Live, for my other DIY tutorials. Even better, join our messenger bot HERE and we’ll send you a message on Facebook the next time we go live. It’s always more fun to join in on the conversation.
Happy Wreathing,
Julie
If you enjoyed this post, you might also like:
Designer Christmas Table Centerpiece Tutorial
Beautiful! I am just wondering how secured the arrangement is to the lantern. I see that it is wired. But should it be glued as well?
NO! You want to change it out from season to season. Wired is fine and works great.
Hi Julie
I really enjoyed your tutorial on the frosty winter lantern swag. I hope to see you do the same for valentines day as I want to decorate both
of my lanterns for the month of Febuary.The house looks so bare with Christmas put away.A valentine lantern swag will perk it back up!I did my tree in monochromatic gold tones with ribbons for the first time. It really turned out lovely. I “cheated” by watching a tutorial on adding ribbon loops to a tree. It was great fun. Thanks for this lesson. I loved it
Thanks, Very helpful.
Finally, a bow even I can master!! Thank you for your easy to understand tutorial.
Just beautiful!! And so well taught. Thanks for the tutorial. My daughter brought a lantern to me
for her front porch.
so I went looking for you right away. Lol I have been keeping up with you for a while now.
Welcome and so happy You were inspired by one of our projects!
love what you create and so inspired !
Absolutely beautiful! Im a wedding florist so I loved it!
I am learning so much and getting into so much trouble, I want to do EVERYTHING!!!!!