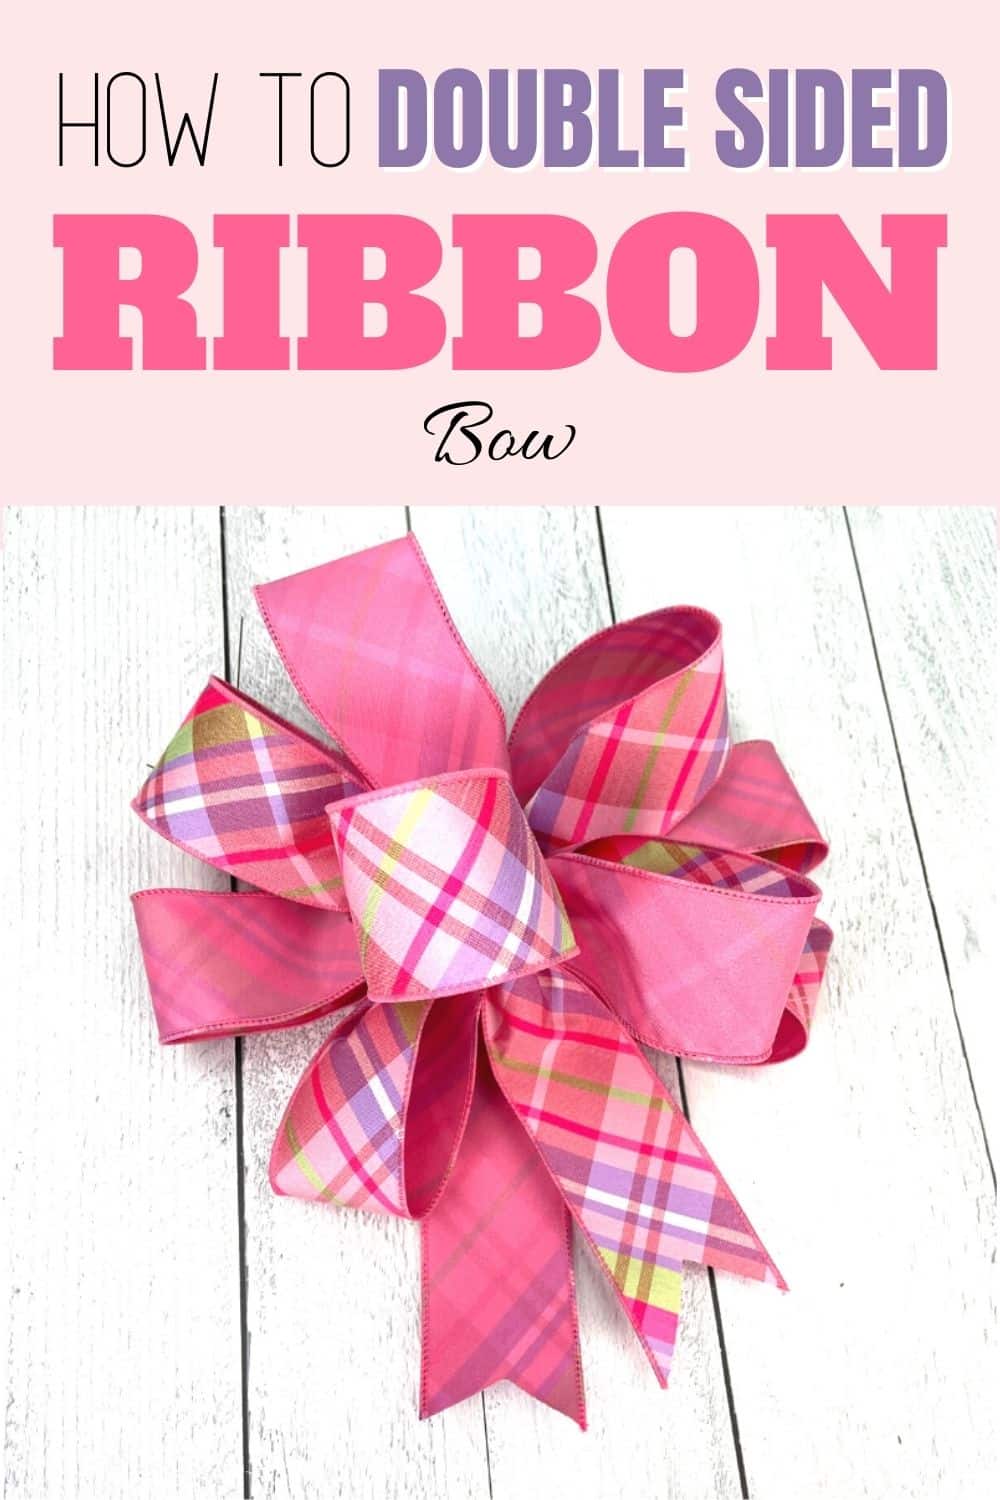
How To Make A Bow Using Double-Sided Ribbon
If you have double-sided ribbon and want to know how to best show it off, watch this! I’ll show you how to make a beautiful bow in just a few minutes.
How To Make A Bow Using Double-Sided Ribbon
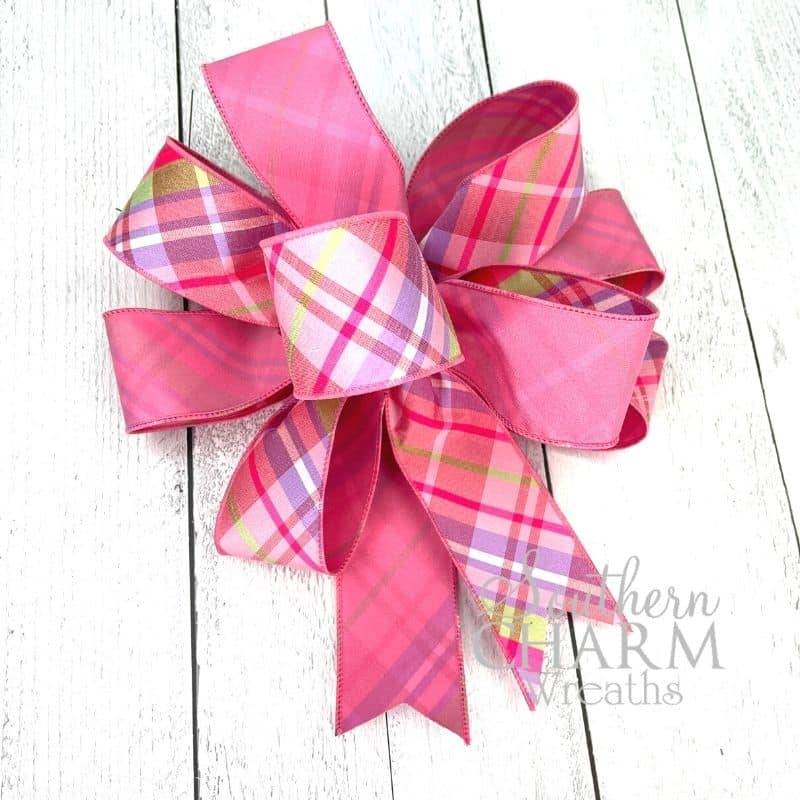
Double-sided ribbon can seem confusing and difficult to manage – but it is actually really easy to use. In fact, you can make a showy and attention-grabbing bow with just one spool of double-sided ribbon. It will look like you spent hours crafting with multiple ribbons, but only you will know the secret!
One of my favorite things about double sided ribbon bows is that you don’t have to dovetail the ends. You can certainly do that if you want, but I love to roll them up and show both sides of the ribbon.
Beginning crafters, experienced wreath-makers, or anyone wanting to learn how to use that type of ribbon – this is for you! Not only will I tell you how to make a bow with double sided ribbon by hand, but I also have a video at the end that will show you how to do it too.
This post may contain affiliate links for your convenience. Click here to read my full disclosure policy.
Supplies For This DIY Bow Project
- Double-Sided Ribbon
- 22-Gauge Florist Wire
How To Hand-Tie A Bow With Double-Sided Ribbon
First, I’m going to show you how to hand-tie a bow using double-sided ribbon.
Step 1: Measure Out The Tail
The very first step is to measure out the bottom streamer of your bow. In my video, I made an 8″ tail. I used a measuring tape on my table, but you can also just eyeball it. When in doubt, make it longer than you think. That way, you can always trim it up later.
Step 2: Pinch The Top Of The Tail
Using your index finger and thumb in your non-dominant hand, pinch the top of the tail. This hand is where you will be holding all the ends of the loops, so that is why we use our non-dominant hand.
Step 3: Measure And Fold The Loops
Now you are ready to make your first loops. Just like with the tail, the exact measurements are not important. I measured 8″ of ribbon and folded it in half in my non-dominant hand, making a 4″ loop.
The way you twist the loops is very important. I used a ribbon with a printed side and a solid side, so that is what I’ll call it in this tutorial. After you make the first loop, the printed side will be showing on the loop. Measure out another 8″ tail of the printed side, then fold it away from you. As you do, you’ll see the printed side will be showing on the outside of the loop again.
Step 4: Repeat With Solid Side Of The Ribbon
You want to create loops that show off both sides of the ribbon; the printed and the solid sides.
After making two loops with the printed side showing, twist the ribbon tail so that the solid color faces up and make a loop with the solid side out.
I like to do this in a pattern that I can easily repeat. I’ll make two loops with the printed side out and then two loops with the solid side facing out. Make as many loops as you want.
Step 5: Add A Ribbon Streamer On The Back
When you are satisfied with the number of loops, measure one final streamer and cut it from the spool. Then, measure another 16-inch streamer and add it to the middle of the back of your bow. Now you will have four even ribbon tails.
Step 6: Secure Double-Sided Ribbon Bow With Florist Wire
Twist a piece of 22-gauge florist wire around the middle of your loops so that it secures them together tightly into one gorgeous bow. At this point, it is done! I like to finish it off by rolling up the ends of the bow tails so that you can see both sides of the ribbon.
How To Use The EZ Bow Maker With Double-Sided Ribbon
You can also use the EZ Bow Maker to create a bow with double sided ribbon. Here’s how!
Step 1: Place The Piece Of Streamer Down First
Pull your wired ribbon through the two vertical pegs. Anything you make on the bow maker, you have to build from the back of the bow forward.
Step 2: Make The Two Largest Loops
Next, make two loops that are 6″ long each. To do so, pull 6″ of the wired ribbon through the two vertical pegs – this is the first tail of the loop. Then twist it, and pull 12″ of the same ribbon, fold it in half to make a 6″ loop, and thread it through the two vertical pegs.
The bow maker has a ruler so you can measure as you go. Repeat this process until you have an equal number of loops on both the right and left of the vertical pegs.
Remember to keep folding your bows so that the printed side is facing out towards you.
Step 3: Make 2 Loops With The Solid Side Of The Ribbon
Repeat the previous steps. This time, twist the ribbon so the solid side faces up. I made another two 6-inch loops on each side of the pegs.
Step 4: Finish With Florist Wire
After it is completely fluffed and all the loops are laying how you want them to, it is time to finish it off with the florist wire.
Lift the entire bow off the bow maker and pinch the middle with your index finger and thumb. Add the florist wire to the back of the bow and bring it around in half to the front of your hand. Use a twisting motion to secure the florist wire to the bow so tightly that it won’t come loose.
Watch The Video: How To Make A Bow With Double Sided Ribbon
If you enjoyed this post, you might also like:
- DIY Multi Ribbon Football Bow
- Quick Christmas Bow Hack For Your Seasonal Wreaths
- How To Make A Bow With Two Pieces of Ribbon
Like this Post? Pin it for later!
Thank you, Julie! I am always looking for ways to improve my bows!
I love this idea. The solid coordinates with the plaid, which saves you from purchasing a solid colored ribbon. I’m all about saving $$$. Thank you, Julie.