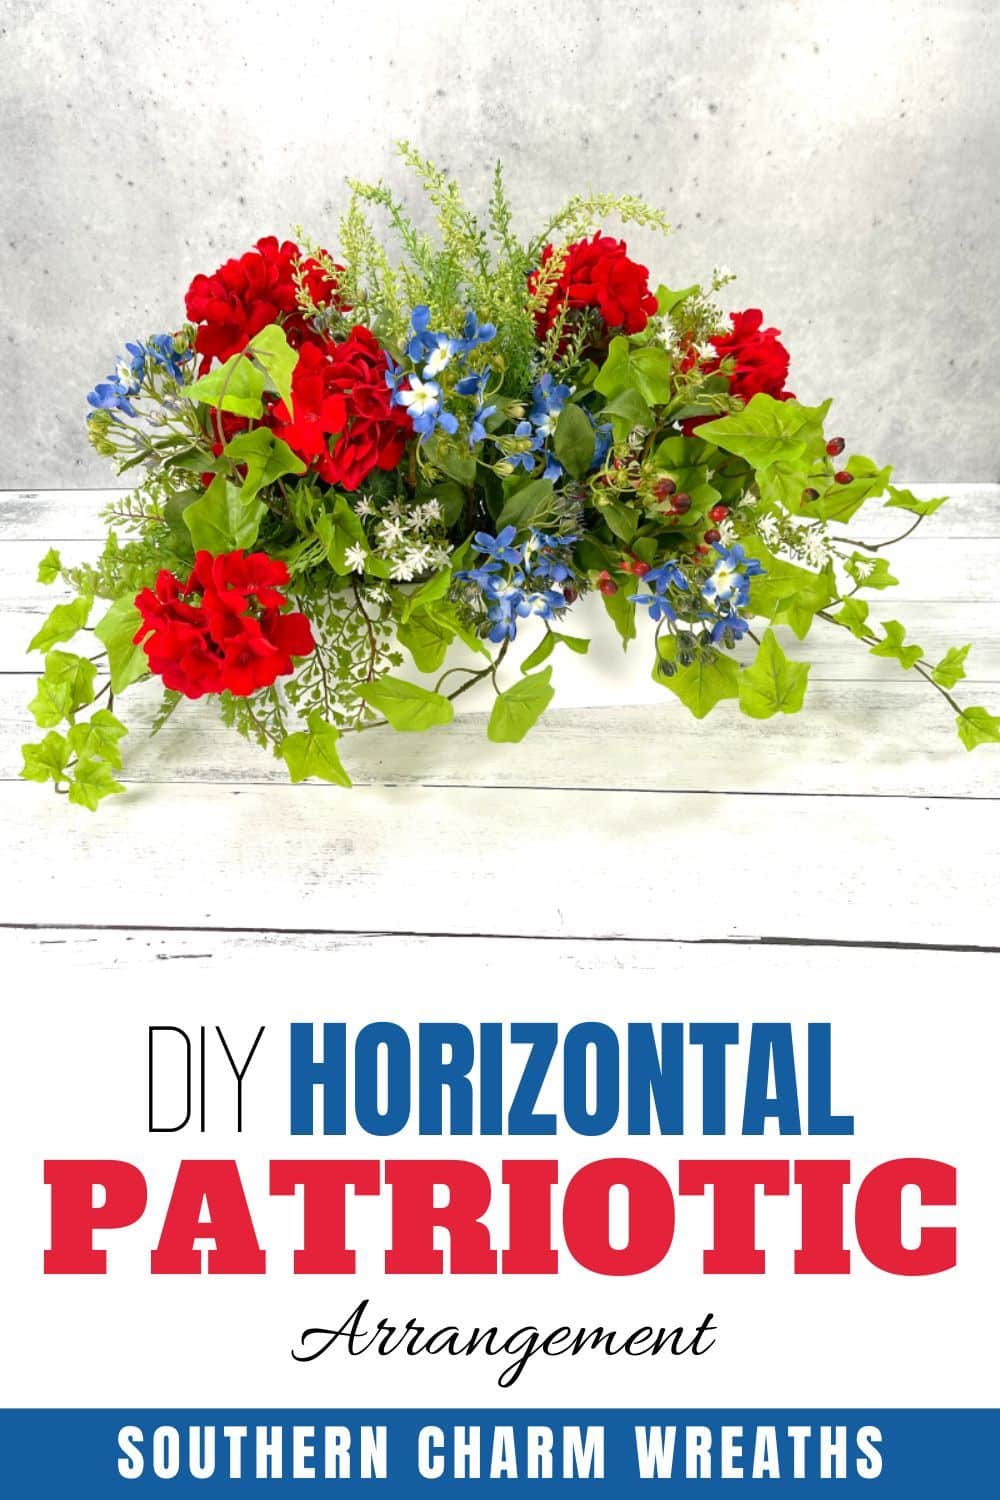
How to Make a Horizontal Patriotic Table Arrangement
Follow this tutorial to make a red, white, and blue horizontal table arrangement that shows your patriotic side in the most beautiful way. The combination of vibrant florals paired with all sorts of greenery in this display is just so pretty.
How to Make a Horizontal Patriotic Table Arrangement
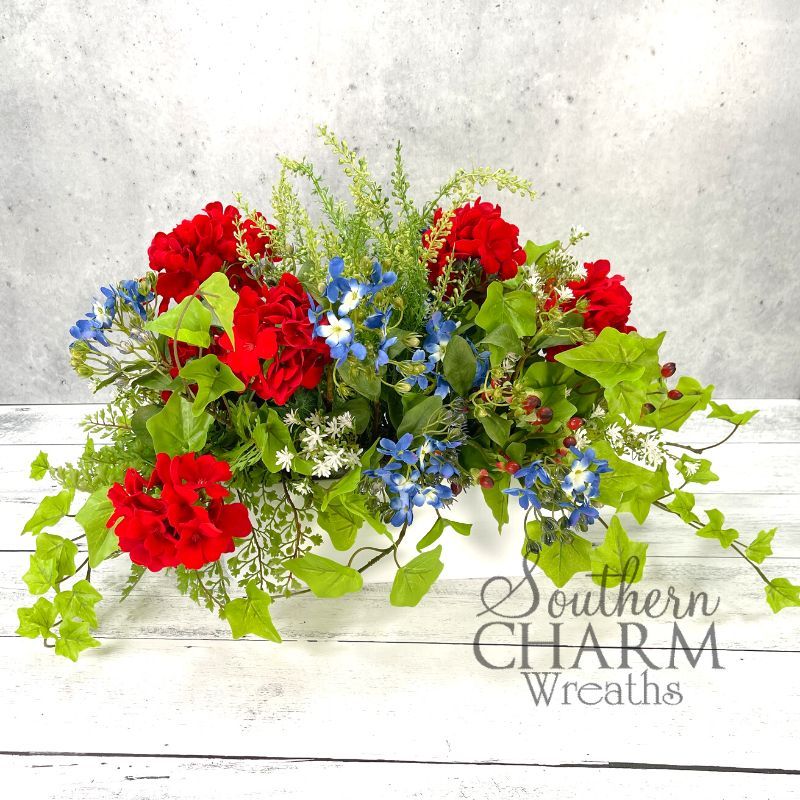
You want everything to be just right when celebrating this country’s birthday, right? Friends, family, and all who are FREE because of the BRAVE will love this beauty of an arrangement. It will look great to decorate your home in the most patriotic way. The red, white, and blue flowers paired with stunning greenery all together in this horizontal container are the perfect touch to your table.
For this piece, I wanted to create a look that resembles more what would be placed in your front yard planter box. That is why I did something a little different from my usual designs. I decided to group my florals together, as opposed to a traditional table arrangement where they are placed in all sorts of directions/angles to create a stunning visual. But I think this turned out pretty stunning even with a break from my normal designs. I hope you agree!
Working with florals doesn’t need to be hard. It is really quite simple if you allow yourself to take some risks and have some fun. Doesn’t that sound like what America is all about? Risks and fun! Let me show you how to create this amazing display of flowers paired with greenery in the simplest of ways. Keep reading to find out how!
This post may contain affiliate links for your convenience. Click here to read my full disclosure policy.
Supplies For This Project
- Long Horizontal Container
- Foam Blocks
- Red Focal Flowers
- Blue Filler Flowers
- White Filler Flowers
- Greenery
- Wire Cutters
- Glue Sticks
- Faux Moss

How to Make a Horizontal Patriotic Table Arrangement – Step by Step Tutorial
1. Prepare The Container
First, look at your container – does it have an obvious front and back? Some containers will have graphics or images on the front. If yours does, keep this in mind as you design the horizontal table arrangement.
Then, begin to insert the florist foam blocks. I dipped my foam into melted glue sticks and glued it to the bottom of the container. You can use either Styrofoam or desert foam. Use a wooden floral pick to keep the blocks together.
Keep adding foam until it reaches the top of your container. Fill your container completely with the foam too. You might have to cut some blocks into thinner shapes so that they fit on the sides of the container.
2. Layer With Moss
Take some faux moss and begin filling the top of the container completely. Keep adding moss to the corners and every side of the container so that you can’t see the foam blocks anymore.
Use wire to secure the moss to the foam blocks.
3. Prep Your Greenery and Florals
Begin to trim your florals and greenery into sections from main bundles where needed. Cut off tags and stems to fit the length desired for this project. Play with placement so you have a good visualization before you start cutting.
Remember this design will look more like a traditional planter box. Much different than a regular floral arrangement you typically find on table decor. Remember that when you trim the stem, always cut at an angle. This way, it will have a sharp edge that will stick into the foam easier.
4. Begin Adding Greenery
Start with a piece of serum greenery, cutting at an angle, to help with easy insertion into foam. Dip in hot glue. Insert directly into the foam and place it in the center of the container. Have greenery cut at different heights to make it appear more natural. Fill in a section of your foam, remember that you are working in the bundles per each section.
5. Begin Adding Flowers
Let’s work some bright red geraniums into our planter-styled arrangement. Cut stems at different lengths to continue creating your natural look. Allow for space as you are adding.
Bend the flower’s stems. This gives it a realistic look. Play with placement and always step back to see how to make any adjustments where needed.
6. Insert Your Fern
Nestle your fern greenery, tucked right in front of all of those hydrangeas to fill in some space and add some new texture. I love the new shades of green too. Outside in planters, your plants tend to intertwine. So keep that in mind as you are placing. Turn and rotate your arrangement to see what looks good and what needs some attention.
7. Begin Adding Your Spiller
Your big Real Touch Ivy bundle is beautiful and the perfect look for the spiller effect you see in many planter boxes. Its natural tendency to drop down as low ground coverage will be perfect for this planter style box.
Trim tiny sections from your main bundle and begin to insert them into your foam base on the open section of your horizontal planter. Have them positioned so they provide height and some spill over towards the side of the container.
Pop in some pieces in the center to provide a natural-looking flow just like in real planter boxes. Play with placement and just have fun.
8. Begin Adding Your Blue Flowers
For the blue, I used Wild Blossoms. They are pretty like big, full hydrangeas, but are the right scale and size I am looking for with this planter box. But do not get me wrong, I do love a big, beautiful hydrangea flower in my arrangements.
Add some of your blue flowers in groups right into your foam, trying to maintain the natural look.
Keep some higher than others to create dimension and shape. They are individually placed, but I created a color-blocked area of all blues similar to what I did with the red geraniums. Continue to rotate your arrangement around as you work, making any adjustments you see fit.
9. Adding Your Berries
Next, let’s add your Hypericum Berries stem to add a little more red. Trim pieces from the main bundle, giving you lots of pieces to add. These are a great pick because they will move up and down on your stem allowing you to determine the height you want to have for your arrangement.
Insert some red berries in a color block format on the other side to even out the red a bit. Keep them grouped close together. Work some entangled with your greenery and blue flowers.
10. Fill In
Mix up your florals where needed and make adjustments to height, crowding, and overall look. Replace, remove, or fill in where needed. If you have any areas showing that need to be filled in, you can fill in with some ivy or even little bits of moss to cover up the edges.
Try not to create big holes when removing from your foam. Use moss and extra pieces to fill in where you see fit. Adjust your fern, florals, and greenery where needed. Allow for your container to be seen.
This is so fun and different from a traditional floral arrangement. It will be beautiful and so special wherever you decide to place it. You can use this to help bring florals into your decor that tie in with the patriotic feel you are hoping to have in your home.
Watch The Video: How To Make a Horizontal Patriotic Table Arrangement
If you enjoyed this post, you might also like:
Liked this Patriotic Flower Arrangement Tutorial? Pin it for later!