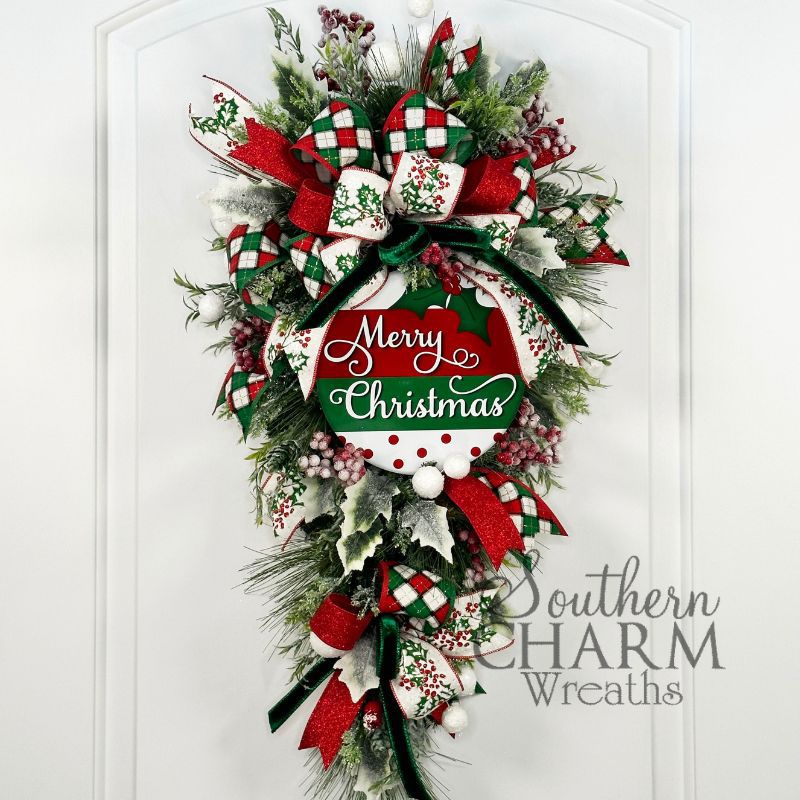
How to Merry Christmas Swag with Coach Laurie Anne
This Merry Christmas swag design is perfect for the holidays, filled with brightly patterned ribbons, wintery faux greenery, and just a touch of whimsy!

Merry Christmas swag
I love holiday designs that mix classic elements with fresh and fun accents – and this DIY Christmas swag hits the nail on the head!
With Classic Christmas colors, cute holiday picks, and the ultimate combination of pine and holly bush, this Merry Christmas swag would look perfect on anyone’s front door.
This post may contain affiliate links for your convenience. Click here to read my full disclosure policy.

Supplies for this project
You’ll need:
- 24” Swag base
- Round merry Christmas sign
- Silk wired ribbon
- 2 ½” Christmas argyle
- 2 ½” Holly
- 1 ½” Glittered red
- ¾” Velvet green
- Faux greenery
- Long needle pine
- Flocked greenery with pine cones
- Iced greenery
- Holly berry stem
- Christmas ball picks
- Florist picks or steel picks
- Hot glue
- Clippers
- Florist wire
How to make a Merry Christmas swag
1. Create your holiday bows
First up – the bows!
Measure a 20” tail of your argyle ribbon, pinch, and pleat. Then, measure 12” for a 6” loop, pinching and twisting to complete it. Repeat for a total of 4 loops, then trim an 8” tail.
For the glittery red ribbon, measure a 10” tail, then 12” for a 6” loop, repeating for a total of two loops.
For the holly ribbon, continue this process with a 10” tail, 10” for a 5” loop, and repeating for a total of four loops.
Finally, repeat these measurements for the green velvet ribbon, making a total of two 5” loops.
Wrap the center with florist wire, pulling tight to secure.
The second bow is much simpler!
Simply measure a 5” tail of holly ribbon, then 10” for a 5” loop, and trim the end.
Repeat these steps for the argyle ribbon, red glitter, and velvet green ribbon. Then, secure the center with florist wire.
2. Establish your foundation with greenery
Begin building the foundation using long-needle pine, adding symmetrically throughout the swag, building shape as you go.
Remember to secure the clippings with hot glue!
3. Attach the focal points
Attach your large bow near the top of your sign using florist wire, wrapping it around the spine of the swag.
Then, nestle the sign just below the bow, feeding florist wire through pre-punched holes and wrapping around the spine of the swag.
Finally, add your second, smaller ribbon near the end of the teardrop, securing it with florist wire and hot glue.
4. Add textured greenery
For more visual interest, begin adding flocked greenery throughout the piece, working around the three focal points.
Pull the greenery throughout your form, then go back and fill in any holes.
Repeat these steps with an icy greenery for even more texture and contrast!
5. Finish your Merry Christmas swag
For the finishing touches on this DIY Christmas swag, begin adding holiday ball picks throughout the piece for a pop of white and holiday fun!
You can also add extra ribbon tails under your Merry Christmas sign or anywhere that needs a bit more color.
Fill in any remaining holes with extra greenery, dovetail ribbon ends, fluff up the swag, and you’re done!
Watch the video: How to make a merry Christmas swag
If you enjoyed this post, you might also like:
- Red Magnolia Christmas Arrangement
- Make a Traditional Christmas Tree Topper Bow
- How to Make a Christmas Greenery Bell Wreath
Like this post? Pin it for later!

