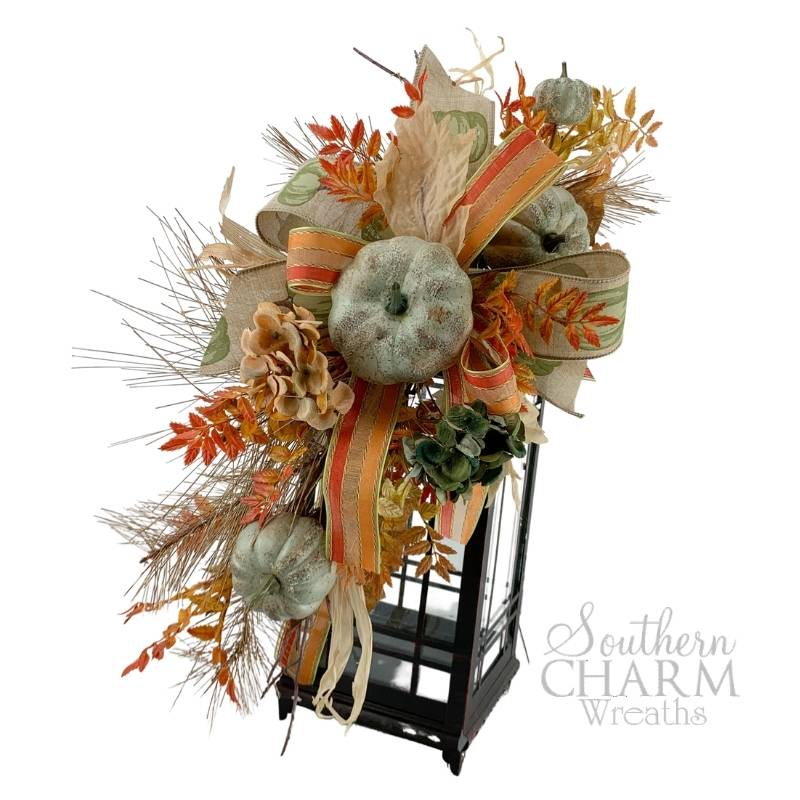
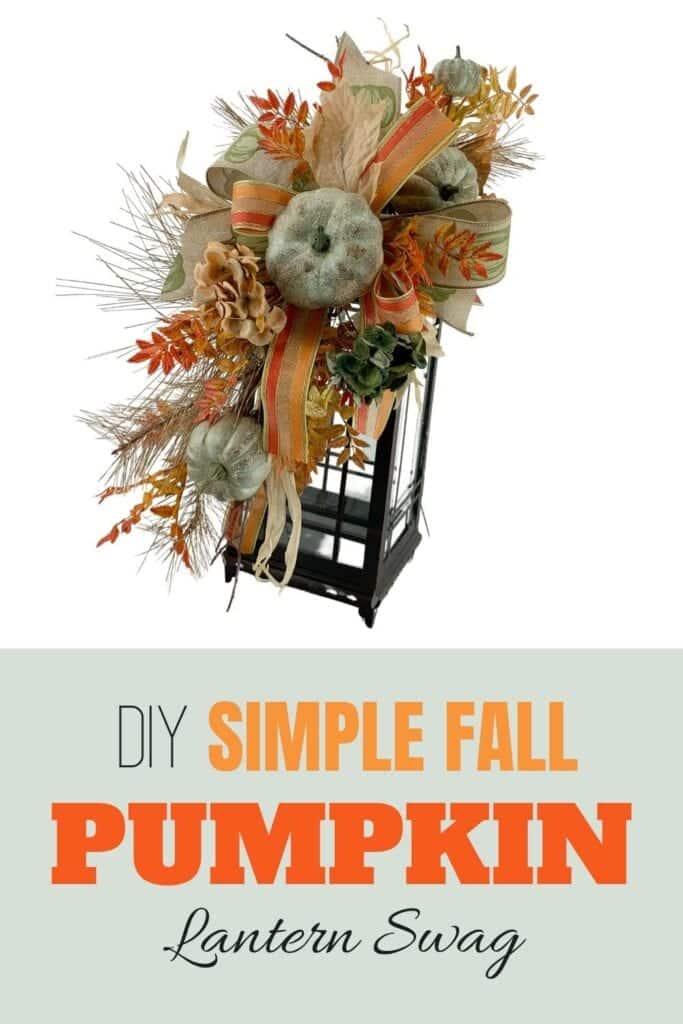
DIY Simple Fall Lantern Swag
It’s fall y’all! (Well not really, but that doesn’t mean we can’t start crafting like it is!) So today in the wreath shop I’m showing you my easy method for making lantern swags. No foam base required! Follow along with the tutorial below, to make this simple Fall Lantern Swag and let’s start getting your home or your shop into the Autumn spirit!
Fall Lantern Swag Supply List
This post may contain affiliate links for your convenience. Click here to read my full disclosure policy.
You’ll need:
2 Coordinating sprays (one long, and one a little smaller)
1 Fall filler bush
2 ribbons
And, of course, a lantern!
Most of the materials I used for this fall lantern swag came from Greenery Market on Etsy. They’re one of my favorite online shops for wreathmaking supplies and I’ve always gotten such good quality and service from them. Check out their shop here!
You’ll also need:
Wire Cutters
Zip Ties
Bind Wire
Rustic Wire
Florist Wire
Floral Picks
Hot Glue Gun
Hot glue
Craft Mat
How to Assemble a Lantern Swag Julie’s Way!
Step 1 – First you’ll need to prepare your sprays. You guys know I always start by fluffing up the sprays to give them a little more shape and dimension. After you get them looking how you like, you’re going to line them up on your craft mat so that the stems are facing each other and overlapping. I like to have them about one hand width apart.
Step 2 – Next, you’ll take apart your greenery bush so that you can glue in individual stems around the sprays. Make sure you leave the stems nice and long, because we aren’t gluing them in like we would on a wreath.
If you have some stems that aren’t quite long enough, you can always add a floral pick to the end to get them there.
Now add in the fillers to your arrangement so that the stems all line up with the stems from the two sprays. Make sure to keep the fillers behind all the elements from the sprays! Leave a few extra stems off to the side. You’ll need them later.
Step 3 – Once everything is in place, you’ll secure it by zip tying everything together. I like to use 2-4 zip ties for this just to make sure I catch all the stems from the filler.
Step 4 – Now it’s time to play with some ribbon! (Y’all know how much I like ribbon!) A nice coordinating bow is going to tie everything together and help hide the gap where all your stems are held together.
I made my bow with two 12″ loops of the pumpkin ribbon, and three 12″ loops of the orange accent ribbon. Then I added an extra streamer of each ribbon to the back of the bow to give it some extra tails.
You’ll have to decide what size loops you want based on the size of your arrangement. Watch the video below to see how I do this.
Step 5 – Now just take the wire that you used to tie off your bow, to secure it to the middle of your swag. You might need to make some adjustments here. I trimmed down a couple of my tails after I added the bow to make sure you could see the sprays well. Then just position all the loops and tails so that they blend well with the rest of the arrangement.
Step 6 – Next you’ll go back and grab those extra stems we left to the side before. Now that you can see how everything is coming together, you can go back in and attach them with bind wire. Make sure to wrap far enough down the stem so it doesn’t come off later.
Step 7 – And now it’s finally time to attach the swag to your lantern! Cut a piece of rustic wire and wrap it around the base of your swag, and then around the top of the lantern to attach it.
It might not look very good just yet, but don’t worry! We are going to work our crafty magic on it to get it looking just right!
After the swag and lantern are attached tightly together, we’re going to finish off the arrangement by giving it a more pleasing shape and making a few adjustments to the swag.
First bend the hanging part of the swag down toward the base of the lantern, and then bend the top of it back a little. (This might be easier if you watch how I do it in the video at about the 23 minute mark.)
Next go through and bend any pieces that look out of place, or fill in areas that look a little light. You can’t move it too far because remember everything is zip tied together. But just moving things around a little bit can have a big impact on the overall look of the arrangement.
Once you have everything in place, if you’ve got any leftover pieces, you can glue them in. Make sure you’re attaching them to the arrangement and not to the lantern. That way you can reuse the lantern for the next season!
And you’re done!
Tip: Ship lantern swags without the lantern attached to save on shipping and give your customers more options for displaying the piece. They’re great for banisters, posts, mantles etc.
DIY Fall Lantern Swag Video Tutorial
If you enjoyed this and want to learn to wreath the professional way, join me in our exclusive Wreath Making of the Month Club!

Happy Wreathing,
Julie
If you enjoyed this post, you might also like:
Fall Farmhouse Table Arrangement
Fall Deco Mesh Wreath Tutorial
Was this Tutorial Helpful? Pin it to save for later!
Julie, I love watching those talented hands. Great tutorial and hope I can do half as well as you. Beautiful!
Love this! Very good instructions,
Julie,
Love watching your tutorials. You do amazing work. I just a little hesitant about working with florals. You give me hope.
Thank you and thanks for watching!
Absolutely beautiful