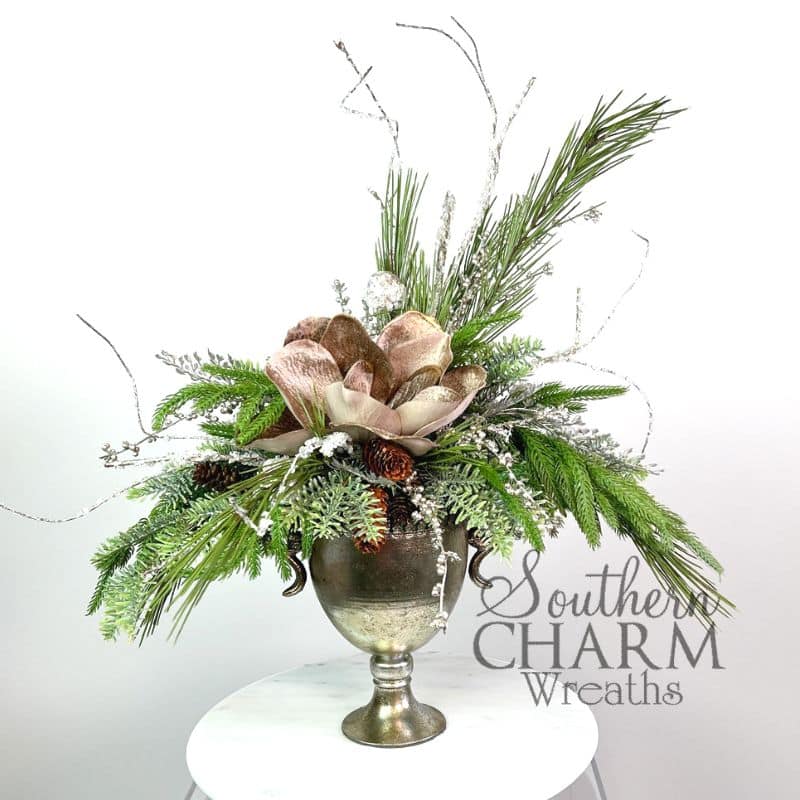
DIY Artificial Flower Christmas Table Arrangement in Urn
Display or sell this stunning holiday arrangement! Learn how to make an easy DIY artificial flower Christmas urn arrangement in minutes.
Easy Christmas table arrangement
Around the holidays, I love combining a little vintage charm with some rustic beauty – and that’s exactly how this artificial flower Christmas table arrangement came about. The urn has an antique allure to it, and I had a feeling it would be the perfect Christmas centerpiece.
Making floral arrangements with artificial flowers is so much easier than you might think! Once you learn the basics of layering and eye movement, you’ll be able to recreate different designs for each season.
Even though I called this a Christmas table arrangement, you can set this out all winter long. The evergreen branches look right at home from November until March.
You won’t believe how simple the tutorial is! Follow along in this post or watch the video as I make it, step-by-step.
This post may contain affiliate links for your convenience. Click here to read my full disclosure policy.
Supplies for this project
- Urn
- Foam Blocks
- Amorpha Pine Greenery
- Cedar Spray
- Noble Fir Spray
- Various Evergreen Sprays and Branches
- Beige Poinsetta
- White Filler Flowers
- White Ornament Picks
- Wire Cutters
- Glue Sticks
- Faux Moss

How to make this artificial flower Christmas arrangement – Step by step tutorial
1. Prepare the container
If you watch the video, you’ll see that I already prepped the container before I made the arrangement. Here’s a quick overview explaining how to prep a container for a faux floral arrangement.
- Fill your container with something that will give your artificial flowers a base they can stick to. If your planter already has dirt or soil, use it – don’t dump it out. If you are using a brand-new container, fill it with foam.
- Either stack and glue foam blocks into the container until they reach the top. Or spray some foam filler into the container. I used some similar to Gaps and Cracks, except it was made for floristry, not insulation.
- Be careful not to add too much – always leave room for expansion. Fill it up to about 2 inches from the top because it will expand and reach the top of the planter.
- Top it with moss. Add green Spanish moss to the top of the foam, giving it a very light coverage. Once you cover the entire top, secure it to the foam with wire.
2. Prep your greenery and florals
Set the planter aside for a moment and grab the greenery and florals you will use.
Prepare them for use by trimming them shorter, removing any tags that are on them, and fluffing out any flat bundles or leaves.
3. Add the greenery
Start with the longest and thickest piece of greenery. This will be the very bottom of your floral arrangement. Once you are satisfied with where it will sit, dip the end of the pick into some melted hot glue and then stick it back into the foam block.
Fluff out the green leaves and make them look more natural and full.
Next, add contrasting sprays and colors of greenery on top of the first sprays you glued down. Measure them to the height you want, and then trim them. Dip the end into the hot glue and insert it into your planter.
4. Fill in the front and back
After the sides have plenty of depth, you’ll notice there are empty spots in the front and back of the urn. Grab shorter pieces of the unused greenery picks and add some height to the arrangement.
Continue to add small pieces of evergreen picks and point them up, not lying down. When they face vertically, you give the arrangement some height and definition.
5. Add the long-needle pine
Be creative and add the long-needle pine sprays wherever you see empty spots. I added some smaller pieces to the sides of the arrangement and along the bottom. These are fantastic filler pieces.
Then, add the longer pieces to the top, and stick them vertically so they almost stand completely upright. You’ll see your arrangement start to take a wonderful shape at this point.
6. Insert focal poinsettia
Next, let’s add a large beige poinsettia to the middle of the arrangement. Since this poinsettia is so large, you only need to use one of them. It fits perfectly right in the middle of the arrangement.
7. Add ornament picks
Keep the poinsettia as the focal point, but add a few glittery ornaments throughout your arrangement. I added mine in the back and around the sides of the poinsettia.
8. Add frosted sticks
If you have some snowy sticks, add them to the arrangement to give it some contrasting colors and wintery touches. These are very long, so they also work to add height to your design too.
9. Fill in with filler flowers
Finally, add some filler flowers throughout the arrangement so that any empty spots are filled in. This is the time to fluff everything out too.
Watch the video: How to make an artificial flower Christmas arrangement in an urn
If you enjoyed this post, you might also like:
- DIY Holly Jolly Deco Mesh Christmas Wreath
- DIY Traditional Christmas Santa Wreath
- How to Make a Simple Traditional Christmas Teardrop Swag


This is absolutely beautiful and very dramatic with a variety of Christmas greenery with one large focal flower, colors compliment each other very well and just Unique and Special!