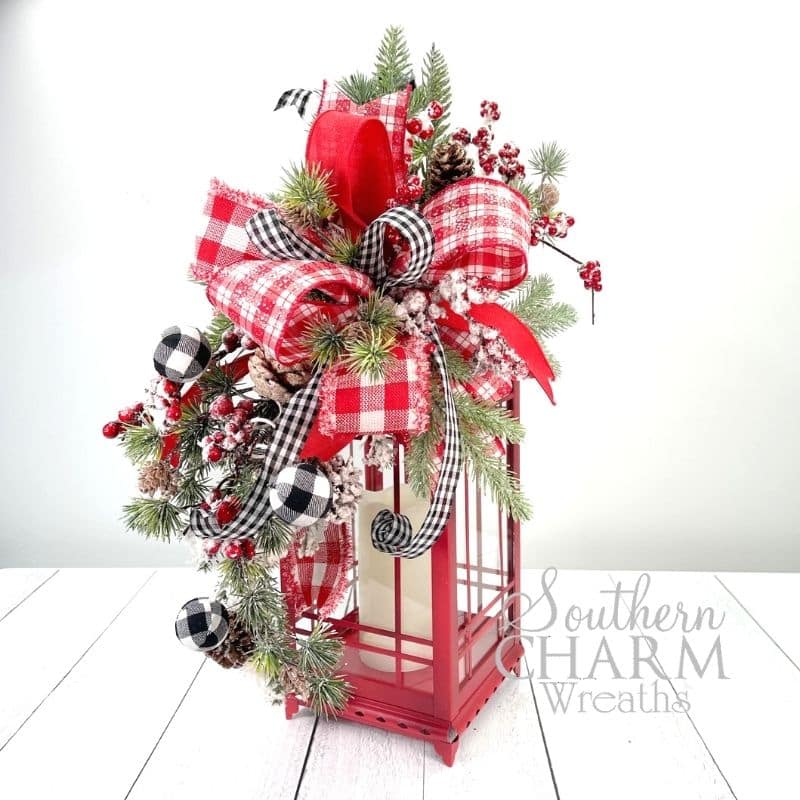
DIY Country Christmas Lantern Topper
This lovely DIY country Christmas lantern topper is filled with picturesque plaid and buffalo check ribbons, and seasonal berries. Follow this tutorial and make your own!
How To Make A DIY Country Christmas Lantern Topper
I adore how nostalgic lantern toppers are! Here in the south, we love big and beautiful centerpieces and home decor items, so this showy lantern fits right in.
A stunning lantern swag or topper is basically a floral arrangement that you attach to any lantern you already have. This project is super easy to customize. Make the bow as big or as full as you want it. You can even make a different topper for each season and holiday.
These bows and toppers aren’t just for lanterns either. Take the bow off and add it on top of your mantel or decorate a banister. You can even add it as a cute Christmas tree topper. This topper will add a whimsical and lovely touch to your holiday decorations.
This post may contain affiliate links for your convenience. Click here to read my full disclosure policy.

Supplies For This Project:
- Evergreen Variety Leaf Spray
- Flocked Winter Berry Spray
- 2 ½” Red Plaid Ribbon
- 2 ½” Red Ribbon
- 1 ½” Buffalo Check Ribbon
- 20” Lantern
- Buffalo Check Picks
- 22 Gauge Wire
- Zip Ties
- Wire Cutters
- Hot Glue Pot With Glue
How To Make A DIY Country Christmas Lantern Topper: Step-By-Step Tutorial
1. Choose & Shape Your Greenery
One thing that trips people up a lot is choosing the greenery because there are lots of different shades of green, even with evergreen winter sprays. Since the greenery is going to be the base of the swag, you should choose the shade of green carefully.
I used a heavily flocked winterberry spray as the base of my swag. It has shades of blue-green in the needles, so I decided to build around that. I paired it with other blue-green sprays in my collection.
After you pick out the greenery you are going to use, begin to shape it. Pull the ends away from each other, so they look realistic.
Attach the greenery pieces together by laying one piece on top of the other one and intertwining the stems within each other. Once that is finished, you can look and see that the bottom of your swag is complete.
2. Create The Top Of Your Swag
The top only needs to be 1/3 of the length of the bottom, so trim your greenery pieces to be shorter. I also cut off some excess stems because I didn’t want the top to be as full as the bottom either.
If you have a spray with larger items like pinecones, remove them. Don’t throw them away – you can use them later on in your wreaths or other projects.
Use a few zip ties to attach the two ends together, leaving a space for the bow in the center. Turn your swag to the back and use wire cutters to cut off any excess stems that you don’t need.
3. Make A Bow
Start with a 12” tail and pinch, then make two 12” loops, pinching and twisting in the center. Cut the tail. Repeat the same with the second layer of 2.5” ribbon, making 12” tails and 12” loops. Shape your bow as you go by adjusting loops towards the front. When you have two loops from the first ribbon, cut the tail and create loops from the second ribbon.
Use as many different sizes and colors of ribbon in your bow as you want. I used three different colors, finishing with the smallest one last. When you are finished making your bow, use floral wire to secure the center of the bow.
4. Add Additional Picks
This step is completely optional. I wanted to incorporate some fun buffalo-check round picks. I thought they matched the black and white ribbon really well.
Either use a small zip tie to add it to the swag or just use some wire to attach them.
5. Attach The Bow
Attach the bow by feeding the wire through the swag, so it is secured. Keep twisting the wire until the bow is completely immovable.
6. Add Topper To Your Lantern
Use more floral wire to attach your topper to your lantern. You can use lanterns anywhere from 20-30” tall. Just make sure that your topper doesn’t cover the whole thing.
Finish the lantern topper by shaping it. Stand back and adjust everything so that it is as fluffy and showy as you want it to be.
Watch The Video: How To Make A Country Christmas Lantern Topper
If you enjoyed this post, you might also like:
- 10+ Lantern Swag Ideas You Must Make
- Frosty Winter Lantern Swag Tutorial
- How To Make A Christmas Lantern Topper
Like this post? Pin it for later!

Love this !!! Thank you !!
Thanks Julie!! I’m going to make one also!! I love it!!?
Julie I love your tutorials. I am changing my email address in a few weeks due to a move. How do I change it so I keep getting your tutorials?
Hey Debbi – Please contact us to update your email address here: https://southerncharmwreaths.com/contact/
good morning Julie my question is I have an old oil Lantren. I don’t use it with oil I use miniature lights. how would I go about adding floral to it?
keeping in mind that it’s just the reverse of the lanterns that you’re showing with the toppers.
You can put it in the center of a small wreath, lay small lantern swag in front or secure around the bottom?
I LOVE the solid color as it “Does bring everything together…I do this all the time….Too much pattern, makes your “eyes go crazy!”…lol
Just Stunning! Perfect, not “over busy”…and as “with a wreath or small evergreen tabletop tree…Cut your ribbon tails so “they do not cover the greenery so much.Just Beautiful Julie!
Yes I love watching your videos but could you slow it so I can the steps when putting wreaths or lantern toppers together.
Thank you,
Tammy’s
Hey Tammy – You can find more detailed videos inside our Wreath Making of the Month Club. You can learn more here:
http://www.southerncharmwreaths.com/wreath-club
#Replay
Thanks as always for sharing your gift.
I especially love the colors in the bow, and fun greenery.
You are such a patient teacher.