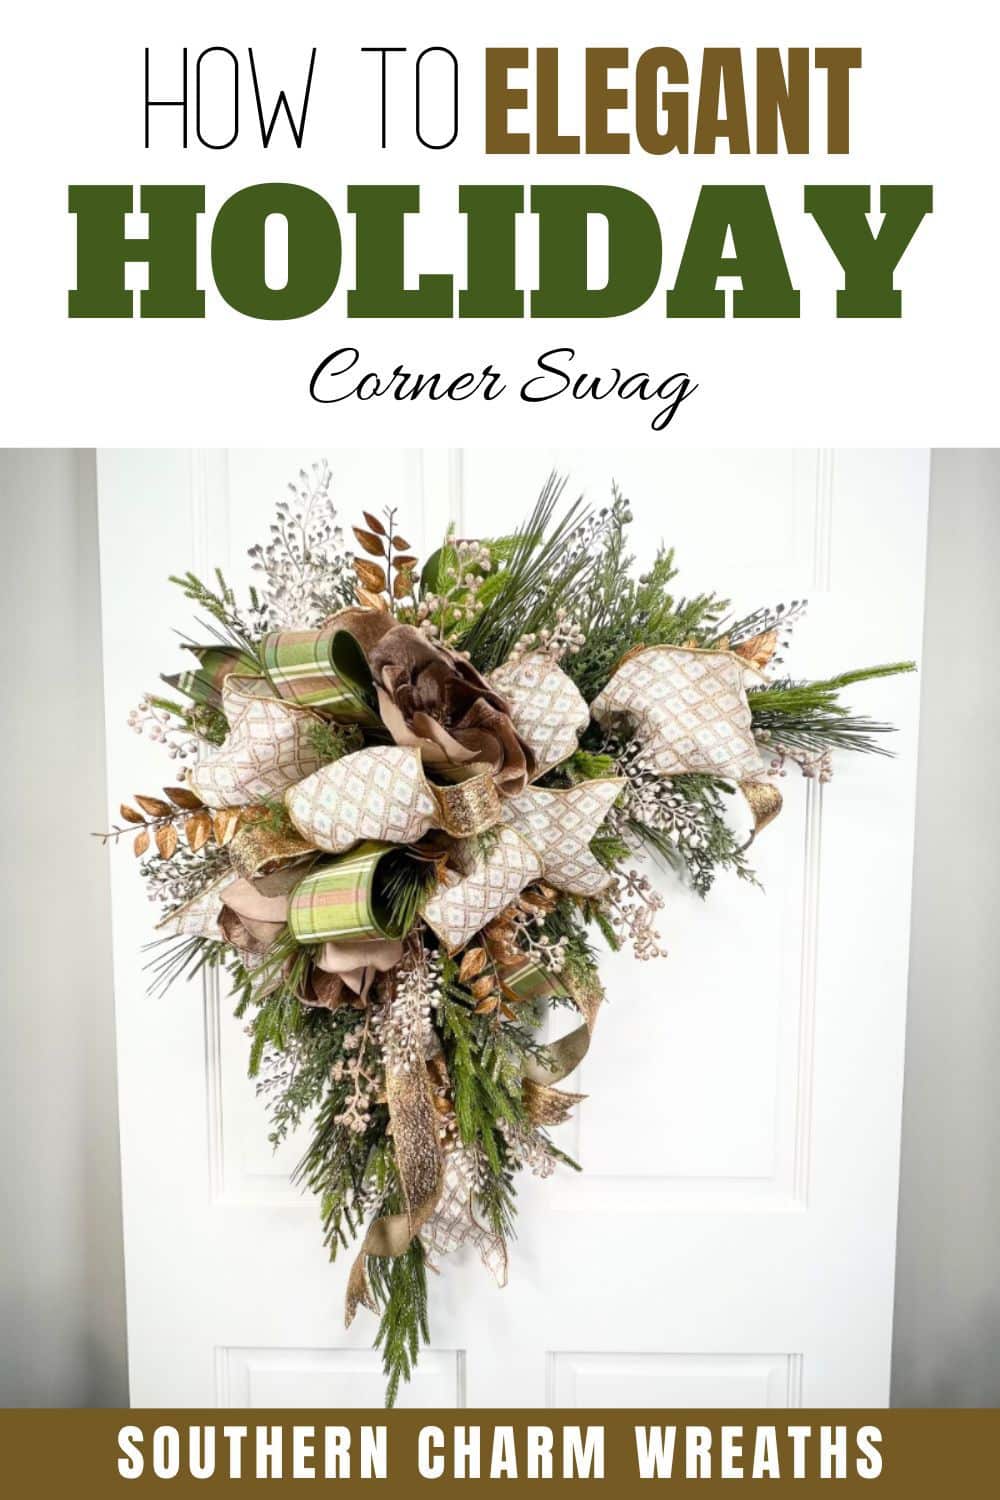
DIY Elegant Holiday Corner Swag
Create this elegant holiday corner swag design, complete with textured greenery, mauve magnolias, and shimmery champagne accents.
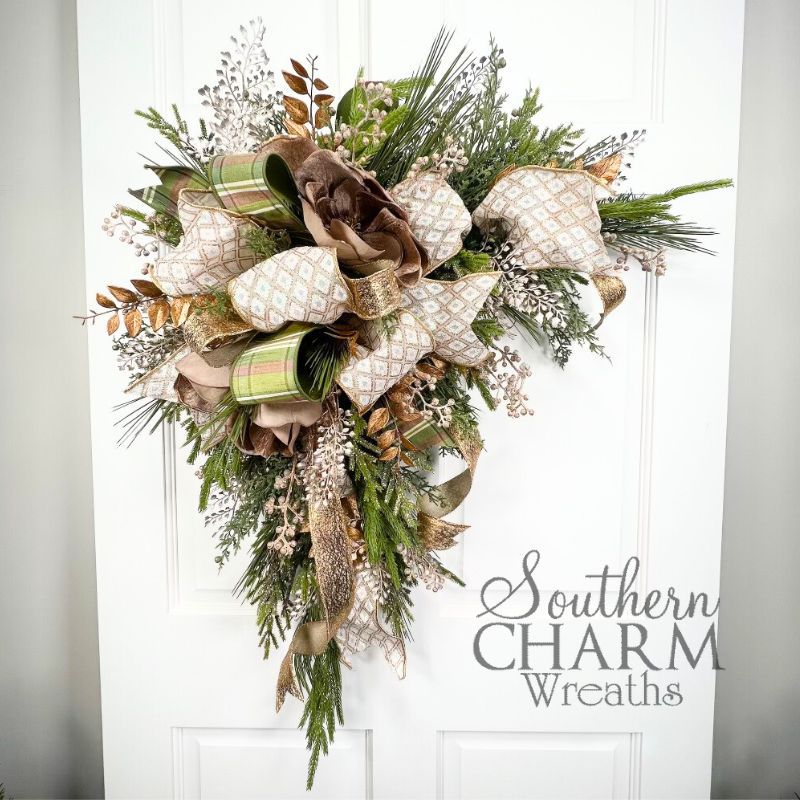
Holiday corner swag
This holiday corner swag exudes a truly special subdued beauty.
While I’m a big fan of “extra” designs, there’s something especially captivating about a subtle color palette with oodles of texture.
And this elegant swag design hits that mark!
In this post, I’m sharing how to make this gorgeous holiday corner swag, made with shimmering extras, for just a pop of glamor.
This post may contain affiliate links for your convenience. Click here to read my full disclosure policy.

Supplies for this project
You’ll need:
- 36” swag base
- Florist wire
- Hot glue
- Clippers
- Silk, wired ribbons
- 4” copper diamond
- 2 ½” rustic plaid
- 1 ½” copper
- Assorted greenery
- Long needle stem
- Cedar
- Norfolk pine
- Glittery pine
- Silk flowers
- Mauve magnolia
- Bronze leaves
- Champagne maidenhair fern
- Champagne berries
How to make a holiday corner swag
1. Prep your holiday corner swag
First, prep your swag by bending in the middle at a 90-degree angle. Then, clip a few needles at the center to make room for your bow.
2. Make the bow
Next up – the bow!
Measure a 24” tail of your diamond ribbon, pinch, and pleat. Then measure 16” for an 8” loop, pinch, and twist. Repeat for a total of two loops, then trim the tail.
For your plaid ribbon, work on top of your first layer. Measure a 10” streamer, pinch, pleat, then 16” for an 8” loop, pinch, and twist. Repeat for a total of two loops and trim the tail.
Next, repeat these steps for your final copper ribbon.
As a finishing touch, add one last loop of diamond ribbon to the top, measuring 14” for one 7” loop. Pinch, pleat, and trim.
Secure the center with florist wire or a zip tie, then attach it to the center of the swag.
Make sure to separate your loops and steamers, dovetailing some ends for a beautiful variety.
3. Add mixed greenery
Next, we’re going to use a variety of greenery to help build shape.
Begin with long needle pine, sticking pieces behind the bow and moving outwards. Use hot glue to secure.
You can also use this pine to create length at the end of the swag.
Then, evenly distribute cedar greenery for bulk, and later, Norfolk pine for more depth.
4. Include focal flowers
For our focal flowers, we’re using beautiful muted mauve magnolias with bits of copper shimmer around the edges.
Trim the magnolia leaves, then attach two magnolias to the swag, one on each side of the bow for balance.
5. Add festive texture
Now for the fun part – festive extras!
Pepper in glittery pine, bronze leaves, maidenhair fern, and champagne berries throughout the arrangement, aiming for balance and variety.
You can also glue in any remaining table clippings and magnolia leaves to fill any holes.
And with that, your elegant holiday corner swag is complete!
Watch the video: How to make an elegant holiday corner swag
If you enjoyed this post, you might also like:
- Make a Traditional Christmas Tree Topper Bow
- DIY Artificial Flower Christmas Table Arrangement in Urn
- DIY Traditional Christmas Santa Wreath
Like this post? Pin it for later!