DIY Galvanized Farmhouse Wall Pocket Arrangements
In this video, we’re making DIY Galvanized Farmhouse Wall Pocket Arrangements just in time for Mother’s day. This post may contain affiliate links for your convenience. Click here to read my full disclosure policy.
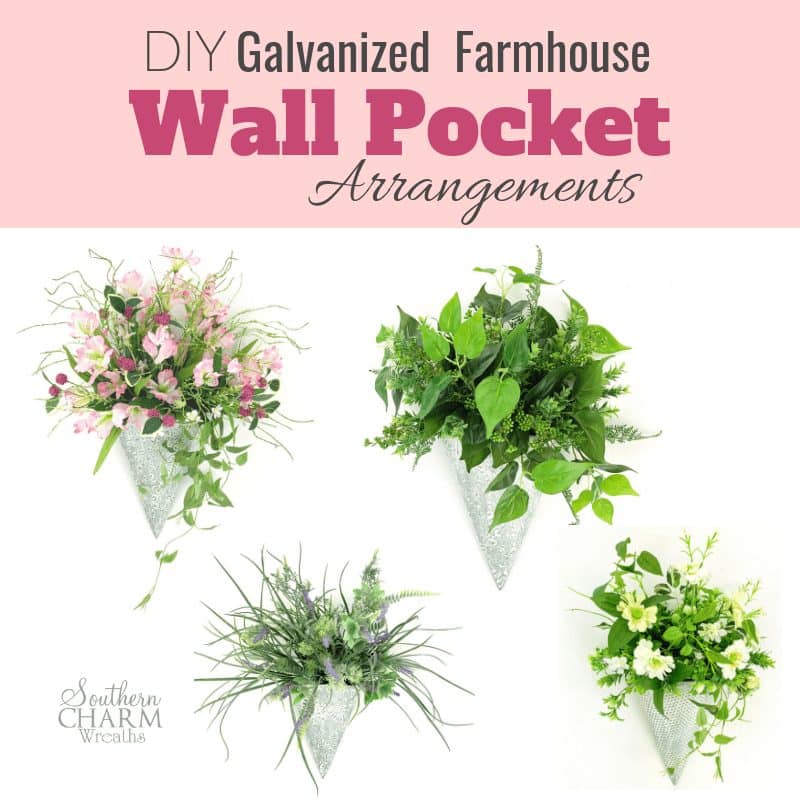
Today I’m showing you how to make DIY Galvanized Farmhouse Wall Pocket Arrangements. I love how these turned out with using all the beautiful silk flowers. They are so versatile and perfect for your farmhouse home décor, decorating for a wedding or to give as a gift. You know Mother’s Day is just around the corner!
[Tweet “DIY Galvanized Farmhouse Wall Pocket Arrangements”]
Supplies
Triangle Tin Wall Pocket Planter Set
Pink Astromeria
Mixed Purple Lavender Bush
Green Leaf Bush
Green Bead Grass
Clematis Foliage Vine
Lavender Mix
Plastic Green Bush
Cream Plastic Berry Bush
Mixed Cosmos
Real Touch Green Foliage
Green Budding Lilac
Styrofoam block
knife
Floral pins
Scissors
Wire Cutters
Hot glue gun
glue sticks
craft mat
Steel Pick Machine
Find my complete list of beginner wreath making tools here.
How to Make DIY Galvanized Farmhouse Wall Pocket Arrangements
Step 1 – Use a knife to cut the Styrofoam to fit inside each wall pocket planter. This can take a bit of trial and error – trimming it, placing it in to check it and trimming again as needed.
Once the Styrofoam is cut to fit, add Gorilla glue to the back side of the Styrofoam and cover that with hot glue. Allow to cool.
Add moss to cover the Styrofoam using floral pins.
Repeat these steps for each planter.
Step 2 – For the first planter, I started with the lavender. Separate the stems and cut them at an angle. Then hot glue each stem and place into the Styrofoam in the planter. I then continued with the grasses until the first planter is full and complete.
Step 3 – For the second planter I started the pink Astromeria. I then added some purples and a clematis vine. Finally, I added the bead grass bush, once again separating the stems and hot gluing the stems into the Styrofoam.
Tip: If some of the Styrofoam is showing in the back, use leftover leaves to cover it.
Step 4 – Complete the next planter, with greenery and cream flowers using the same process.
Step 5 – For the final planter, I used a mix of greenery. Remember to take into consideration the textures and colors of the greenery and use a nice mix.
Video DIY Galvanized Farmhouse Wall Pocket Arrangements
Wasn’t this fun? Comment below and tell me which one was your favorite! Something different than a wreath today and I know you can make one too! Remember, you don’t have to have the exact same plants that I do or even the same planters. You use what you love and what goes with your décor, the process stays the same.
If you enjoyed this and want to learn to wreath the professional way, subscribe to our Wreath Making of the Month Club!

Happy Wreathing,
Julie
If you enjoyed this post, you might also like:
How to Make Dollar Tree Mother’s Day Wreaths
Love the pink one, followed by the white one.
Absolutely beautiful! Enjoyed watching this so much! Can’t wait to get started! You are such a blessing and have helped me with my florals. Thanks so much for sharing your gifting with us! God Bless xo
I’ve been using some birdcages with assorted greens with butterflies & bees. I really want to try these. So beautiful! Thank you for sharing this gorgeous idea!