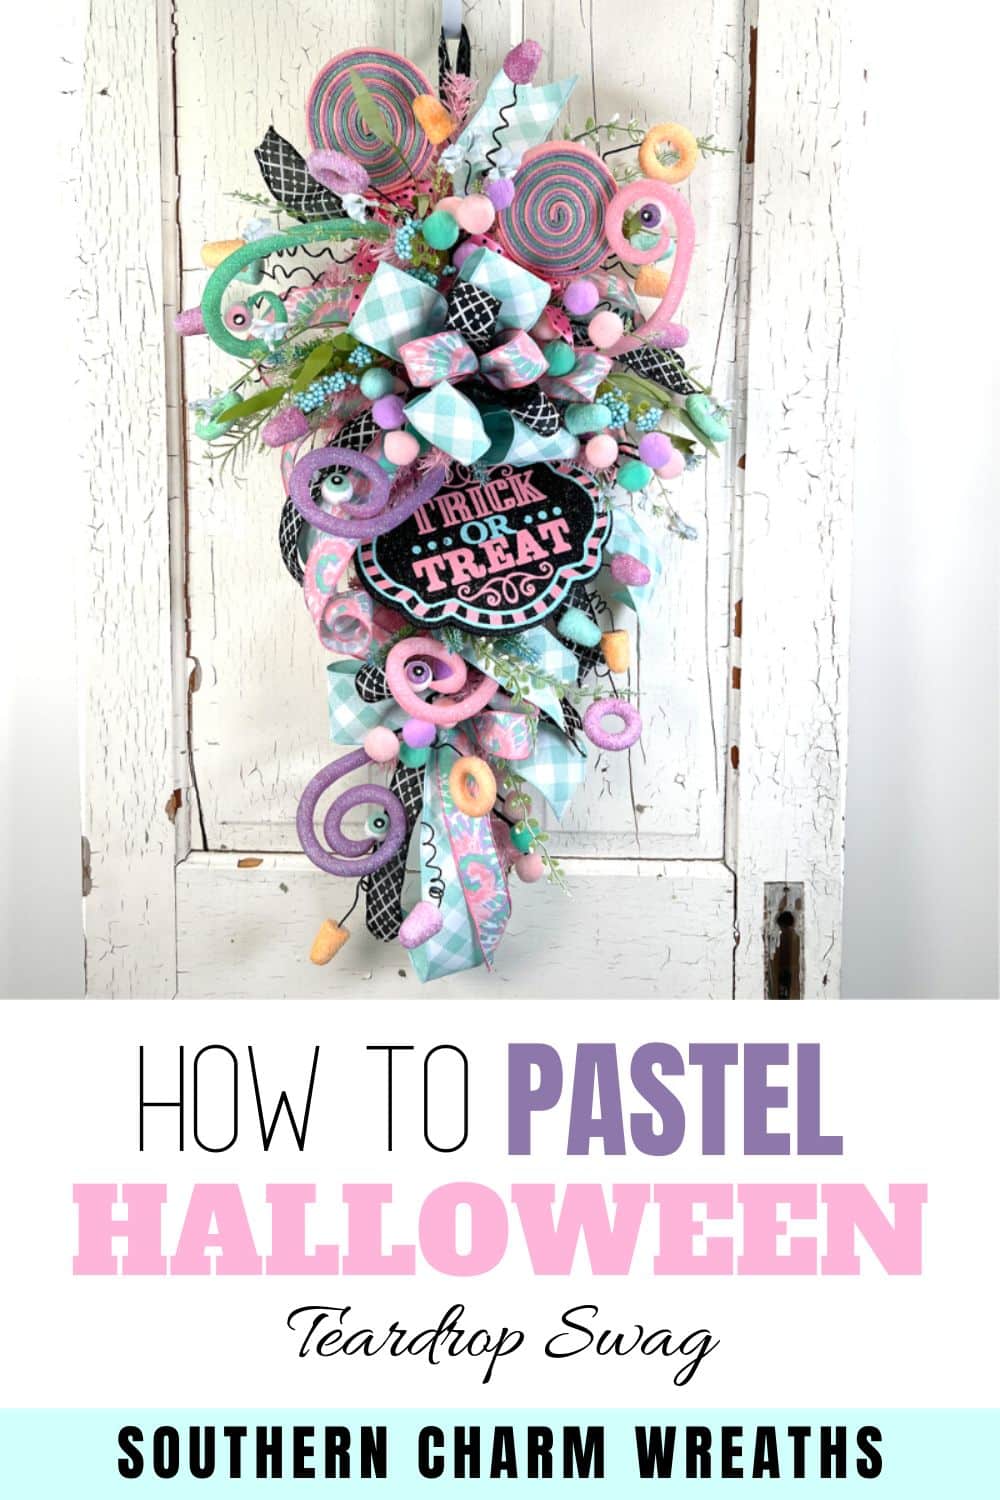
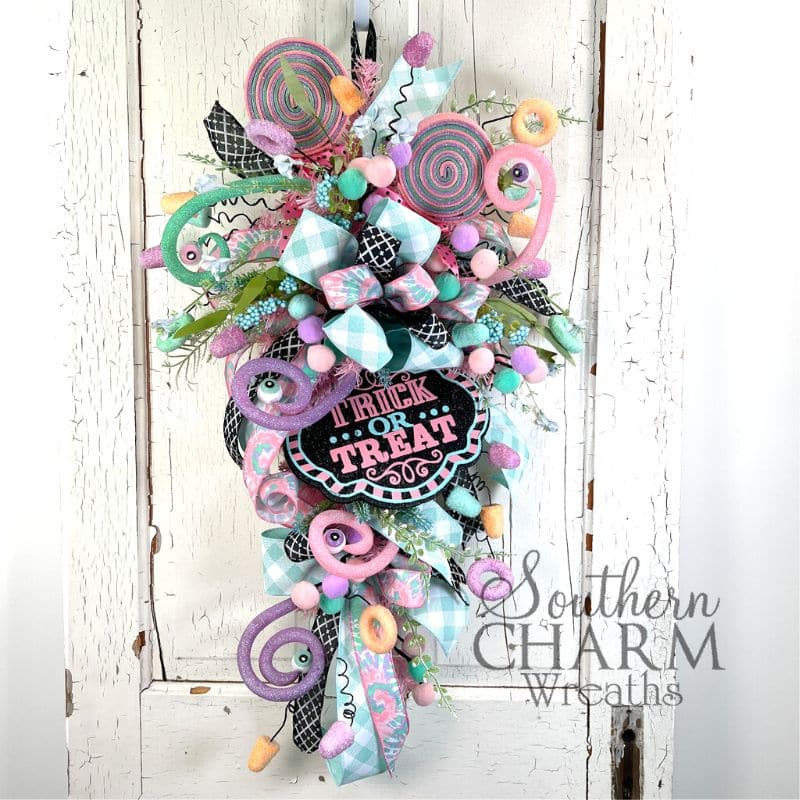
DIY Pastel Teardrop Halloween Swag Wreath
Prefer pastel cuteness to dark and spooky? You’re going to love this fun Halloween swag. It’s made with a sugary sweet color palette, soft blue florals, and whimsical candy picks that would pique anyone’s interest!
How to make your own pastel Halloween teardrop swag
Listen, dark orange and black are Halloween staples, but I’m all about pushing the boundaries on color palettes. Today’s Halloween swag does just that, with whimsical pastel colors standing out in a whole new way.
This pastel teardrop design is family-friendly and just so inviting. The bobbles and picks remind me of the interior of a candy shop – the perfect thing for Halloween, wouldn’t you say?
Follow along as I show you how easy it is to make this sweet (and just a touch spooky) design.
This post may contain affiliate links for your convenience. Click here to read my full disclosure policy.
Supplies for this project:
Some of the items from this wreath can be found at Greenery Market.
- 1 – 24″ Pink Pine Teardrop Swag
- 1 – Pink Mint Trick or Treat Sign
- 1 – 2.5″ Mint Diagonal Plaid Ribbon
- 1 – 1.5″ White Black Argyle Glitter Ribbon
- 1 – 1.5″ Tie Dye Ribbon
- 1 – Gumdrop Spray
- 1 – Lollipop Spray
- 1 – Pom Pom Spray
- 1 – Swirly Eyeball Spray
- 1 – Turquoise Flower Spray
- Florist Wire
- Glue Pan
- Wire Cutters
- Scissors
- Staple Gun
DIY pastel Halloween teardrop swag: Step-by-step tutorial
1. Prep the swag
Before we even get started, we need to set the swag base on an easel and pull all the wire pieces apart.
Prep your swag by positioning the pieces so they are nice and full. Fluff them here and there to make sure your swag is ready to have adorable bows, greenery, florals, and embellishments added to it.
2. Tie two bows
After your swag base is all prepped, you are ready to make the bows.
Start with your 2 ½” blue ribbon. Measure a long streamer, then 12” for a 6” loop. Pinch, pleat, and twist. Repeat these steps for a total of four loops, then trim a short streamer. Hold the centre of the bow in your hand as you continue to layer ribbons.
Repeat this process with your black ribbon, tying two 6” loops on top of your blue base. Then, repeat these steps with your pastel tie-dye ribbon, tying three 6” loops.
Fluff your ribbon loops so that they’re evenly spaced and alternating in color. Turn your hand over like you’re checking your watch, lift your pointer finger, and roll florist wire around the centre of your bow.
Pull the bow towards you as you pull the wire away from you, twist the wire ends to secure the center of the bow.
Repeat this process for your miniature bow, tying just one 5” loop for each kind of ribbon.
3. Secure the bows
Attach the bow to your swag base with the wire that you used on your bow. Twist the wire together after you push it through the base. Make sure you take the time to fluff and arrange your bow – this step is what really makes your bow look pretty!
Take a moment to maneuver the long streamers to the left side of your swag.
Then, attach your miniature bow to the end of the swag using florist wire. Roll and dovetail your ribbon ends until you achieve the desired look.
4. Attach the sign
Hot glue cable mounts to the top and bottom of your sign. Feed florist wire through the mounts and use this to anchor your sign to the spine of the swag, directly under the bow. I attached mine slightly off-centre to the right.
5. Add candy picks
This is the best part of the process because it’s where your creativity takes over!
As the largest picks, we’ll start with the lollipops; begin adding these picks behind your top bow loops, securing the stems with hot glue.
Next, add the swirly eyeball picks. Scatter them around the swag until you’re happy with the placement, then secure each with hot glue. Be sure to space out the different colors!
Add a tall gumdrop pick to the back-centre of the design for a cute bit of height. Then, work with smaller picks around the sides to build out the shape and add even more whimsy to the design. I focused a bit more candy on the right side of the swag to even out the ribbon streamers on the left.
Finally, divide your pom-pom sprays and evenly distribute the clippings throughout the swag, securing them with hot glue.
Use your creative judgment and create a well-balanced swag. To keep it balanced, whenever you add a pick on one side, add another one on the other side.
6. Fill in with turquoise florals
After you are satisfied with how many picks and baubles your swag has, take a step back to assess it. The final step is to fill in any empty spaces with a blue floral spray and its greenery.
Separate the filler spray and hot glue pieces around the outer edge of the design for extra fullness. You can also glue smaller pieces throughout the core of the design.
7. Halloween swag final touches
With your leftover greenery, florals, and embellishments, start filling the empty holes you see on your teardrop swag. You may find that all it needs is a nice floral or a piece of greenery to make it look complete and finished.
Fluff and arrange your bows and enjoy the finished product!
Watch the video: DIY Halloween swag
If you enjoyed this post, you might also like:
- Deco Mesh Trick Or Treat Wreath
- How to Make a Whimsical Halloween Door Swag
- DIY Halloween Witch Wreath
Pin this tutorial to save it for later!