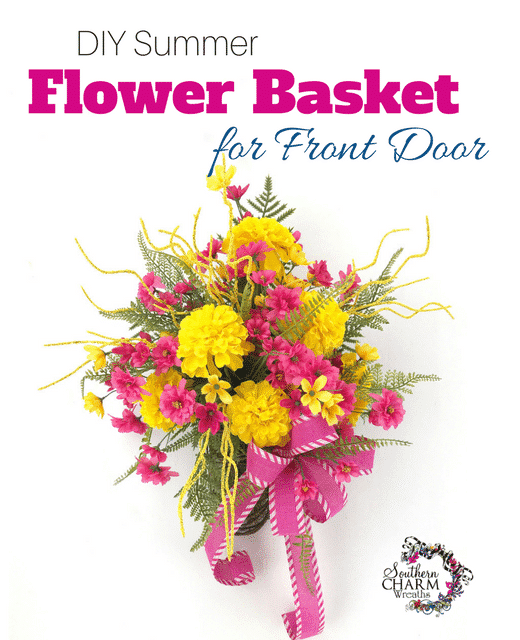
DIY Summer Flower Basket for Front Door
In today’s video, we’re making a fun Summer Flower Basket for your Front Door! This is a perfect gift for a hostess or teacher or even a get well surprise. This post contains some affiliate links for your convenience. Click here to read my full disclosure policy.
DIY Summer Flower Basket for Front Door
For this project, we’re making a DIY Summer Flower Basket for your Front Door. This simple project will brighten up any home and makes a fabulous gift. Today’s project uses summer colors and flowers but you could change this up for any occasion. Here’s how to make it:
Supplies
- Wire basket (Hobby Lobby)
- Silk flowers & greenery
- Styrofoam
- Sheet moss
- Floral pins
- Glue Gun or Glue Pan
- Glue Pillows for Glue Pan
- Optional – Stemming Machine with Picks
[Tweet “How To Make a DIY Summer Flower Basket for Front Door”]
How To Make a DIY Summer Flower Basket for the Front Door:
- Cut the Styrofoam (I like to use an old serrated knife from the kitchen) to fit the basket.
- Cover the Styrofoam with sheet moss (you could also use Spanish moss) using floral pins to adhere it. Note: To give mine a professional look, I covered the back of the Styrofoam as well.
- Place the Styrofoam covered in moss in your basket.
- Choose the silk flowers you want to use for this project. Note: If any of the flowers are a part of a bush, cut them so you have individual stems.
- Begin adding greenery to create the shape you want. Add a dab of hot glue to each stem before adding. I began with fern leaves in the top to create height. Note: To help the stems insert into the Styrofoam, I add a pick using a Stemming Machine. This is optional.
- Once you have a bit of greenery in your arrangement, begin adding flowers. I started with three large yellow stems in the top of the arrangement and then added some smaller pink flowers.
- Continue adding flowers until you have a beautiful full arrangement. Note: If you have bare spots or areas of moss you want to cover you can go back and fill in with more greenery like silk fern stems.
- To add a bit more texture, I added some fun yellow filler flowers that are long and wavy.
- Next, add your bow. I used bright pink ribbon and made mine with 10 inch loops and a 16 inch tail. For detailed bow instructions, click here. I chose to insert my bow into the arrangement so I added a bit of hot glue to the wire and inserted it into the moss.
- Lastly, for a beautiful finishing touch, add a bit of greenery between the bow loops using a bit of hot glue.
How To Make a DIY Summer Flower Basket for the Front Door video…
Isn’t this fun? This is a great simple project that is easy to customize. This would be a fun project to give a new mom using the colors of the nursery! This would also be a fun project to give a friend just because.
Let me know if you enjoyed this and don’t forget to join me on Facebook so you can watch me Live!
If you enjoy watching me and/or learning to make wreaths of various styles, join me in my Wreath Making of the Month Club, learn more here.
Happy Wreathing,
Julie
If you enjoyed this post, you might also like:


Hello Julie,
In response to your doctor having laryngitis – not barking, I found a website you might be interested in reading.
https://www.petmd.com/dog/conditions/respiratory/c_dg_laryngeal_disease?page=show
Take care,
Penny
Thank you for the tip.