How to Make a Holiday Ornament Wreath
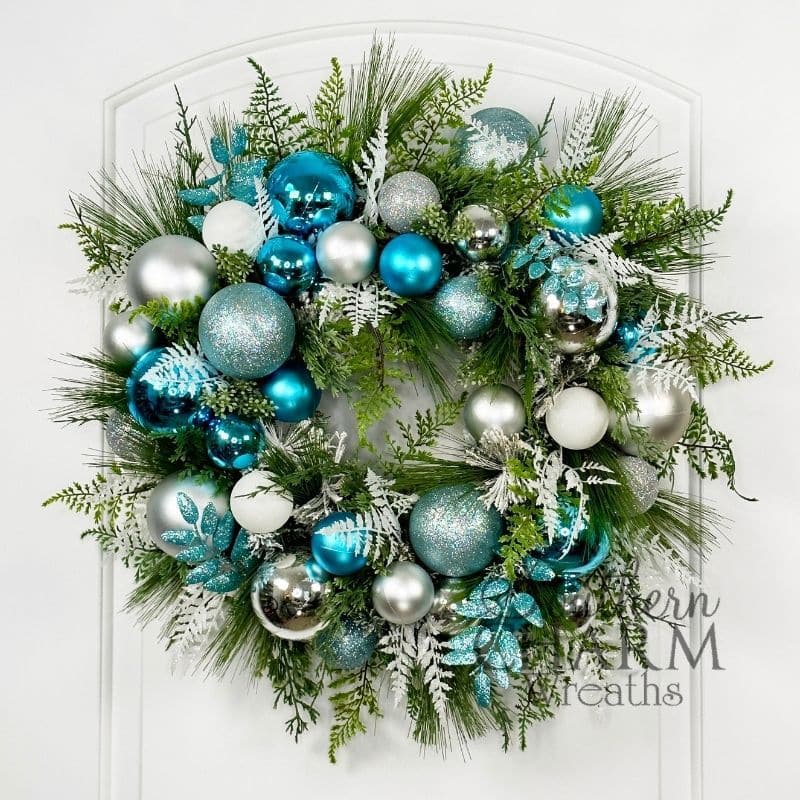
This holiday ornament wreath is incredibly easy to make, using minimal products for maximum beauty on a budget! Enjoy silver and blue baubles, mixed greenery, and metallic blue accents.

Holiday ornament wreath
Today’s holiday ornament wreath is all about the garland!
This technique is quick and easy to replicate while providing a major Christmas-y impact.
If you love the Blue Christmas trend, you’re going to go crazy for this holiday ornament wreath. It’s made with blue, silver, and white holiday ornaments, blue metallic leaves, and tiny white berries for a gorgeous texture.
It’s the perfect mixture of nostalgic and trendy. In other words – I’m all over this design!
This post may contain affiliate links for your convenience. Click here to read my full disclosure policy.

Supplies for this project
You’ll need:
- Flocked 24” wreath
- Blue, silver, and white ornament garland
- Faux greenery
- Cedar holiday garland
- Airy greenery
- Dark, long-needle pine
- White leaves
- Blue metallic leaves
- Small white berries
- Zip ties
- Hot glue
How to make a holiday ornament wreath
1. Prep the base
To begin, pull the top layer of your flocked wreath up; this is going to make attaching the garland much easier!
Now, we’re going to zip the garland to the top ring of the wreath, beginning at one end and working all the way around.
Use 4-5 zip ties to make sure everything is secure, then off any excess garland the zip tie ends.
Then, just fluff up your wreath to its previous beauty, pulling ornaments apart until the colors are evenly distributed.
2. Fill in with greenery
Now, clip some blue-green cedar from the holiday garland, and add pieces around the outer edge of your wreath.
Hot glue to the pine needles, with each piece on the right going downward and each piece on the left going upwards.
3. Add textured greenery
For more texture, add bits of airy greenery between your established cedar, gluing to the pine needle base.
Continue working with bits of dark, long-needle pine for more depth and contrast.
Fill in any holes where greenery is lacking, and feed a bit of pine to the inner ring.
4. Add festive extras
Now to keep things festive, add blue metallic leaves evenly throughout the wreath, perfectly matching your blue Christmas baubles.
Then, fill in holes with clippings of white greenery, securing with hot glue; these white extras are great for contrast, helping to draw the eye in.
Finally, fill in with little bundles of white berries for even more texture and wintery beauty.
Once you’ve fluffed up your finished product, your holiday ornament wreath is ready to enjoy!
And if you’re feeling extra spirited, you can always add a beautiful hand-tied bow in coordinating colors.
You can learn how to make a bow here.
Watch the video: How to make a holiday ornament wreath
If you enjoyed this post, you might also like:
- Traditional Christmas Cardinal Wreath
- Williamsburg Christmas Wreath with Faux Fruit
- DIY Elegant Holiday Corner Swag
Like this post? Pin it for later!

