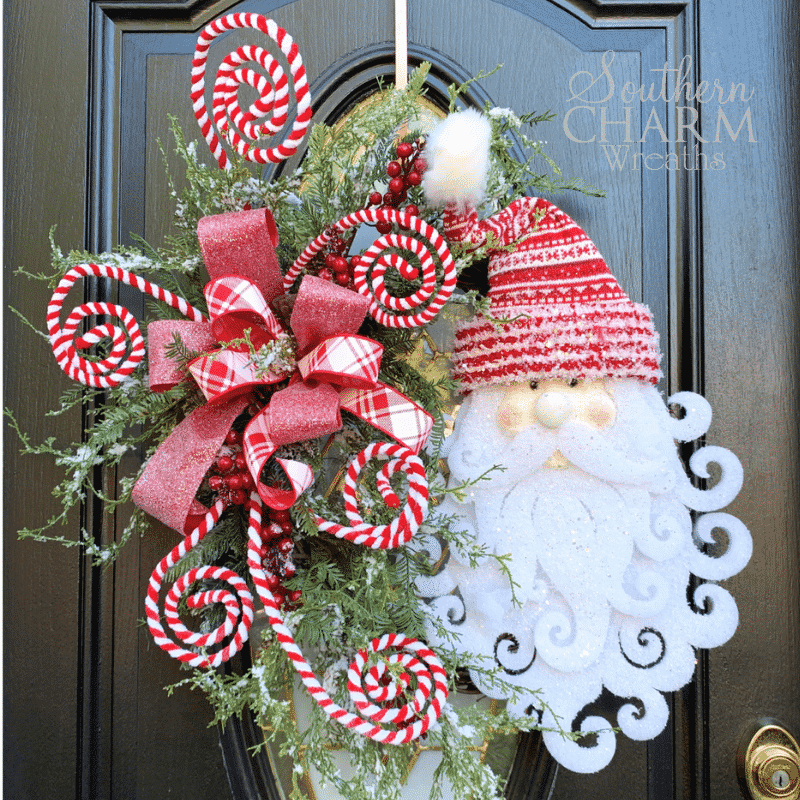
How to make Santa Christmas Wreath on Grapevine Base
Get your door Christmas ready and learn how to make a Santa Christmas Wreath using a grapevine wreath as the base. This is a simple Christmas wreath you can do in an afternoon! This post may contain affiliate links for your convenience. Click here to read my full disclosure policy.

This tutorial is super popular on my Youtube Channel and I’m excited to share it with you on the blog. All the supplies are from one of my favorite online boutiques that sell quality silk flowers, Greenery Market. Let’s get started!
Supplies needed to make a Whimsical Santa Themed Grapevine Wreath
Grapevine wreath – 16 inch
Foam Santa Sign
Ribbon, 1.5″ and 2.5″ widths
Flocked Greenery
Christmas picks
Florist wire
Hot glue gun
Glue sticks
Craft mat
*Supplies available from Greenery Market
Steps for how to make a Santa Christmas Wreath on Grapevine Base
Step 1 – Begin by making your bow. I made mine with 10-inch tails and 12-inch loops but you can adjust the size if you need a bow larger or smaller. Just do what ‘feels’ right. Yes, I have to feel my wreaths! LOL For detailed bow-making instructions, click here. Set the bow aside once you’ve made it.
Step 2 – Determine placement for the Santa sign. Feed wire through the back of the Santa and into the foam. Then attach to the grapevine using the wire and piercing through the foam but making sure the wire cannot be seen on the front.
Step 3 – Next, attach the bow using florist wire on the opposite side of the Santa. This helps to balance the wreath. Be sure to fluff the bow loops so the bow doesn’t lay flat.
Step 4 – Now it’s time for the greenery. Start by adjusting the pieces to make sure they are open and bent the way you would like. Add hot glue to the stem and insert it into the grapevine. I started by adding one above and one below the bow.
Step 5 – Continue adding greenery to fill in your wreath. Tip: You can cut pieces from a greenery bush and use the individual pieces where you need something smaller. You can also add additional red berries where you would like.
Step 6 – Next, add the red and white swirl picks. Simply add hot glue to the stem (trim the stem if needed) and insert where you would like in the wreath. These can then be bent in the direction you would like.
Step 7 – Finish your wreath by filling in open areas. You can also add greenery inside the bow loops for a beautiful finishing touch.
Watch the video below for detailed how-to instructions.
Video of How to Make a Santa Christmas Wreath on a Grapevine Base
I hope this tutorial helped get you in the Christmas spirit. Don’t forget to visit my friends at Greenery Market for your wreath supplies. They have beautiful, quality items for your Christmas wreaths and year-round items too!
If you enjoyed this and want to learn to wreath the professional way, join me in our exclusive Wreath Making of the Month Club where we provide you with 6-8 new wreath-making or silk flower arrangement tutorials every month.
Happy Wreathing,
Julie
If you enjoyed this post, you might also like:
DIY Tabletop Christmas Tree Ideas with Silk Flowers
How to Make an Elegant Deco Mesh Christmas Wreath
DIY Rustic Farmhouse Christmas Table Centerpiece
Liked this Wreath Making tutorial? Pin it for later!


Thank you so much. All of your ideas are always charming and your tutorials are easy to follow.
Your wreath is beautifully done. Your step are easy to follow.
I can’t ind the Santa. Is ther another source?
I do not. They restocked twice but sold out fast.
I also cant find the santa. Please advise.
They are currently sold out. Try thewreathshop here: https://thewreathshop.com/whats-new/13-foam-fabric-santa-head/xn3484/
so beautiful
Where do I get the Santa head for the wreath???
It was from TendzandGemz as it stated in the post, however if they are sold out try herehttps://thewreathshop.com/whats-new/13-foam-fabric-santa-head/xn3484/.