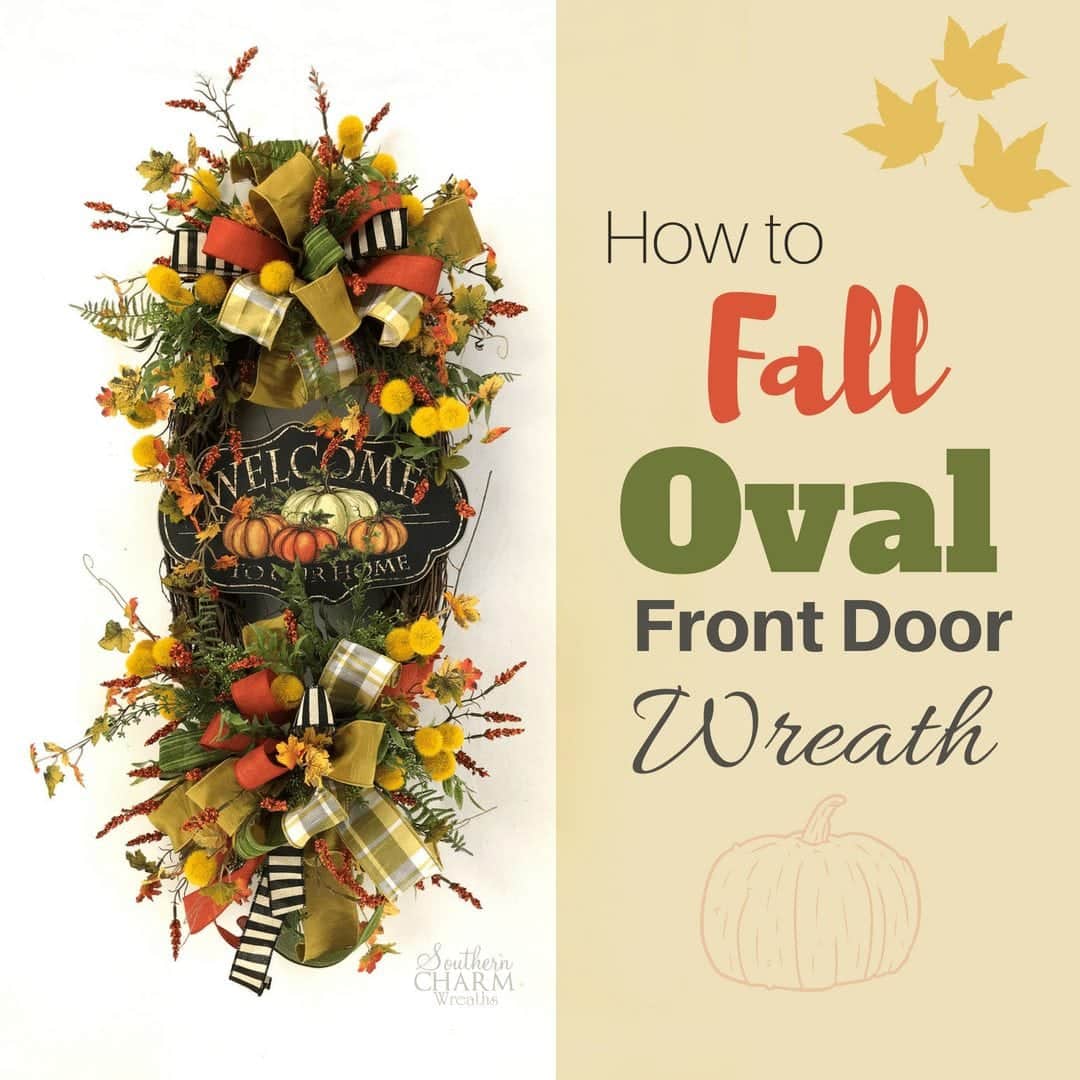
How To Fall Oval Front Door Wreath | Easy Fall Wreath Tutorial
In this step by step fall oval front door wreath tutorial we’ll have your front door ready for fall in no time. I love the fall colors of gold, moss green and orange!
And if you want to make more fall decor, try our other DIY Fall Decor ideas; DIY Fall Door Wreath Idea, How to Make a Fall Lantern Flower Arrangement, Fall Cornucopia Centerpiece Tutorial
This post contains some affiliate links for your crafting convenience. Click here to read my full disclosure policy.
How To Make a Fall Oval Front Door Wreath
In this video, we’re are making a Fall Oval Front Door Wreath. You’ll be the envy of the neighborhood when you put this beautiful wreath full of Fall colors on your door. Here’s how to make it:
Supplies
- Welcome sign (Hobby Lobby)
- Oval grapevine wreath – 12″w x 24″l
- Florist wire or pipe cleaners
- Assorted wired ribbon (Carolina Pottery)
- Assorted silk greenery & flowers (Trendy Tree, Carolina Pottery, Hobby Lobby, Michaels)
- Wire cutters
- Hot glue gun or Glue Skillet
- Glue sticks
- Craft mat
[Tweet “How to make a stunning Fall Oval Front Door Wreath #howto #falldecor”]
Steps for How To Make a Fall Oval Front Door Wreath
- First, attach pipe cleaners to the back of your sign using a staple gun. Add hot glue over staples to ensure it is secure. Set aside to cool. Note: Check first to see if your staples will go through the sign. If they will, you can build up a cushion using ribbon between the sign and the staple.
- Make two of the same bows. I used my Funky Bow method with 12 inch bow loops.
- Attach the sign across the center of the grapevine using the pipe cleaners.
- Attach one of your bows to the bottom of the wreath and one to the top using the wire you wrapped around the center of your bow. Note: Don’t forget to take a moment to roll the tails of the ribbon and spread out/fluff up the ribbon loops.
- Now add greenery. I used my favorite greenery – a mixed greenery bush from Trendy Tree. Start by cutting the stems from the bush and fluffing each one up so it isn’t flat. Dip the stems in hot glue and place them under the bow loops in a triangle.
- Add silk Fall leaves around the bows leaving a few pieces long so they would drape down the wreath.
- Continue filling in the wreath around the bow using silk flowers and hot glue.
- For a beautiful finishing touch, add sprigs of greenery or silk flowers into the bow loops using hot glue.
Video on How to Make a Fall Oval Front Door Wreath Video…
Did you enjoy this Fall DIY wreath tutorial? Even though it may still be hot where you are, it’s not too early to start planning for your Fall décor!
Hey, you can learn more about wreath making and how to become a professional wreath maker to help supplement your income in my Wreath Making of the Month Club.
And join me on Facebook Live, for my other DIY tutorials. Even better, join our messenger bot HERE and we’ll send you a message on Facebook the next time we go live. It’s always more fun to join in on the conversation.
Happy Wreathing,
Julie
If you enjoyed this post, you might also like:
How to Make a Fall Lantern Flower Arrangement
How to Jazz Up a Store Bought Fall Door Hanger Using Flowers
Quick 30 Minute Fall Wreath Tutorial


Enjoyed the video. Have missed seeing your videos this summer. I do know you have been busy.
Beautiful, fun!
Does Elmer’s Glue work, or should it always be hot glue?
Your work is AMAZING!
ALWAYS hot glue. Great question!
I love this wreath! The colors are so pretty, and your step by step tutorial is very much appreciated. You da bomb Miss Julie.
So nice Love the colors
I so enjoy watching you make these gorgeous wreaths. You have taught me to embellish bows so that they become incorporated into the wreath instead of just standing alone. This gives the wreath such a finished professional look. Thanks for inspiring me to make lovely wreaths, too.
Thank you for teaching everyone how to make this beautiful fall wreath☺️
Thank you so much, Julie, for sharing ‘how to’s’ with us.
JULIE I CANT GET INTO THOSE BONUS WREATHS THAT SAY IN BIO WHAT DOES THAT MEAN???????????????????????///
Go to my instagram page and click on the link in the top of my page’s bio.
love the tutorial and beautiful end product. I adore the plaid yellow/gold ribbon. Have been looking for months for something similar and haven’t been able to find it anywhere. I believe you said you purchased from Amazon. I still couldn’t find it. Can you tell me the name that’s on the spool. I won’t be happy until I find it . Thank you so much for your wonderful tutorials They have helped me tremendously.
p.s. I’m like you a ribbon addict. I make wreaths, swags and garlands just as a hobby for friends and family and I have well over 300 rolls of ribbons, yet never seem to have quite the right one. Lol
I love watching you make wreaths and have learned so much from you, especially bows! I am like you I love ribbon. Thanks for all you do to help people.