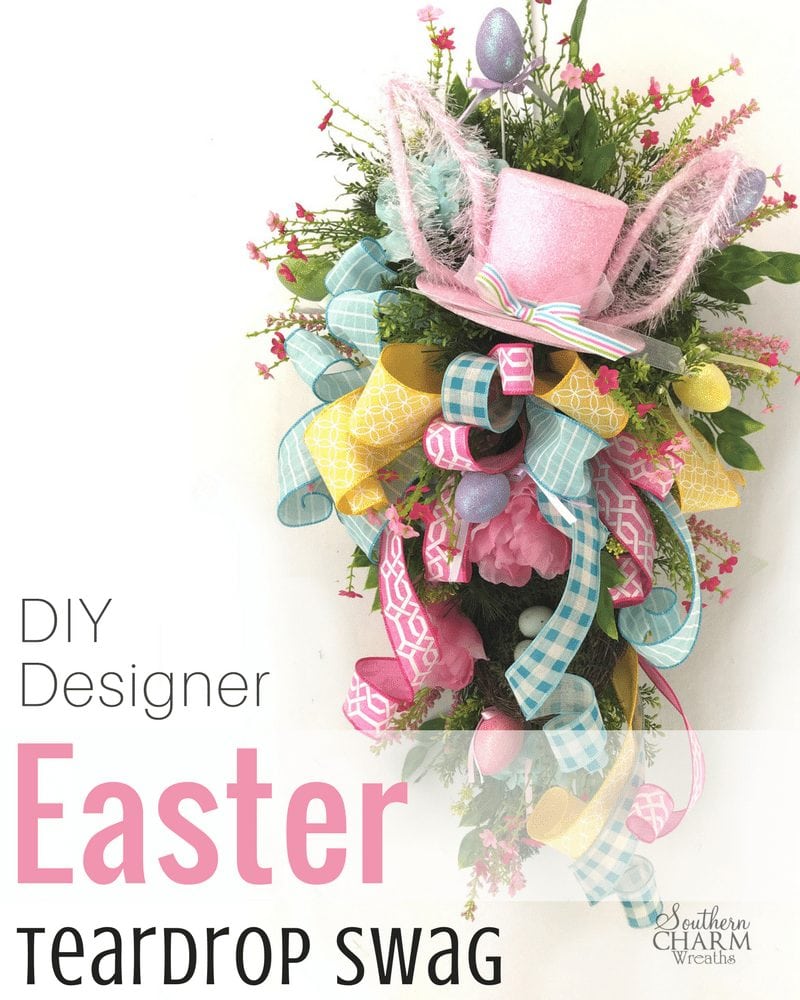
DIY Designer Easter Teardrop Swag Tutorial
A fun alternative to a wreath, this Beautiful Easter Teardrop Swag will be a great addition to your front door and will surprise your friends when you tell them it starts with an evergreen swag! This post contains some affiliate links for your crafting convenience. Click here to read my full disclosure policy.

DIY Designer Easter Teardrop Swag Tutorial
In this video, we’re making a Designer Easter Teardrop Swag. Start with a fun centerpiece for your design – for this project, I used a pink Easter hat with bunny ears! Here’s how to make it:
Supplies
- Evergreen swag – 24 inch
- Easter hat with bunny ears (Mine came from Raz Imports)
- Assorted wired ribbon
- Spring silk flowers
- Nest (Mine came from Carolina Pottery)
- Small Robin’s eggs
- Assorted greenery
- Easter egg stems
- Florist wire
- Wood floral picks
- Steelpix Stemming Machine
- Steelpix Steel Floral Picks
- Wire cutters
- Hot glue gun or Glue Skillet
- Glue sticks
- Craft mat
[Tweet “How to Make a Designer Easter Teardrop Swag”]
Designer Easter Teardrop Swag Tutorial
- Take a moment first to fluff your swag and make sure all of the stems are up and not wrapped around each other.
- Next, make your bow. I used 4 different ribbons for this funky bow. I made the tails long for this one (18 inches) and used 16 inch loops. For bow making details, click here. Secure it with florist wire when done and set aside.
- Now it’s time to add the fun centerpiece of this project, our Easter hat with bunny ears. Determine where you would like to place it. Then punch two holes in the back rim of the hat, wrap florist wire through the holes and a bit of hot glue to hold it. Then place the hat in the swag and wrap the wire around the swag stems. Note: If you need a bit more stability, punch holes in each side and wrap wire through it and around the nearest branch. Trim any excess wire.
- Add your bow under the hat using florist wire. Don’t forget to fluff your bow loops and move them around where you want them.
- Begin arranging your silk flowers and other items. I first added a nest below the bow and attached with florist wire.
- For the flowers, I like to start with the larger flowers and then move to the smaller sizes. Lay them out in the arrangement and when you are happy with their placement, hot glue them into place. If you need extra stability for a stem, you can add a steel pick using a Steel Pick machine or a wooden floral pick.
- For greenery, I cut stems from boxwood and grasses, etc. and used them to fill in empty space around the swag. The greenery adds a bit more dimension and color to the swag.
- Next, I added some fun small pink flowers that are very light and airy throughout the arrangement.
- Of course we don’t want to leave the nest empty, so I added small Robin’s eggs to the nest with hot glue. Be sure to hold the egg there for a minute to ensure it sticks.
- Remember to hang the swag up and look at it from every angle. For additional interest towards the bottom, you can add a few ribbon tails by twisting the tops of the ribbon with the swag branches. Roll the ends of the ribbon for a beautiful finished look.
- Now add a few of the Easter egg stems adding a bit of hot glue to each stem before inserting into the swag.
- If you have any open areas, simply fill them in with small flowers or greenery.
Beautiful Easter Teardrop Swag Tutorial Video…
I hope you loved this Easter swag project! Can you believe we started with an Evergreen swag that you would normally see at Christmas time? Just like all of my other projects, feel free to tweak the colors you use to make it your style and of course, if you can’t find the exact same hat I used, pick something else fun for the centerpiece of your design.
If you would like to learn more about wreath making, join my Wreath Making Club.
Don’t forget to join me on Facebook Live, for my other DIY tutorials. Even better, join our messenger bot HERE and we’ll send you a message on Facebook the next time we go live. It’s always more fun to join in on the conversation.
Happy Wreathing,
Julie
If you enjoyed this post, you might also like:
Top 15 Wreath Making Tools Needed for Beginners


I really love watching your tutorials, you are very talented. Just beautiful, anyone would be very blessed to have one of your arrangements.
Love this tutorial, I am also tried this one but something is missing my one.
Where did u purchase the swag?Cant find one
Where do you get the swags wholesale?
Thanks
Any wholesalers sells them.
Hi Julie,
I’m new to your site. I love your wreaths! I have a question what kind of glue is in the skillet?
Just regular glue sticks. Welcome and talk soon!
Can I purchase this swag ?
Hello Julie. Thank you for all the beautiful inspiration!!
Have you ever worked and REWORKED “live” evergreen swags, and wreaths from metal frames??
Where did you get your wooden mesh spool holder? Would make cutting a Lot easier!
Hey Kim – You can find all of Julie’s favorite vendors in her Big Book of Faux Floral Suppliers here:
https://southerncharmwreaths.com/faux-floral-suppliers/